Wednesday, April 22, 2015

Precious memories with Alicia Barry

Thanks for joining me with some new projects featuring Memory maze products. I don't normally do matching posts, but I had such a great time with this collection, that I couldn't put it away. It was nice to do some good fussy cutting again, it feels like it has been ages. 

Precious Memories

I have used Graphic 45 papers for this project. The florals are so pretty.  I started by swiping some Viva 3D stamp paint across the page in several spots, then used a hexagon stencil over the top with thick texture paste. I sprinkled fairy glitter over the top before it dried. 


I used some chipboard scrolls to enhance my layout. Both pieces are quite delicate, so I didn't have a lot of surface area to play with. 


 I painted each piece with Viva 3D Stamp Paint. This has such pretty sparkle to it. I then applied some glue in random spots and added some microbeads in a matching colour for added texture. 


Memory maze supplies:

Wrought Iron 45  flourish min buy 3

Precious Cards
Since I already had the papers out, I decided to continue with some matching cards. 


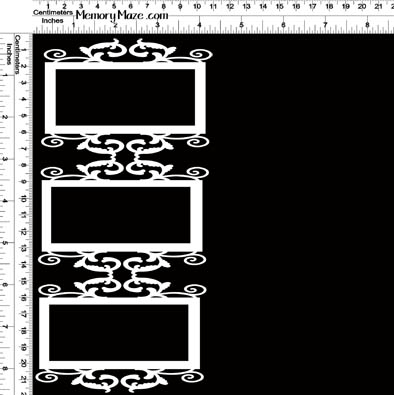
I have used a hanging three frame split into individual pieces. I painted these with more Viva paint, then sprinkled fairy glitter over the top for even more sparkle. 


On this one I also used the same stencil again, with the smaller section. 


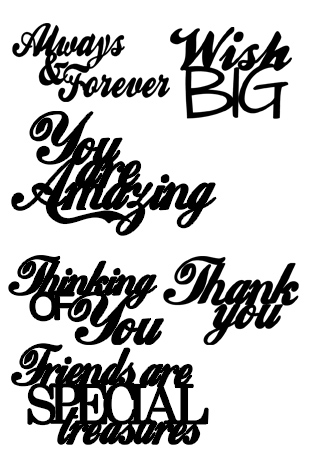
I painted each of the titles in Ranger liquid pearls, so that they would stand out over the frame. 


 Memory Maze supplies

Vintage Frames Oblong
VINTAGE FRAMES OBLONG  X 3  JOINED  111 X 230

Card sentiments 3 110 x 160 mm assorted greetings Memory Maze


Monday, April 20, 2015

Mini Album in a Box with Kim Kendall

Hi everyone and welcome to my Memory Maze blog post. 

Mini Album in A Box

Hi all, back again. Today I am sharing a mini album in a box with you. I have used a Graphic 45  Album in Box and Graphic 45 papers (I have a love affair of their papers).
I just love how smaller pieces of Memory Maze chipboard works so well with the album.


As you can see in the image I have just painted the chipboard with rustic gold paint as it just complemented the whole feel of the album.


I have used the following Memory Maze products


Set of Happy Birthday Cards 

My second share is a set of three birthday cards Again I have left the chipboard raw as it complements the paper so well that way. Also I have cut one happy birthday to make a straight line word.


I have used the following Memory Maze product


Thank you for coming to view my upload. I hope I have inspired you to create something wonderful with Memory Maze.


Kim.
Memory Maze Design Team Member 2015

Saturday, April 18, 2015

Memory File and Boy Layout by Jan Agnew

What a gorgeous time of year, I love Autumn, beautiful warm days and cool nights.  As I am currently on term break, I have been creating lots of memory files, one of which I will share today......


Memory File

I love Memory Files, they are great way to scrap events or memories where you have lots of photos that are maybe not good enough to put onto your layouts.  This file I have created for my son and his wife on their new home.  They will be able to look back in years to come and see what they have achieved.

I have kept the chipboard raw for this project as it fitted in well with the colours used in the Memory File.  I have cut Sweet Dreams into Dreams and Sweet therefore changing the meaning for the words to suit my project.  


Front Cover


Close up front cover
Inside front cover
Close up inside front cover
Inside Back Cover
Inside Back Cover, photo's flipped up.
Journalling block for son to add his To Do List!
Close up inside back cover
Memory Maze chipboard used:


Sweet Dreams
Old Key

Border 1


Boy Layout  ~  FUN

Again I have taken the scissors to the chipboard and removed the cement mixer 
from the truck to suit my layout.  I have used my favourite media on the word fun 
and the truck....metallic rub ons.  I have painted the little stars with the new 
Dylusions vibrant acrylic paint. 


Chipboard altered with Metallic Rub Ons

Metallic Rub Ons

Chipboard altered with Dylusions Paint
Dylusions Vibrant Paints


Cement Truck
Many Stars
100% Girl

Thank you for visiting Memory Maze


Thursday, April 16, 2015

Lovely Treasures with Mel Barnicoat

Hi everyone and welcome to another post by me. 

This week I decided to do some off the page work. I found this Tim Holtz Printers Tray Book and decided to create a cute little keepsake for lots of little treasures. This project is perfect for all those mini chipboard pieces that are available in the shop. They are designed as card chipboard mini's but are perfect for any small projects that you have in mind.


This large flourish on the front cover of my book was sprayed with some Artisan spray in a lovely red colour. I then added some Finnabair Glass Glitter to some prominent parts of the flourish and covered the entire piece with Glossy Accents. I love the look the Glass Glitter gives.


All my small chipboard pieces were sprayed with either Artisan spray in red or Tattered Angels Glimmer Mist spray in Tattered Leather and then covered in Glossy Accents.


I added some gorgeous keys from the lovely Jan. These were perfect for this project and helped to add a vintage feel to the project.


I used some of the leftover papers and roses to create a cute card that would be perfect for Valentines Day, an anniversary or for a wedding.

I used the same technique on the Wrought Iron where I sprayed with some Artisan spray in a lovely red colour. I then added some Finnabair Glass Glitter to some prominent parts of the flourish and covered the entire piece with Glossy Accents. I made sure to turn my Wrought Iron upside down to make it look like a heart which was perfect for this card.


Thanks for having a look at my creations today. Make sure you follow the links to find all your mini chipboard pieces in the shop. They are certainly something you need in your chipboard stash.

Mel
xxx
Memory Maze Design Team Member 2015