Monday, October 9, 2017

Friday 13th by Leanne Nankervis


Hi Everyone!
Leanne back to share another project with you today, using Memory Maze Chipboard products.

Friday the 13th

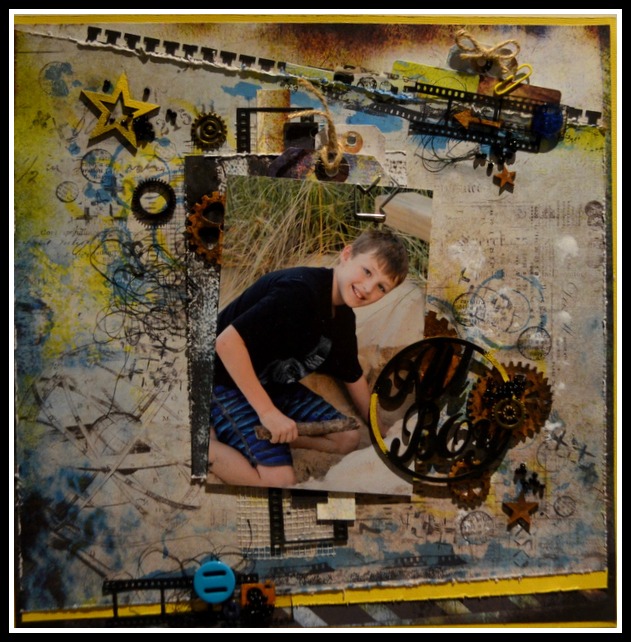
Can you believe we are into October already, I thought I would start off with a Halloween layout, the photo is of my daughter Holly dressed up as a black cat from a couple of years ago.

 
   My Memory Maze chipboard pieces I used was a Friday the 13th Title,which I used and embossing folder with my Title, I then painted it black and dry brushed the edges in white gesso.
 
 
I also used some frames around my photo which I inked and rubbed a white gelato to soften and a orange gelato.


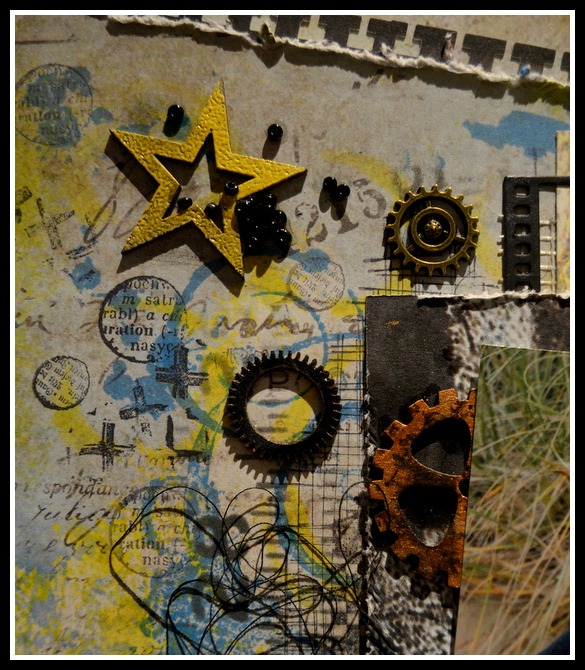
The Barb Wire I painted with Black Distress paint and used and orange Gelato.


Memory Maze supplies used:


Thanks for stopping By the blog today!
For all your Memory Maze Products go to www.memorymaze.com.au
 
Leanne Nankervis

Leanne Nankervis Design Team Member 2017

Saturday, October 7, 2017

{my little favourite}


Hi everyone Kylie here
sharing a super cute layout featuring one little cutie pie.......


I have created this bright background using my gel plate and yellow and grey acrylic paint with stencils once dry I used a hot pink paint through a mandela stencil I just loved how it turned out.


I used a black cardstock to matt my photograph this really makes it pop - I have used a patterned tissue paper, black tissue paper and some yellow netting to build the photo up.

To embellish the layout I have used assorted flowers to co-ordinate I have used the pink paint to tone one of the flowers a Pink Paisley arrow and some Heidi Swapp fringe and a cute black and white spotted heart.  To balance the layout I matched the pattern tissue paper, washi tape and yellow netting.


I have used the below Memory Maze frames - selected the frame I wanted to use which was the largest one and painted with black acrylic paint. I journaled on my layout and adhered the frame over my journalling. 


To complete the layout I used Black thread for machine stitching and assorted background stamps with black ink an some gold puffy hearts and stars adhered randomly in the top left and bottom right corner.

I hope you found some inspiration in this layout.....


Wednesday, October 4, 2017

Floral Cards

For tonight's post I have created 4 cards using Memory Maze 'lots of Birds' and 'Wrought Iron' chipboard.  I have coloured the chipboard using Versa Masic Chalk Ink and Brillance Pigment Ink. 


Thanks Jan

Saturday, September 30, 2017

Layered Cards

Today I have created 2 layered cards. I have used Memory Maze stencils with white texture paste on the patterned paper, then layered on Memory Maze chipboard (sprayed with silver), leaves, flowers and gauze to create these pretty cards. 


Thanks for looking, Jan

Wednesday, September 27, 2017

{just the girls}

Hi Everyone - Kylie here..... 

Sharing with you another colourful creative background layout of course it is embellished with awesome 


To start I have created my 12" layout on white Marshmallow cardstock    assorted acrylic paints, stencils and Gelli Plate..... this sets the theme for my layout.

I love to frame my photograph with Black Cardstock it really frames the photo.

I selected the frame sized I wanted to use from the packet of 3 and painted it with black acrylic paint. 

Junky frames arrows 2 300 x 300 set of 3 


I adhered the photograph to the top of the chipboard frame I placed silver tulle underneath to create more texture. I added a Charms Creations fabric heart and Heidi Swapp Puffy Glitter Heart sticker to the bottom corner of the layout. I also randomly adhered puffy heart stickers around the layout along with assorted washi tapes and some plumbers tape.

To create the title I used a "Just the girls" sticker and a wooden Heidi Swapp "Memory" piece.


I have framed the layout with black machine stitching and added some random background stamping with black ink.


Last but not least I added my journalling to finish the layout.

I hope you ensued this layout - see you next time.....


Monday, September 25, 2017

Vintage Clock Tag by Tania

Hello again, hoping you have all had some time to create over the weekend. I've been playing with lots of goodies, and made this Mixed Media Tag using the gorgeous, Memory Maze, Vintage Clock as my centrepiece.

Vintage Clock


I started with a Prima, Julie Nutting Tag, I love the size of these, lots of length to work with. 


I gave both the tag and the Vintage Clock Chipboard piece, a rough coat of Black Gesso, using a sponge.


When the Gesso was dry, I used the Tim Holtz, sanding tool, to sand over the surface of the tag.


Next, Using this gorgeous stencil from Memory Maze, I sponged some Distress Stain in Metallic, Brushed Pewter, over the entire tag.


I sanded over the top again, once the stenciling was dry. Then I started adding some layers of embellishments.
I used some gauze and coated it with black Gesso, some cotton, and some Micro beads. There's some metal embellishments, pearls & Liquid pearls. The flowers were all coloured with Metallic Distress Stain.


The doily was needed to break up all the dark areas under the clock. Here you can see, I painted the middle of the clock with some awesome Art Alchemy, acrylic paint, and added an Antique Pearl in the centre.


One more close up of the Micro Beads..


I hope I have inspired you and given you some ideas for all your stand out pieces of chipboard from Memory Maze.
Thanks for stopping by!
Tania
Memory Maze Design Team


Tuesday, September 19, 2017

All Boy-By Leanne Nankervis


Hi Everyone!
Leanne here to share a couple of projects with you today, using the wonderful products from Memory Maze Lasercuts.

All Boy Layout

For my first project I did a layout of my Son Dylan, taken a few years back on a trip to Queensland. I have used 7 dots Hazy days papers for this layout, with a lot of stencilling and stamping in the background.

 
Close up of the Memory maze Duo Stars, which I embossed and sponged in distress paint
 
 
All Boy title Painted and Embossed on the edges and Chipboard Cogs, I painted in copper metallic paint and stamped with a grunge stamp, then sponged some of the edges in black paint.
 
 
Close up of Memory Maze Grungy Stencil which I used with blue distress ink, and the Cross stamp which I stamped with archival ink randomly around the page.
 
 
Memory Maze supplies used:

All Boy in circle 75 x 75mm packs of 10 Memory Maze
Stars duo pack of 10
Double Z fold card Birthday (Dad)

For my Second project I made a grungy dad birthday card with the left over cogs, from the 12x12 cogs sheet.
 
Chipboard cogs I left natural rawness and inked some of their edges just in distress inks.
 
I used some metal cogs on my top layers of my cluster
Back of the card for your sentiment and small chipboard cog cluster
 
12 x 12 all there is is cogs, cogs for everything
Mini cogs and watchparts 5 gram hang sell. All will be different


Thanks for stopping by the blog today!
Till next time happy crafting!
Leanne Nankervis
Memory Maze Design Team 2017