Showing posts with label suzanne. Show all posts

Wednesday, September 26, 2018

Start Over by Suzanne Franin


Hey Everyone Suzanne here

This weeks project for Memory Maze Laser Cut Chipboard make sure you check out the website for all the fantastic products and make sure your favourite store stocks them
Make sure you check out the rest of Blog for great inspiration from the Design Team every week 

This project was for a friend that seen something I had made and asked for me to make them something so I showed them some quotes I had printed and this is the one they picked 
It's one of my favourites


So I started off with the Door Wire Stencil (one of my favourites) with some texture paste once it was dry I painted it all with some White Gesso from Colour Blast
I also painted all my embellishments and chipboard with it and set them aside to dry while I worked on the canvas


I used Sienna Colour Shimmer Cube (which unfortunately Colour Blast no longer stock due to manufacturing issues hopefully they'll be back one day soon)
Painting it on with lots of water and spraying every now and then as well so it wasn't too intense 


I used the largest flourish from the 12 X 12 Flourish Corner Set and cut it up so I could use a piece in either corner otherwise a lot of it would have been covered and I wanted it to be seen
I also painted it with the Sienna Colour Shimmer Cube and then stamped over the top with a Kaisercraft bird cage stamp for some added interest


One of the requests was there be a bird cage on the project somewhere so I had this little metal one and I painted it with and all the other embellishments which are paper clay with Colour Blast's Soot Colour Artist Ink - I added some water too it so it wouldn't be too black but for some reason turned it out blue (lucky for me they love blue) I then made a mix of the Dorland's Wax Medium and  Espresso Colour Mica Powder to rub over the top to add dimension and bring out the details


Then I used some die cuts from Kaisercraft to add making sure there was a bird cage on one of them 

The stem with buds I coated them with the wax mixed with the Mica Powder as well because the colour they were didn't go with the colours on the canvas


I added some seed beads randomly and a few Prima Art Pebbles for dimension


Memory Maze Products I used -


Thank you for visiting and I hope you will come back soon x

Saturday, September 22, 2018

Hello by Suzanne Franin

Hey Everyone Suzanne here

Yes it's another owl but I can't help it I just love them and this one is very cute LOL 
This weeks project for the Memory Maze Blog I used a Printers Tray they are so pretty and you can do just about anything with them
I love how they have the different shaped sections in them and if you really want to you can cut some of the chipboard out to fit what you need in


On each feather I used a different stencil using modelling paste as you can see (links below) just to add some interest rather than leaving them plain


On the background of the Printers Tray I used modelling paste with the Wire Stencil for some dimension and texture


On the back ground of the I used Colour Shimmer Dust Lollipop


With the feathers I sprayed (I have these colours already made up as I seem to use them a lot) some Colour Blast Colour Shimmer Dust Cobalt, Lollipop and Sunflower they all mixed and made a few different colours which I think added extra interest and is also what I used on the Boho Skull and Feathers and lace border too  


You can see the textures on the feathers


This feather arrow was from the Boho Skull and Feathers and I use Colour Paste Sunshine on the larger feather
I painted the outside of the Printers Tray with Jade Impasto 


This is one of the Acrylic words that Memory Maze make they also have a whole range of different shapes as well 
The Hello also comes in chipboard I love this font


I won a prize from joining in at White with 1's monthly challenge from The Resin Rainbow and this gorgeous lace border was in the pack it was a pale pink and it didn't really go with my project so I  did the same thing as I did with my feathers and the colour shimmer dusts 


And of course there had to be and owl somewhere
And to finish the project off I went around and added Silver Micro Beads with some Helmar Super-Tac Glue 


Products I used


Hello (but acrylic)
Thank you for visiting and I hope you will come back soon xx

Tuesday, August 28, 2018

Whoo by Suzanne Franin

Hey Everyone Suzanne here

This weeks project includes my favourite animal and you will see thatI use them a lot in my projects they are just so beautiful and I can only use so many pictures of people LOL 
I made a process video of this one on YouTube so please watch and subscribe to my channel, give me a thumbs up and leave me some feedback good or bad I'm happy for creative ideas

So I turned the canvas around and used modelling paste along the edge to cover the timber and staples
Then covered the whole thing with gesso as well as all my chipboard

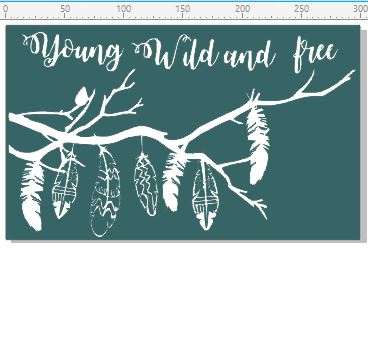
With the Branch from the Young Wild and Free I painted it with Colour Shimmer Spray Leather, then the feathers that are cut out I used Colour Shimmer Dust Amber, Candy, Lush and Cobalt and the other feathers I used clear gesso mixed with Colour Mica Powders Polar, Cool Mint and Watermelon and the little leaf I used some Colour Paste Apple of My Eye 


With the Colour Mica Powders Polar, Cool Mint and Watermelon after the clear gesso dried the Colour Mica Powders dried with no shimmer so I went over them again with a little bit of the powder and water and the shimmer was back


Here I rusted the Owl Steam Punked and the cogs with some brown paint that I had mixed some fine sand with then add some Rusty Paper Paint randomly over them
I then added a Flutterby Design Flair Button (one of my favourite embellishments) to give him a heart and add some more detail to him


I used Colour Shimmer Dust Lollipop and Colour Shimmer Spray Sunshine on the canvas sides and background
I used some little white flowers and some glass cabochons randomly for some added texture


Here you can see the Mayhem chipboard which I painted with Colour Shimmer Dust Peacock
I added a metal piece across the middle of the canvas


I added the three different sized Finnabair Art Stones mixed with some Helmar Super-Tac Glue and stuck them in different places over the canvas with some more metal


Here you can see where I added some muslin to the background for another texture and more metal and flowers yes I really do love metal and flowers


Products I used


Thank you for visiting and I hope you will be back soon x

Monday, August 6, 2018

Young and Free by Suzanne Franin


Hey Everyone Suzanne here

Here's my project I created using some of the Memory Maze Laser Cuts Chipboard and a Stencil
Make sure to check out the rest of the BLOG to see the what the Design Team have created and get some inspiration for your next project  

I saw this photo of my cousin and thought it was awesome so I had to use it


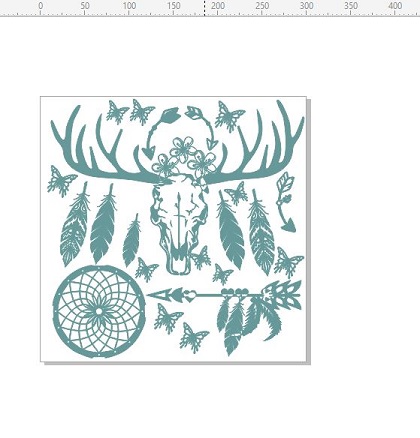
I used Young and Free from the Young Wild and Free set, the feathers and arrows from the Boho Deer Skull with Feathers and the Pebbles Stencil on the background all from Memory Maze


On the background I mixed some Colour Blast Colour Shimmer Dusts - Colour Midnight and Colour Cobalt to try and get a deep blue but it didn't go as dark as I thought which in the end was a good thing I think it would have made the photo darker

I then used some Colour Blast Colour Paste Stormy Weather through the Pebbles Stencil for some texture and dimension and it also framed the photo 


I painted all the chipboard with white gesso and left it like that I think that's all it need with this photo 


I added some Prima Art Stones mixed with some Helmar  Gem Stone Glue randomly and that was enough the photo didn't need anything else

Memory Maze products I used - 


Thank you for visiting and I hope you will come back soon xx