Hi and welcome to another new product reveal from Memory Maze. This is a brand new off the page project available from the store right now.
Biplane project
This plane is made from sturdy MDF board. It come in pieces with cut notches, making it super easy to assemble. The finished project is around 12 inches sqaure, giving lots of room to decorate. With so many pretty projects around for little girls, I am excited to have something for my little boy, who is obsessed with all things aviation.
Please let us know what you think. We have future plans for lots more three dimensional projects including vehicles and landmarks. What do you want to see?
To assesmble, simply click the pieces into the matching notches. I did add some glue to hold it all in place permanently. I used a combination of ink and paper to decorate my plane.
A couple of things to remember:
- The notches are designed to fit tightly, so any additional paper etc in there will make it difficult, so be sure to use a craft knife to cut away those areas.
- The main wing goes through the slot in the fuselage. Adding paper first makes this super tight. To avoid damaging the paper, trace and cut first. Thread the MDF through first, then thread the paper through on top, and glue into place.
- The top wing slants backward. Check you have the struts facing the right way before gluing.
- Ink before assembling.
I then used a combination of chicken wire chipboard cut into small pieces, and cogs, all of which were inked, then embossed. I created a little banner across the back of the plane to dress it up a little more.
You could even add a little silhouette photo of your little one in the cockpit if you wanted, or add a banner out the back of the plane.
Memory Maze supplies used:
"Sons" Platelet
Next up is another item that was recently added to to the store, called Platelets. These are so cute and are a great little mini project. They are great on their own, or could be added to a layout.
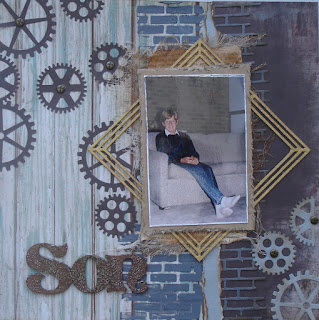
I first covered the chipboard in gesso, then added some scruched pieces of tissue paper to create texture. I added small pieces of chicken wire chipboard and some cogs, and again covered in gesso. Next I sprayed layers of paint spray, drying in between until I got the look I wanted. I also sprinkled some metallic embossing powder across the piece.
I adhered the photo in place, with some additional cogs sprayed in brown paint, and enhanced with some ink. I also added one part of the title only which I dressed the same way as the cogs. Finally I finished off with some ribbon at the top.
Thanks for visiting


