Tuesday, April 26, 2016

Wedding Card by Candy Chelepy

Hi everyone welcome to anotheR tutorial from me for April. Today I have made a 5x7 inch card and a decorated box. I am off to our nephews wedding in May and this is just what I needed to make for them both. 


I have started with a 7 3/4 x 6 inch cd/dvd photo mailing box. I bought this from my local Officeworks store. I have covered it inside and out using the Ultimate Craft Magnolia Lane Collection.


I have used two frames and the long pendant heart and a double heart and applied white ink to cover well. You can use gesso, white paint as well. I then used some Distress ink Victoria velvet and a music stamp and stamped over the top of them all. Then carefully applied some dimensional magic over each one.


When they where all dry I inked using the Victorian velvet again around the edges. I have also added flowers and some bling to both


The inside of the card


The outside of the box


Inside of the box


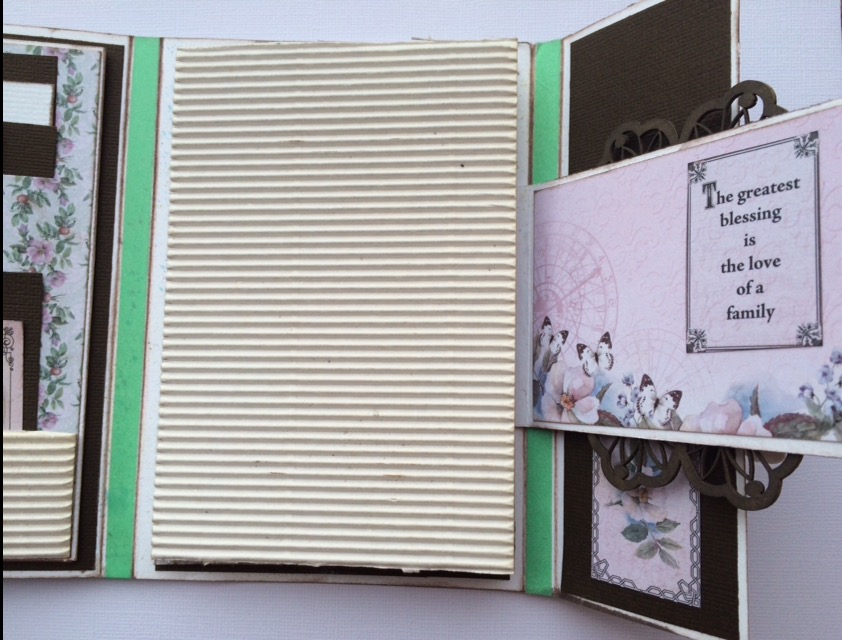
The inside with the card

Memory Maze Product used


fancy frame

vintage card  frame 70 x 100 mm 3 pack Min buy 3

Heart Pendant


Double heart

Bling

Micro bling black , pink  and clear,, stones enamel & diamante

Other products used
Cd/ photO mail box
Magnolia Lane paper collection
Magnolia borders, Poetical Labels, Damask Curtains, Sweet Music, Butterflies and Lace, Elegant Lady, Diecut Ephemera, Tpyegraphy
Tim Holtz Distress Ink Victoria Velvet
White ink/ Music background stamp
Dimensional ink
Assorted flowers


Thank you for visiting
Candy Chelepy
2016 Memory Maze DT


Friday, April 22, 2016

Swimming Champ Canvas - by Toni Herron

I have been so lucky to get to play with the brand new Memory Maze Swimming Design Set! I have a project to share with you which I used a couple of the pieces.
 
This canvas features my oldest son Lane, whom is the new 2016 CQ Champ for 12yr old Backstroke!
 
He actually had a terrible swim, but it was still good enough to beat his competition by quite a decent margin. The photos on the left are from one of the State Championships in Brisbane. The photos on the right are actually from the carnival in Gladstone where he recorded his PB for this event (quite a bit quicker than what he swam in Rockhampton for the CQ Champs).


To start off with, I prepped the base of the canvas with white gesso. I sprayed with two Gold mists and a blue mist, then went over the top with a Goosebumps spray plus a wonderful sprinkling of Distress Clear Rock glitter. This baby SHINES!  
 
For the chipboard pieces, I used the following products and techniques;
*Ribbon - Blue fluff to give a Felt feel. Black ink for the inner circle.
*1- Gold ink
*perfection - Dipped in multiple layers of silver Opal embossing powder and then drizzled with Gold embossing powder.
*Lane Ropes - both are covered with multiple layers of the Silver Opal embossing powder
 
Here is the effect of the two different embossing powders on "perfections" and the awesome felt look with the fluff on the blue first place ribbon.
 
Although I have used Thickers for the title, you can easily achieve the same effect with Memory Maze Alphas with either some Gold Opal embossing powders / normal Gold embossing powder with Dimensional magic / gold ink with Dimensional magic.
I decided to make the Lane Ropes the silver instead of traditional colours as the Metallic look was really flowing for me..

 
The canvas was finished off with the Memory Maze swimmer stencil. I turned it upside down and on a slight angle to look somewhat like a Backstroker.. Last touches were three clusters of random swimming words. I did ink the edges of the photos very subtly with some black ink. Not very noticeable, but very defining aspect between the colourful canvas base and the colours in the photos.
 
 
I would like to say a very big THANK YOU to Memory Maze and Sally for allowing me to have a little bit of creative input with these swimming designs. I appreciate the opportunity very much, especially with something like this as it is so close to my heart. I love watching my boys swim and get overwhelmed with pride when I see Lane reach yet another goal or achievement!
 
 
Memory Maze products used;
 
Perfection
 
SWIM stencil 110 x 180mm
 
Swim team  110 x 180mm    swimming team carnival, Min buy 3
 
Swim, 110 x 180,

Thank you so much for joining me today
Toni Herron
2016 Memory Maze DT Member


Friday, April 8, 2016

Decorative wall heart - Candy Chelepy

Hello everyone my turn once more showing you all how I created my lovely heart plaque for the wall. I have had this in my stash for a while, you know how it is you buy it thinking yes I will use this one day. And for sure I have. My niece has opened a Beauty Boutique and I thought this would look lovely hanging on her wall. 


I didn't do anything to the heart just left it as is.
I cut with a die borrowed from a friend the letters for the word Welcome from a piece of 12x12 inch chipboard. And using  the wrought iron flourishes and a heart, give all these a good coat of gesso.


I cut the largest swirl so I now have a large and a big one. 
The three swirls and the letters I have coated with Lindy's embossing powder(Chateau Rose) I gave them about three coats each to give them a good look. The heart I coated with Lindy's embossing powder( Bougainvillia red teal )and toned it down with some of the pink I used on the swirls and letters. 


I had some white leaves which I sprayed with Sprinkles Cacyus green spray and also the 2 smaller flowers I sprayed with Cherub pink glimmermist. I added a few white pearl sprays to set this off.


Memory Maze products


EASTER SAT SPECIAL 12 x 12 sheet chipboard 120 UM  pack 10


Wrought Iron 26  flourish min buy 3


Wrought Iron 34  flourish min buy 3


Other products used

Lindy's Embossing powder - Chateau Rose, Bougainvillia red teal
Manor House flowers and leaves
Sprinklers cactus and glimmermist cherub pink sprays
pearl sprays
gesso

Thank you for visiting
Candy Chelepy
2016 Design Team


Tuesday, April 5, 2016

Photo Book - by Toni Herron

Hello crafters, Toni here bringing you another project for Memory Maze.
I spent over 4 hours on this photo book, but no matter what I was doing it just wasn't flowing for me.
Although I'm pretty happy with the finished project now though, remembering not every project can be as awesome as the last or next! 
There are a lot of photos included in todays post, so please grab a cuppa then sit down and relax!
 

Photo Book


I started off with some white cardstock measuring 6&1/2 " x 12".
I used a recent Magnolia Lane 6x6 paper pad for the pattern paper and some Memory Maze goodies.
 
 
The large chipboard piece has been coloured with Pinecone ink then some Glossy Accents and sprinkles of Distress Glitter on top. The delicate butterfly has been coloured with a Purple H2O. It really shines off the page and adds to the flower cluster.

 
Here is the middle of the photo book / album when you open it. To the left are some tags on the front of a pull out 12" piece. - More on that in a moment -

 
To the right is this stunning Memory Maze Doily that has been coloured with the Pinecone ink then coated with some Blue Kindy Glitz and a few bling Pearl dots plus the beautiful MM Bling in the middle. Love Love!  This flap piece actually opens up to the right.


This entire side has plenty of room for some 6x4 photos. The Corrugated card is just for display at the moment.
 
It can be opened to the right for photos or journaling underneath and then pulled open towards the right to reveal more layers.
 
Plus room for more photos when another left flap piece opens out to the left.
 
It uncovers some tags for either small photos or journaling.
 
Now onto the left side.
That gorgeous Memory Maze piece has been coloured simply by using the Pinecone Ink again and some purple Kindy Glitz..
There are three tags up the top for small / medium photos or journaling and again another tag on the bottom. The diecut of the lady, has not been attached.

 
As you can see it opens out too. Just plain and simple though, no extra embellishments or papers. The back side of this is the same. There is room for two 6x4 photos on either side.

 
Lastly, I really wanted to show you a brand new stencil out by Memory Maze. I am totally LOVING IT! However, this is how hard my creative process was - no matter what I did, I just couldn't get it to something that suited the book / album. I was sooooo far off it was silly! I eventually cut pieces off. TWICE something went in the bin cause I just couldn't get my colours right with this stencil.
** Absolutely NOT the stencils fault! Completely MINE! :( 
I really do love this design and am hoping that once my crafting mojo is back, I will be able to create something amazing with it!! :)


Memory Maze products used:
 
 
Stencil,mask or template J0151 110X180   Min buy 3
 
Vintage Lace Doily 2
 
Lush     flourish Sold in 3\'s
 
butterfly magic 100 x 150  min buy 3
 
Wrought Iron 5 flourish min buy 3