Wednesday, November 29, 2017

{amaze yourself}


Hi everyone - thanks for stopping by the Memory Maze blog I hope you you are inspired by my upload today....


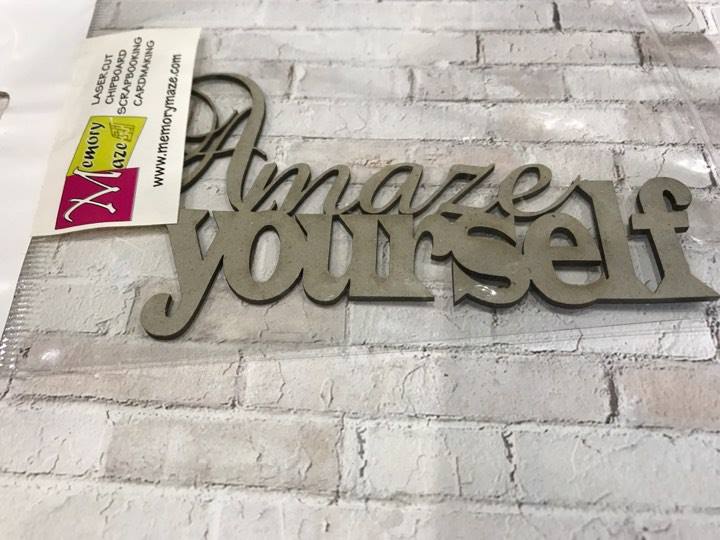
I love this Memory Maze title AMAZE YOURSELF

I altered the chipboard with Minc Reactive Paint


I painted the chipboard title with the Reactive paint and set aside to completely dry. Once dry cut a piece of the Minc foil I have selected teal - place the chipboard face down and place inside the plastic mind sleeve and using the high setting let run it through the minc machine. Once its through peel the foil away to reveal an awesome minced title......


I really love this layout ..... to create I have used a 12" Marshmallow piece of cardstock I altered with Dylusion sprays and water, once dry I used green and yellow colour pastes and a circle stencil which added dimension and texture, once dry I added another layer using black acrylic paint and an awesome wing stencil. I placed my photograph wothits black mat over the wings and added some green tissue paper, pattern paper, wash tape and dyed gauze.


To finish the layout off I have machine stitched with black thread and added some gold shimmer powder, background stamping and doodling.

I hope this layout has inspired you too create today.....


Monday, November 27, 2017

You make me Smile layout by Tania

Hi all! I'm sharing a layout on the blog today, made using some awesome stencils and a large, Chipboard title, from Memory Maze. I was in a brights mood this weekend and this is what I came up with!!


My background sheet, is 12 x 12" Watercolour paper from Kaszazz. I love the thickness of this paper for mixed media background work.
I started with some beautiful pink watercolour paint, from my Prima Confections. When the main area of colour was dry, I flicked some deeper colour drops, mixed with a good splash of water onto the page with my brush . 
Once that was dry, I did some background stamping in Archival Ink, with a script stamp, then I used some Distres Ink in a similar shade as the paint, with a blending tool, through this stencil, (which is one of my favourites):

Mini Stencil inverted bricks 4x4 min buy 5


My next Mixed Media layer, was some texture paste through this awesome Roses, stencil, another favourite.

OT 0008 Roses, Leaves stencil,mask,template, 110 x 180mm MIN BUY
[OT 008]


To make my photo pop off the page, I added some strips of Patterned paper and then backed it with a sheet of chipboard for height. Then I fussy cut some gorgeous flowers from the paper, and added them around the page, tucking some under the photo, before sticking it down.


My Chipboard title, was painted with a coat of Gesso and Then Distress Paint, and I used Magic Mount/foam dots to lift it up off the page. (Once everything was finished, I gave it a coat of Glossy Accents to make it shine.)

You make me smile 98 x 102 min buy 3
[you make me ]


To finish the page, my journaling was typed on the computer and then printed and attatched.
I added some strips of patterned paper to the top and bottom edges, and then went around each edge of the water colour paper with a Black Alcohol marker.

I just love the way this page turned out!
Tania


Thursday, November 23, 2017

Advent Calendar by Candy

Hello ladies today I have created an Advent Calendar.
This is for my grand daughter Zarna.


I have just put together a Kaisercraft Advent Calendar
using good pva wood glue and clamps
to hold it together until it dries.
I painted the whole thing with some white gesso, I gave it 2 coats
This is just to protect it from the elements.


I measured and cut the christmas papers to suit. 
Then applied using matt medium.
Front of the draws, inside the square and also around the outside.


I painted all the chipboard pieces with white gesso.
Snowflakes, merry christmas, the two berries and leaves and also the scroll on the top.

The scroll I coated well with the shabby white embossing enamel.
The snowflakes and merry christmas word cover with seafoam embossing powder.
And the berries cover with red and the leaves with green embossing powder.

Put everything together and use some dimensional magic to make the
numbers 1 - 24 stand out.


Memory Maze products


Other Porducts used
Kaisercraft Advent Calendar
Kaisercraft Letters to Santa Collection
Pva glue, Clamps
White gesso, Matt medium
Dimensional magic
Bell garland, christmas tree ornament, flowers and berries
The word Believe from my stash

Thank you for visiting
Candy Chelepy
2017
Design Team


Tuesday, November 21, 2017

Wedding Day by-Leanne Nankervis


Hi Everyone!
Leanne here to share another project with you today, using Memory Maze Chipboard products.

Wedding Day!

Today I'm sharing a layout with you using the lovely scripted wedding day title from Memory Maze.
I was asked by a friend at work if I could do a couple of wedding photo's of her sons wedding this year! I used lovely papers from Blue Fern, my Memory Maze title was the perfect addition to my page.

 
Wedding Day Title I embossed in a white detailed embossing powder.
 

Memory Maze Mandelas I embossed the same as the title, I then cut it in half and used a piece at the bottom of the page, as a small cluster. The other half I used underneath my main flower cluster, beside my photo.


Memory Maze supplies used:


Memory Maze Title Wedding Day


Thanks for stopping by the blog today
Happy crafting!
Leanne Nankervis
Design Team Member 2017

Wednesday, November 15, 2017

Another Sugar Skull layout.


Hello all there are so many beautiful new pieces of chipboard available on the site .
I  have had fun with a reverse canvas, with a fabulous photo of my grand daughter taken in Mexico. This photo just suited the sugar skull chipboard and stencil.


 I have taken a canvas, reversed it and worked on the inside of the canvas making a 3 dimensional piece.


I have  added to the front on of the memorymaze fences, and tree, and filled the inside with ink dyed  cotton .


I have used several memorymaze stencils on the background to create the effect of a parkland,
and several flourishes to the outside of the frame,to create a 3d garden effect,using hand made paper flowers.


Thanks for taking the time to look , share with your friends 


Sunday, November 12, 2017

Sugar Skull Art


I was really excited when I got this sugar Skull in my Design team kit.
I had the perfect challenge to use it with too. Over on the Artastic blog.

I used some old basic grey accents to Jazz him up and add colour and a lovely 3D frame for the photo.

Thanks for looking
Tracey

Treasure layout by Tania

Hi everyone. Today I'm back here with a layout, using some great Chipboard pieces and a stencil from Memory Maze. My layout is recording a pic of my little man, who is now 11 years old. I love this photo, which captures his entire personality. He has always been a smiler!!

I started out with a watercolour paper background, and added some watered down Distress Ink with a large brush. I used 2 different shades of grey.
Then I grabbed this cool mini stencil:

MINI STENCILS 100 X 100 NO 5 WIRE X 5

MINI STENCILS 100 X 100 NO 5 WIRE X 5
Using the stencil with more Distress inks and Oxide ink, I dabbed colour onto the background in a diamond shape.
Once that was dry, I did some background stamping over the patterns.


My photo was cut into a circle using a die cutting machine and I painted up this awesome Chipboard frame, using Distress Paints.

Vintage frame 001 11x14cm BULK 5 PACK unpackaged


Vintage frame 001 11x14cm BULK 5 PACK unpackaged


I attatched the background paper to black cardstock and added a strip of cool, embossed cardstock from Bella, (that's been in my stash forever!!)
Once I worked out placement of my photo and frame, I did some stamping with some little quote stamps from Kaszazz, then added the photo and frame.

My other little chipboard piece was painted with Distress Paints, and used as my title. You can find some cool mini words here:

BARGAIN PACKS ,Mixed packs of small and Mini words


BARGAIN PACKS ,Mixed packs of small and Mini words


This is how it all came together. I used minimal embellishments, as I wanted the chipboard frame and photo to take centre stage!


Thanks for joining us on the blog today, happy creating!!!

Tania