Friday, February 28, 2014

Mini book for the man in your life.

Sally here with you all today.

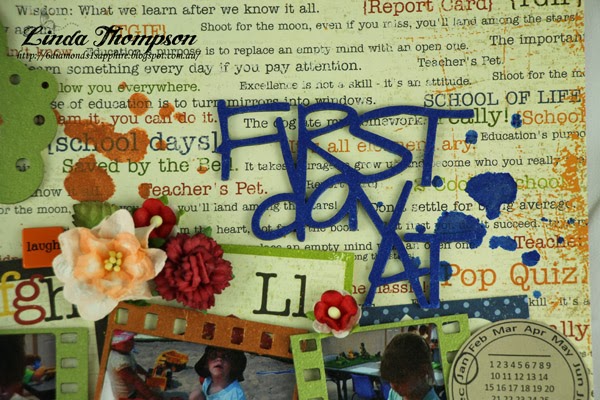
For my very first post I have created this mini book from a  push out book from Memory Maze, cut in cardstock perfect in place of a card or when you want to do something special .


I started with a plain card stock, and used patterned papers to suit the theme of my book I chose a book for a male, so the cogs, rulers, and tags were perfect for embellishments.
Because these books come as  plain colors  the theme is determined by the papers and embellishments you use.
I am addicted to these and currently have in the planning a mini book for a new baby, mothers day,fathers day, ladies birthday,school fun,sure there are many more


 I have left areas where you could add photos , Key words or affirmations or phrases.
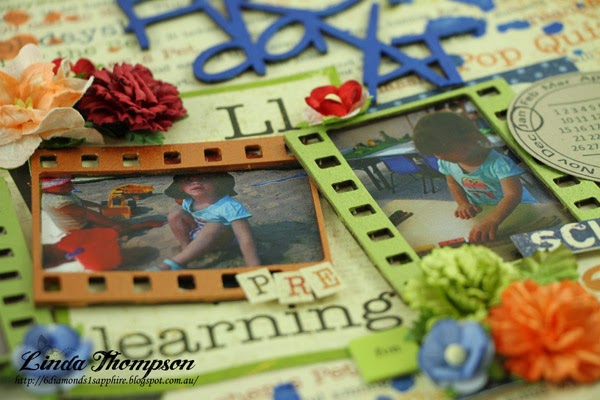
I have incorporated mini pockets in my pages as I  covered them, and popped in mini booklets for effect.


This page uses the Memory maze new rulers, playing cards and cogs to embellish. Great men's stuff.


some tags and cogs complete this project , room to write some special sentiments.
Why not give one of these a try everyone will be different and they are so satisfying to  make.

Ruler 2 pack 
Miniature cogs  code mini cogs

Cardstock book 3 pages and a half for a secret page, tags for covering and using on your pages
code CSB 001

Tuesday, February 25, 2014

My first ever blog post! ~ Danice Hamilton

This is so very exciting, my work being seen by all of you and I just hope I have done the Memory Maze products justice!
This layout is for me, I like this photo especially because if you know what you are looking at, you will know thats washi tape in the background, (I might even admit thats not even a quarter of my stash!) and it gave me a chance to use this finely detailed and delicate Mannequin that I covered in opal kindy glitz, I wanted to keep the delicacy of the skirt visible and I added some of the kindy glitz to a white mulberry rose in amongst some violet/purple shaded roses.


Mulberry paper wild roses
Wrought iron large mannequin

This gorgeous wee lass was snapped on a tractor at the Hamilton Field Days, and just happened to be perfect for the Tractor embellishment

And finally, this is a photo taken at the local beach with my dog Micky, He features alot in my layouts because he is my wee treasure, and hes so patient with me all the time!
I spread out the matt board squares out and sprayed them all with a light coating of tattered angels chalk mist, then one by one I removed the smallest and each time I resprayed the remaining ones to get a monochrome set of gorgeous frames to compliment the coordinating paper finishing with a double frame around the photo. I used adhesive to attach My Treasure to the photo to make it really stand out.

 used: Matt board square set
My Treasure from the Sweet word sheet
Thank you for checking out my layouts, stay tuned to see what fun things I can do next month too!
Danice

Saturday, February 22, 2014

Love & Chipboard

I'm back again today with the rest of this months blog post.

"Love Is"


8 inch canvas covered with a napkin then small amounts of gesso & gelatos used to get the perfect colouring.


MM hinge was first treated with rusting powder the inka gold and pearls added.


MM heart painted in metallic paint with touches of inka gold.


MM little bird covered in metallic paint then more gold. 


Lots of MM flowers with touches of gesso and inka gold.


MM hanging hearts have been cut up painted with metallic paint then touches of gold.


Another cluster of MM flowers and hearts


Memory Maze products used

Swirly Heart
Keys locks & knockers
Hanging hearts
Blue birds
Cosmos flowers blue
Trellis rose flower blue
Lily flowers yellow
Gardenia flowers Yellow
Chrysanthemum flowers Pink

.................................................................

"New baby princess"


A cute little new baby girl card. I used a shimmery paper to make both the card and envelope.
MM Babies pram has been painted with gesso then light pink embossing powder added to the main part and glitter embossing powder added to the rest so it all glitters and shines.


I tinted some texture paste pink and used the MM hearts stencil.


I added some glitter embossing powder to the hearts to act like a little reflection.


MM flowers, I also added glitter embossing powder to the tips of the flowers.


Memory Maze products used

Vintage pram 1
Heart to Heart stencil
Cosmos daisy pink flower
Carnation white flower
Sweethearts pink flower

.........................................................................

Friday, February 21, 2014

First Day of Pre-school

Hello, today marks this very first day of our new Design Team. 
I hope they will be able to inspire and amaze you with their skills and designs

"First Day of Pre-school"


Keeping with our Feb school theme here is my youngest daughter on her first day of pre-school. We were lucky enough that the pre-school recorded the day and printed it out as a flyer, so I cut out the photos and description and created a page.


Using some single film strips I coloured each one in a metallic paint.


I didn't want a lot of detail in my tree so I turned a swirly tree upside down


First day at prep title however I have cut the word prep off as it didn't suit.


Using a MM stencil to create splotches around the page to represent the mess little kids make with paint


Lots of MM flowers have been used through out the layout.


Memory Maze products used

First day at prep
Tree with swirls small
12" film set
Dots n stuff stencil
Cosmo daisy's in blue
Sweet heart blossoms in red, blue & orange
Carnations in red, green, orange 
Green leaves 30mm
Gardenia orange & blue

.............................................................

I have been a little unwell so was unable to get all my projects done in time, but I'll be back again tomorrow with something else.

Linda xxx


Tuesday, February 18, 2014

Tracey Campbell's Mid February Reveal

February is the month of love. We don't really celebrate Valentines in our house, as we express our love all year round, but I couldn't let February pass without a loving layout. So to celebrate Saint Valentine I want to share a wedding layout that I have created using the wonderful nesting hearts chipboard - who doesn't love hearts that come in all different sizes, they are perfect for any occasion.

You and Me

Have you tried gold leafing on your chipboard yet? If not it is something you absolutely must try....for a technique so simple to do you get and effect that is pure dynamite. Simply coat your chipboard with some tacky glue and apply the gold leafing over the top. Leave to dry and then brush off the excess gold leave and you are left with a stunning gold embellishment that is to die for.
Another simple technique to change the look of your chipboard pieces is to cover them with washi tape. In this layout I have used three different washi tapes over the nested hearts giving them an individual look.
Memory Maze Product Used:
Arrows family laugh love
Memory Maze Product Used:
12x12 nested hearts: Product ID Number LO265
************************
 Seeing as we are still in February and concentrating on Back to School I thought I would share my final layout of Bronte going off to Year Two this year. I wanted bright and bold colours for this layout, not sure why but when I am doing school layouts I almost always work in Primary colours and this layout is no different.

1st Day of Year Two

The School Buses were the perfect embellishment to finish off my page.
Simply a matter of giving them a good spray with some bold bright mists
The large "1st" chipboard piece was the finishing touch to my title, I wanted to emphasise that it was Bronte's 1st day of Year Two and this piece does exactly that.
Memory Maze Product Used:
1st: Product Idea Number SO359
Memory Maze Product Used:
School Bus: Product ID Number SO891
 ************************
Until next month....Happy Scrapping
Hugs
Tracey