Friday, February 21, 2014

First Day of Pre-school

Hello, today marks this very first day of our new Design Team. 
I hope they will be able to inspire and amaze you with their skills and designs

"First Day of Pre-school"


Keeping with our Feb school theme here is my youngest daughter on her first day of pre-school. We were lucky enough that the pre-school recorded the day and printed it out as a flyer, so I cut out the photos and description and created a page.


Using some single film strips I coloured each one in a metallic paint.


I didn't want a lot of detail in my tree so I turned a swirly tree upside down
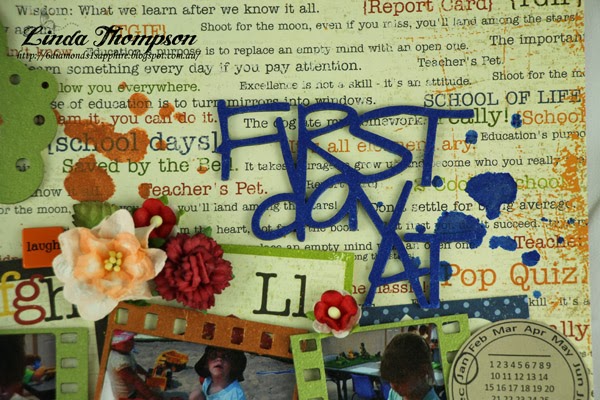

First day at prep title however I have cut the word prep off as it didn't suit.


Using a MM stencil to create splotches around the page to represent the mess little kids make with paint


Lots of MM flowers have been used through out the layout.
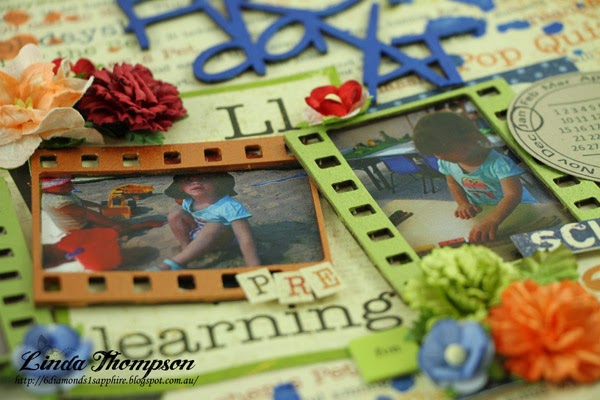


Memory Maze products used

First day at prep
Tree with swirls small
12" film set
Dots n stuff stencil
Cosmo daisy's in blue
Sweet heart blossoms in red, blue & orange
Carnations in red, green, orange 
Green leaves 30mm
Gardenia orange & blue

.............................................................

I have been a little unwell so was unable to get all my projects done in time, but I'll be back again tomorrow with something else.

Linda xxx


Tuesday, February 18, 2014

Tracey Campbell's Mid February Reveal

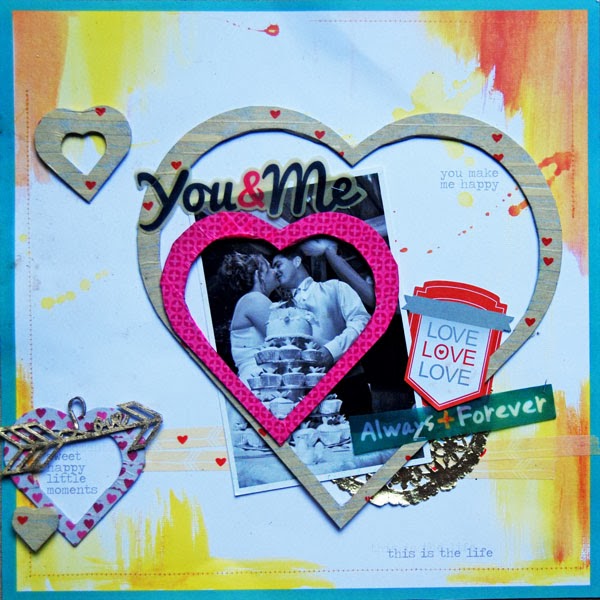
February is the month of love. We don't really celebrate Valentines in our house, as we express our love all year round, but I couldn't let February pass without a loving layout. So to celebrate Saint Valentine I want to share a wedding layout that I have created using the wonderful nesting hearts chipboard - who doesn't love hearts that come in all different sizes, they are perfect for any occasion.

You and Me

Have you tried gold leafing on your chipboard yet? If not it is something you absolutely must try....for a technique so simple to do you get and effect that is pure dynamite. Simply coat your chipboard with some tacky glue and apply the gold leafing over the top. Leave to dry and then brush off the excess gold leave and you are left with a stunning gold embellishment that is to die for.
Another simple technique to change the look of your chipboard pieces is to cover them with washi tape. In this layout I have used three different washi tapes over the nested hearts giving them an individual look.
Memory Maze Product Used:
Arrows family laugh love
Memory Maze Product Used:
12x12 nested hearts: Product ID Number LO265
************************
 Seeing as we are still in February and concentrating on Back to School I thought I would share my final layout of Bronte going off to Year Two this year. I wanted bright and bold colours for this layout, not sure why but when I am doing school layouts I almost always work in Primary colours and this layout is no different.

1st Day of Year Two

The School Buses were the perfect embellishment to finish off my page.
Simply a matter of giving them a good spray with some bold bright mists
The large "1st" chipboard piece was the finishing touch to my title, I wanted to emphasise that it was Bronte's 1st day of Year Two and this piece does exactly that.
Memory Maze Product Used:
1st: Product Idea Number SO359
Memory Maze Product Used:
School Bus: Product ID Number SO891
 ************************
Until next month....Happy Scrapping
Hugs
Tracey

Saturday, February 15, 2014

A Little bit of Fairy Dust....

Hello and welcome all, thanks for stopping by.  The other day I got a parcel From Memory Maze and I was like a little  child opening a Christmas present.  Oh where to start!  The wee fairy girl really took my fancy. 
There was so much to choose from!  Let me show you what I created.


* * * * * * * * * * * * * * * * * * * *

Beautiful


This was such a fun project to create.  I started by covering each piece of the shadow box with patterned paper and then inked the edges with so distress inks.  After I put the box together I started decorating it with lots of yummy embellishments.


The fairy was covered in a light layer of gesso and then I applied distress paint to the dress,  and Gelato  to the other  different  parts.  Once the paint was dried I embossed the wings with very glittery embossing powder.   


The vintage frame I got a little distress ink around the edge of the frame and added the sticker.


The vintage frame has been dipped into hot melted embossing powder in the melting pot.


  I cut he sign and light off so I could colour them.  Once I attached the post I glued back the sign and light which have been coloured with Gelatos and then clear embossed.


I then attached the vines and flowers.  If you look close you can see lots of lines of glue, which has been sprinkled with glitter to look  like frosted spider webs.


Here is a side view of the shadow box,  it sits lovely :-).  If you get a chance to play with one of these shadow boxes do it!

* * * * * * * * * * * * * * * * * * * *

A Fairy Garden.


 After making  the shadow box I had all this pretty papers left over had needed to do something with it. 
 So I created this card.


The reeds have been coloured in Gelato's and then I added clear crackle to the foliage and for the reed heads I glued some tiny beads.


In the back ground you can see the fence which has been dipped in the melting pot and then coloured with metallic rubs.  I layered the memory maze chipboard with cut outs from the paper.  Glittered the fairy butterfly wings and butterflies.


Memory Maze Chip Board used....fancy tags large  210 x 295 min buy 3
                                                                   Fancy Tags Large


Wrought iron fence set


Memory Box Oval


A fairy in my garden sold 3\'s  100 x 120


                                        Vintage Lamp Post

                                                                    Vintage Lamp Post


                                                         Reed Corner small   Sold in 3\'s

                                                                        Reed Corner


Thanks for stopping by today,  I hope you enjoyed my share.  Take care and happy scrappin  xox  Donna
                                               

.


Wednesday, February 12, 2014

It's time to say goodbye ...

Sadly, this will be my last post as part of the Memory Maze design team. It's hard to believe a whole year has passed since I started on the team. I really do hope that I have managed to bring each and every one of you some creative inspiration at some time or another. Behind the scenes, the new team are in full swing and already creating up a storm! I'm sure you will all be wowed by their work real soon. 

I have two layouts to share for my last post.

PeekABoo I See You


This girl never ceases to make me smile with her fun loving personality, even when I am mad at her I can't stay mad for long. I recently got her some new sunglasses and she wears them upside down. It's very cute!


I used chalk ink to colour the title being careful to leave the glasses. I then simply used a black sharpie to colour them in.


The other half of the title was coloured with the same colour chalk ink.


The heart frame I covered in some patterned paper. I just simply glued the piece face down and trimmed around the edge once it was dry.

Memory Maze products used:


....................................................................................................

Hugs & Kisses


We had a little mini shoot one morning to get a photo to send in our Christmas cards. I always like to scrap these photos too and like that they look great not as a Christmas themed page. 


I used a wrought iron chipboard piece which has been painted with some twinkling h2o's.


The title was a combination of ink and h2o's. I used a scrap of card to mask off the '&' while I inked the rest. Then it was easy to go back and and colour the other area with a fine waterbrush.


I used 2 of the vintage frames for my pics. They are a great size for 3x4's I just had to trim a little off the height. I painted these with distress paint and then added a row of machine stitching for some extra detail.

Memory Maze products used:


....................................................................................................

Well that's it from me. I really do appreciate you all stopping by over the past year. Thank you for all the lovely comments too.

Farewell and keep creating
Amanda xx