Sunday, February 15, 2015

Jan's Upload

This month for Memory Maze I have created two layouts, one vintage and the second a boy layout.


100% BOY
This layout features my son dropping Liam off at daycare.  I have used three pieces of chipboard on this layout.  The chipboard has been altered using one of my favorite mediums, metallic rub-ons.


Metallic Rub-ons - used to accent or as a full coverage.
Apply with finger, rubbing the metallics over the surface
 to bring out the full colour.
Memory Maze chipboard used:

Arrows All Messed Up

Chicken Wire Large

100% BOY
LIFE IS A BEAUTIFUL RIDE
This vintage layout features my parents, photo taken around 1940.  Its a long time since I have done any vintage layouts.  The chipboard is this layout has been altered using Brilliance Ink - Coffee Bean.


Memory Maze chipboard used:

Bicycle Micro

Life is a Beautiful Ride

Friday, February 13, 2015

A Little Bit Country

Mel here again with my second post for today.
This time I have a double layout to share with you. I live in the Country and love everything Country so these Chipboard pieces were perfect for me to work with. Unfortunately I didn't have any printed photos to go on my layout but I am sure I will have some printed off at a later date and will have the perfect layout for them to go on.

For my Chipboard fence I covered it in Walnut Ink Crystals. I then added some water using a paint brush to activate the crystals. This makes them dissolve and cover the chipboard. Once it was dry I added some gold and silver ink to give it that rusty look.
 I cut the Chipboard piece in half so I could use some of it on the top as well as the bottom of the layout.
 I used a Memory Maze flower template and some Distress Embossing Powder to give a textured background.
 I just love this Memory Maze Cowboy and Son. I covered the piece with some Brushed Pewter Distress paint and then inked the edge with the trusty Pinecone ink. (who doesn't have this in their stash!!!!!)
I am loving the end result of this layout and the Teresa Collins Life Emporium paper collection went perfect with the colours and the feel of the layout.

My Country layout wouldn't be complete without some Memory Maze Chipboard barbed wire. I just covered this with some pinecone ink and left it at that.

Memory Maze Chipboard flower stencil RED4.
Memory Maze Chipboard Fence and Barbed Wire L0192.
Memory Maze Chipboard Barbed Wire S0898.
Memory Maze Chipboard Cowboy and Son S0473.

Thanks for looking.
Mel
xxx

Whoooo is Around for a Canvas

Hi everyone, Mel here with my very first post on the Memory Maze Design Team. I am so honoured to be here and to be lucky enough to get to play with so many different goodies.

First up I have a canvas that I made creating some gorgeous chippy.


I started by prepping my canvas with some Gesso. I then Covered it with Mod Podge and added some paper from my My Mind's Eye Now and Then Collection.
Once that was dry I used some texture past and my Memory Maze brick after Brick template to give the canvas some dimension. While that was still wet I sprayed the entire canvas with some mists and paints.
I used the Memory Maze large chipboard cog which can be purchased in a Frame set. I cut off the desired piece and covered in Gesso, while it was still wet I covered it in white embossing powder and heat set it.  I repeated this step with the embossing powder but this time while it was being heat set I sprinkled some coloured embossing powder over the cog and continued to heat set it.
I then worked in sections of the cog, heating the section again and while it was still liquefied I pressed a stamp into the powder and allowed it to dry before removing the stamp. I did this in sections until the entire piece was completed. (remember if you are going to do this technique to cover what you have already done so it won't get affected by the heat gun and wreck you stamped design).
For my cute little Memory Maze Owl I covered it in grey ink. Once it was dry I drew in the detail with a black Spica Pen and then covered the entire owl with Hot Set Powder to give the owl some texture.

I have added some tags and extra embellishments including a Memory Maze Fence to complete my canvas.

Memory Maze Chipboard Cog Frame Z0002.
Memory Maze Chipboard Owl L0021.
Memory Maze Chipboard Picket Fence L0061.
Memory Maze Chipboard Brick after Brick Poly Template.

Thanks for looking. I will be back this afternoon for another creation using Memory Maze Chipboard.

Mel
xxx

Wednesday, February 11, 2015

LIZ HERE WITH MY 1ST DESIGN TEAM POST

Hello girls,

Well to say that I am very excited to join Memory Maze's Design Team and work with a wonderful group of girls is an under statement and I can't wait to show you some of MM fantastic products.

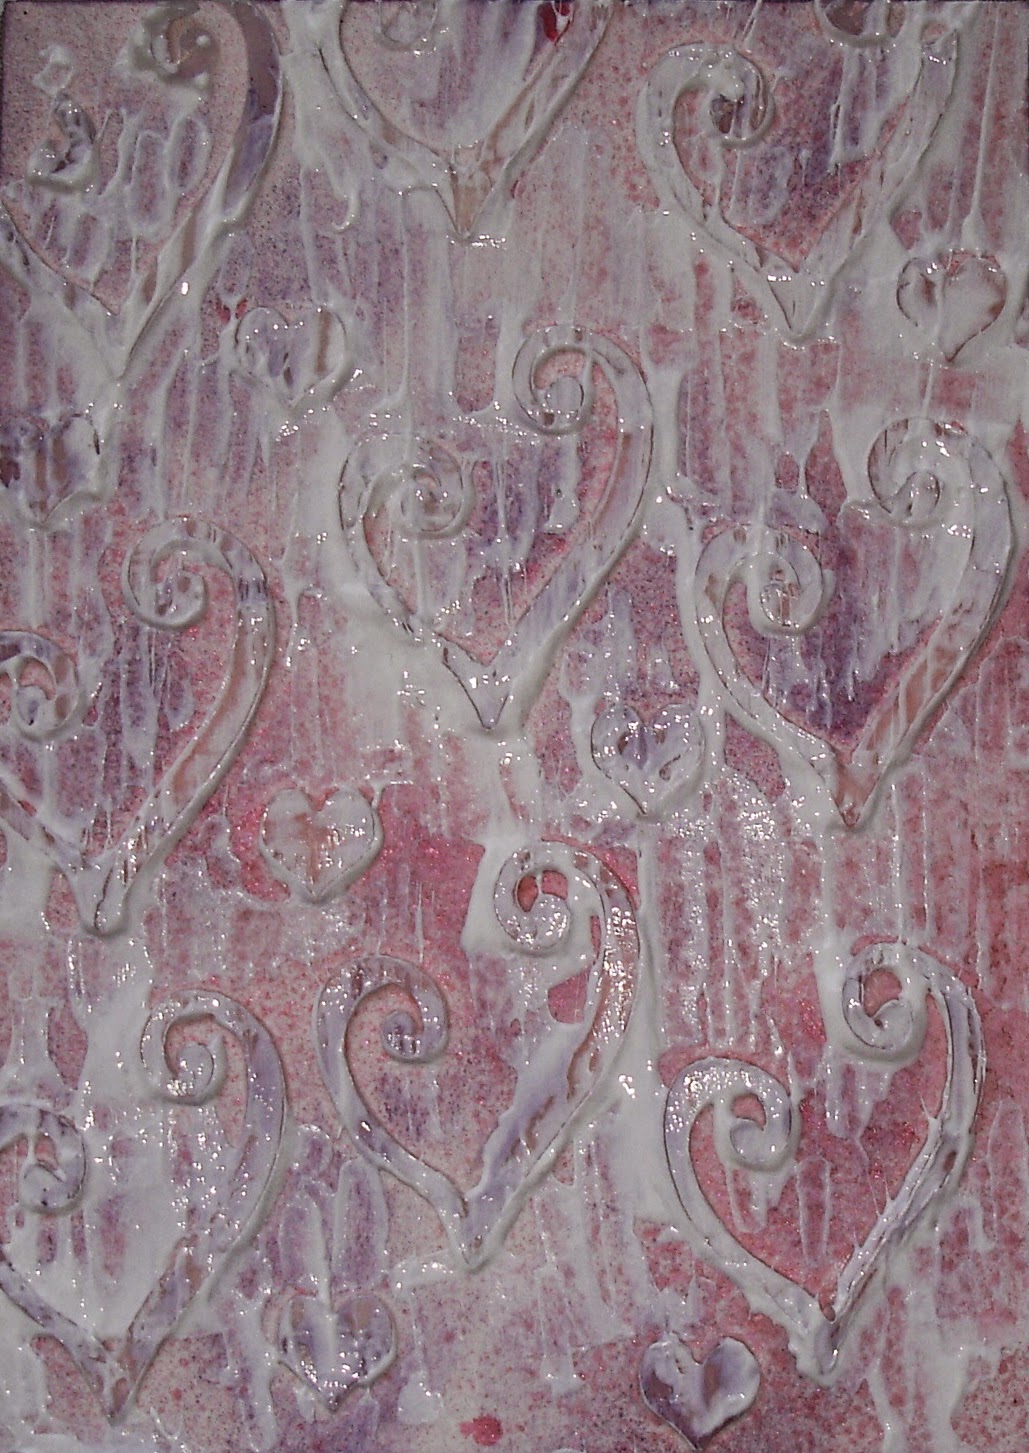
Firstly, I decided to have a play with Memory Maze's heart stencils.  Although we don't celebrate Valentine's Day here in Australia, I could not resist making a card for my dear Hubby Ray.

So I set to with some water colour paper, sprayed with a little Tattered Angels Vintage Pink Glimmer Mist.  Then the gorgeous MM heart stencil with some Impasto and dried with a heat gun.

 I then applied some Tim Holtz Distress Ink 'Dusty Concord'.

I love how this looks at the moment and you could stop here, but why????? It is a lot more fun to extend your work don't you think??  I decided to apply some Gesso over the whole area, just patchy
and dried with the heat gun once again.
Now for the fun part.............I embossed the hearts you could do this with clear or coloured embossing powder.

 So now all the play is over, I set to dressing up the card and here is my final result.  I used another heart stencil from Memory Maze to cut out the centre purple heart.


Now for a layout girls, here I have cut up the Memory Maze's Flourish, which I have spread with PVA Glue, then dried with heat gun to make it bubble up, looks great when it bubbles up. Then spread gesso over the top and dried with heat gun.  Sprayed with Tattered Angels Glimmer mist, which caused a dotted effect.

For the Memory Maze Anchor I covered it with Gesso and applied some Silks 'warm gray' and some Inca gold to give it an aged look.
Now for the final result..........................................................

Thanks for taking the time to look and don't forget to check out the wonderful array of goodies at Memory Maze
and until next time........Happy Scrapping   Love Liz.


Monday, February 9, 2015

Jodie's back with her Family Canvas


Hi all. It’s Jodie here and I am back as promised with a canvas reveal this time. Now I did pre-warn you that it may be a little long, so if you haven’t already done so you may want to grab yourself a cuppa before you get too into it. There is plenty of Memory Maze chippies used on this one, and I used a few techniques that I haven’t tried with chippies before, but am really impressed with the way they turned out. So let’s get into it.

To begin with I started by selecting a picture that I thought would go nicely with the frame chipboard that I had (I actually had 2 that I couldn’t decide between as you will see in the following pictures). Then I searched through my Memory Maze chippies stash to find others that might work with these. After a few minutes of playing around with the layout I had one that I was quite happy with.


Then it was onto preparing the canvas. This would be the background of the piece so I wanted it to have some texture to it, but also match in with the theme of the piece. I initially stamped a floral image several times on the canvas and then out came my leaf stencil and modelling paste. While the modelling paste was still wet I grabbed another smaller leaf embossing plate that I had, and pressed this in to a few areas of the paste. This gave it just a bit more texture as you can see in the following pictures.


This was then allowed to dry (with some assistance from my heat gun), and a coat of gesso applied over the top. I only had a little gesso left in my container so decided to add a few drops of ink to it, to give the background a bit of base colour. This was then heated again to speed up the drying time.


Then came the fun (but messy if you are anything like me) part, colouring time. I spritzed the canvas with a little water and then added drops of inks in random places over it, followed by more water and inks, a little heat and then more of the same until I had something that I was reasonably happy with.


I then decided to add a little more ink to the background, but this time I added it to a baby wipe first and then sponged this over the canvas randomly. It gave the ink colours a completely different look, and gave the base colours that bit extra it needed. Once this was all dried a coat of matt medium was brushed over the top to help seal it all.


Then it was time to move on to the other elements for the canvas. There was the main frame chippie, the Family sentiment, the butterfly halves, and the other word sentiments and small ornate frames that all needed preparation before being able to stick to the canvas backing. The word sentiments, ornate frames, butterfly halves and large frame were all given a coat of gesso and then covered in acrylic paint.


I then concentrated on the butterfly halves, by giving them a coat of crackle accents. These were left to sit and dry while I worked on some of the other elements and after a little while you could see the little crack marks appear. This was when drops of alcohol inks were placed over the top of the crackle accents and left to soak in. Check out the effect in the pictures.


They needed a little bit of lightening, so I did the same again with some liquid acrylic ink, only this time it was only left for a minute or so and then the excess sponged off.


The smile and laugh word sentiments and the ornate frames (that had already been painted in black), were prepared in the same manner with the crackle accents and alcohol ink droplets soaking in. Here are a few close ups so you can see the effect of using this process on these pieces.


With the Family word sentiment I wanted it to be a bit lighter than the others, so before it was covered in crackle accents I sponged some white acrylic paint over it lightly. Then instead of adding the alcohol ink drops directly to the chippie piece, I applied them to my craft mat (which already had a spritz or 2 of water on it to help the inks react). I then turned the chippie over and left it to soak up some of the liquid colour (crackle accents side down in the ink). Be careful when lifting this as it will be very wet and fragile. I then heated it to help it dry a little (both front and back). As you can see from the close up below the difference in colours is a lot more subtle than the direct ink approach. I then covered the piece in the green liquid acrylic ink and wiped it off after a minute so that it seeped into some of the cracks.

Then it was onto the main frame. I thought that this needed a bit more texture to it so decided to clear emboss a leaf stamp randomly onto the top of it before I added any more colour. The glossy sections are where the leaves have been heat embossed.


Ink drops were then placed on a sponge and these were sponged over the frame to give it some additional colour.

Now it was time to start assembling all of the pieces. I decided to change up the original layout idea slightly as you can see from the pictures. I chose the main picture that I was to go with and this was cut down and glued to the back of the main frame. I also printed out some of the photos details on a spare piece of photo paper and cut these out and glued to the back of the ornate frames. I covered the front of the details sections with glossy accents. These were then glued in place on the main frame as were the butterfly halves. The sentiments were glued down to the canvas and the main frame was glued to several sheets of cardboard before being adhered to the canvas (to give it some added depth).


There you have it. Sorry about the length of the post, but there were quite a few steps involved in this one. Enjoy the rest of your day and another team member will be back in a few days, with more Memory Maze goodness to share.

Until next time,

Happy Crafting.

Jodie.