Wednesday, September 6, 2017

Ten little fingers ten little toes by Candy

Welcome again to another scrappy month. 
Today I have  created a layout using a leaf mask and a verse from 
the baby chipboard collection.


I trimmed the background pattern paper to 11 1/2 inches square
than taped it well to the cardstock.
Cover well with some clear gesso and let dry.
Using the larger leaf on the mask and the texture paste apply to the
base using three of these leaves on each side of
where you are going to place your photo. I then sprinkled my sprays
over the leaves and sprayed with water to make them run
. Do one at a time and dry between them.
Stamp around the edges using the black ink and the script stamp.
Splatter some ink around.

The verse I painted with some white paint. Mine was old and gluggy
this gave some texture I just daubed it on. Then before it dried
sprinkle over some clear glitter.

Glue down your laces, then double matt your photo 
I just used some scraps of pattern paper I had in my stash.
Tape down using some foam tape.
Then add your flowers, pearl sprays
butterfly and lastly your verse


Memory Maze products


Other products used

White cardstock
Clear gesso
Kaisercraft Lilac Whisper collection
- opal paper, paper pad
Texture paste
Lindys - Merci Beaucoup mint and Tea pot purple sprays
Thick white paint
Ranger distress stickles clear dry glitter
Script stamp and black staz on ink
Assorted lace
Green tara flowers, leaf spray and butterfly


Thank you for visiting

Candy Chelepy
2017
Design Team


Monday, September 4, 2017

Cute-By Leanne Nankervis


Hi Everyone!

Leanne back again to share some more Memory Maze projects with you today.
I have two layouts to share with you today, using some lovely Sea papers from 49and Market.
Along with some awesome Memory Maze Chipboard products.

Layout
Cute

 
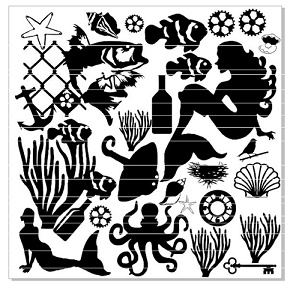
I used quite a few different techniques, to alter some of the chipboard pieces, from this 12x12 chipboard Mermaid set. The Cute Title I embossed with a chunky ivory embossing powder which has a hint of gold in it.
 
 
The sea horses and Coral I painted in white gesso first, I then used Prima water colour oil pastels to colour them in, I did the same with the coral pieces as well. Once the pieces were dry I then used my clear Wink of Stella glitter pen, over my chipboard pieces to give a little sparkle and shine to my chipboard.


Layout
Beauty

 
For my second layout I used another one of the 49 and Market Sand and Sea papers, with left over chipboard pieces from the Mermaid set. The anchor I embossed with a distress embossing powder to give a rustic look, I added a little bit of distress ink colour to the edges of the anchor. The wire I painted with white gesso, I wanted to leave it a little bit of the shabby look. The coral I water coloured once again and painted the coral prongs with heavy gesso.
 
 
The Beauty Title I used the same shabby white embossing powder, the sea shell I embossed with a sea blue glitter.
 
 
The Mermaid I altered her using some of Lindys Stamp Gang Starbursts sprays, I added some Mica powders, some Art ingredients beads and muslin and sequins. I firstly glued on all my chipboard pieces to layer her up, then gave her a coat of white gesso. Then a couple layer of sprays and started to decorate her.


..

Memory Maze supplies used:


Thanks for stopping by the blog today!


Leanne Nankervis
Memory Maze Design Team 2017

Saturday, September 2, 2017

{This is Happy}


Hi everyone Kylie here.....

THIS IS HAPPY - LAYOUT

This layout is a Mixed Media background I created on Black Bazill, with some bright acrylic paint colours and assorted washi tape a fab Glitter Title and of course some Memory Maze Chipboard.....

 I have chosen to use the 
gorgeous Memory Maze Chipboard below.


To alter the chipboard I have painted the scrolls using Metallic Blue paint - set aside to dry. 

Once dry I embossed randomly with Pink embossing powder.


The scrolls now are altered and looking gorgeous 
and are now matched to coordinate with my layout.


Place the scrolls on your layout

I have added to top and bottom of my photograph


I totally love how the Chipboard now coordinates with my layout and has given my layout dimension.......

I hope you have enjoyed my layout I have enjoyed sharing it...

See you next post!


Wednesday, August 30, 2017

{friends adventure awaits}

Hi everyone,  Kylie here sharing another of my layouts.....


I just loved this shot of my daughter Chelsea and her friend Monique all dressed up in combat gear before playing Paint Ball....

The photo really was the inspiration for the background I created with assorted acrylic paints, stencils and my trusty Gelli Plate.

I chose a black Mat for the photo along with a Black Thicker word, I  used Khaki wool to stitch a red Hambly transparency to the background. Embellished with a Charms Creations fabric denim arrow some gauze which I have stained red and a Tim Holtz Chip word "adventure awaits"........


To finish the layout I have used Memory Maze Arrows  


I selected the arrows I wanted to use and painted 
two Black and two Metallic Copper


Set aside to dry ready to embellish your layout..........


Once dry I adhered to my layout!


Of course I love how this layout turned out 
Chelsea also thinks its cool... thanks for taking the time to read my post I hope you found some inspiration.


Monday, August 28, 2017

Mini Butterfly canvas with Tania

Hi everyone! It's my turn to share a project with you today, using some more awesome Chipboard bits from Memory Maze!!!
I've made a mini canvas for you this time, and it features an absolutely, fabulous, and large butterfly!!!


I gave my canvas a mixed media background, by using some spray inks, Distress Oxide inks and  stamping. Then to add some more layers, I did some stenciling and  texture paste. Washi tape added another layer, and then to build up interest under the butterfly, I added some lace and coloured hessian.

The gorgeous chipboard butterfly, was first painted in gold, clear embossed and had black ink added to the edges. I felt it needed something more, so down the middle, I added some gel medium and tiny, pink, micro beads. To make sure they set, I then added some Dimensional Magic on the top!!!


I finished off with some Tim Holtz quote stickers, and felt that was enough. Hope I've inspired you to use some of these awesome larger Chipboard elements on a project!!!
See you next time!
Tania
Memory Maze Design Team 2017

Thursday, August 24, 2017

Hello you by Candy Chelepy

Welcome ladies nearly the end of August wow the year is going so fast.
Today I have created a layout using a Memory Maze
heart template and fancy frame.
And of course my beautiful grand daughter
Zarna Rose. And she does like the camera.


I have applied some mint texture paste over the heart  mask
moving this around where I want my photo and frame.


The squares I cut from a full sheet of paper. 
Then used an edge distresser around all the edges.
The frame I covered well with the silver texture paste, daubing all over.
This has given a crackle messy affect.
When this was dry I glued on my photo to the back of the frame.
Add this to where I wanted it , then using foam tape under all the squares.
Taping them around the framed photo.
Add all the flowers and glass hearts, 
then scribble around the edge of the layout and the small squares.


Memory Maze products


Vintage frame


Other products used

Create paper - cut girl collection - cherry paper
Pebbles - Girl squad collection - hello friend
Heidi swap mint and silver texture paste
Prima flowers
Corbett Creations glass hearts
Black pen

Thank you for visiting
Candy Chelepy
Memory Maze
2017 Design Team


Tuesday, August 22, 2017

Christmas in July-By Leanne Nankervis


Hi Everyone!

Leanne back to share a winter layout and card with you today, using the wonderful Memory Maze chipboard products. Over the last school holidays we took a trip to Ballarat, to see the Christmas Wonderland lights at Sovereign Hill. It was truly a beautiful experience with fake snow falls, and all the buildings lit up in colourful lights.
 
Christmas
In
July layout

 
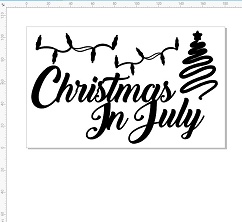
For my layout I used the new Christmas in July set from Memory Maze, I embossed the Title, lights and the swirly tree in a frosted silver embossing powder. I then used heavy gesso to add to the title and tree to look like fallen snow. I then sprinkled some Diamond Dust on top of the Gesso paint, for some added sparkle the Christmas lights I added some clear rhinestones to look like light bulbs.
 
 
Christmas chipboard lights embossed.
 
 
Christmas in July title embossed and gesso applied, dusted with diamond dust.
 
Tee-Pee Christmas card I made with left overs, inside I used a best wishes title from the card sentiments pack, which I embossed in the frosted silver embossing powder.


 Memory Maze laser cuts products I used a listed below.


Memory Maze supplies used:

Christmas in July ,lights,tree 110 x 180mm min buy 3


card sentiments 2 110 x 160 mm assorted greetings Memory Maze


Thanks for stopping by the blog today!
Don't forget to pop on over to the Memory Maze Laser cuts store, for all your chipboard needs.
 
Leanne Nankervis
Memory Maze Design Team 2017