Monday, May 6, 2019

Cheers by Suzanne Franin

Hey Everyone Suzanne here

Here is my latest layout 
I'm slowly working my way through the wedding photos (it will be their First Wedding Anniversary on the 18th of May lol)
I love this photo of the girls, I better do some of the boys soon though

Make sure to check out the rest of the blog for loads of inspiration and check out what's new


I had this Wine Glass Chipboard in my stash which was perfect but I didn't want to paint it like I always do so the paper range from Prima I used had this paper in it which is so pretty so 
I glued it to the chipboard waited for it to dry then used a knife to cut around it

I then used some Art Alchemy Wax inAged Brass around the edge to get rid of the chipboard colour to finish it off 

I added a few feathers for something different over the top of the vellum sheet that came with the matching flowers and feathers

 One of the Prima papers has a foil print on the paper so I hand cut around it to make a frame
The little white flowers were out of one of the Prima packs 

One of the Prima sheets of paper had different sized shapes on it and I cut a few different piece from that to lay under the glass and the added another flower 

I then used the Finnabair Art Ingredients Glass Glitter in Copper randomly over the page for some sparkle  

These flowers I got from a cheap shop and added some glass glitter too as well


Memory Maze Product I used


Thank you for visiting I hope you visit again soon x

Saturday, May 4, 2019

I am Woman Hear Me Roar by Jason


Welcome to my Memory Maze blog post, today I will be sharing a new large tag.

This amazing new tag from Memory Maze is 24.8cm x 4.23cm perfect size for any craft project.

With this giant tag I painted it with a layer of 13 arts Gesso, then I put a layer of 3D Gloss Gel from Prima marketing's Finnabair collection I dried it with a heat gun.

I then prayed 13 arts Fuchsia over all the area of the 3D Gloss Gel for this amazing affect.

The title "I am Women Hear Me Roar", I painted with Dina Wakley Night paint, when this was dry I went over it with Glossy Accents for this amazing effect .


I have used the flowing Memory Maze Products
  GAINT TAG
I'AM WOMAN HEAR ME ROAR

               Thank you very much for stopping by am checking out my Memory Maze blog post              Jason Anesbury.

Friday, May 3, 2019

All About Me From A To Z- By Leanne Nankervis


Hi Everyone!
Leanne here to share another project with you today, using wonderful products from Memory Maze Lasercuts. Today I'm sharing a layout of my daughter Holly, a pirate theme from her school concert a couple of months ago. I have used 7 Dots and Cartabella papers, Flowers from Blossom Tree Creations and 49 Market and some embellishments from D-lish Scraps.
Layout 
All About Me From A-Z


For my layout I have used the 12x12 Pirate frame, I cut away the right hand corner of the frame, I covered part of the frame with papers to match my background. I kept some of the chipboard frame in its raw state, and I used some mixed media inks to colour parts of the frame.12 x 12 Pirates theme  sold individually


I used the same inks to colour my Memory Maze title to blend in with my chipboard frame.


Close up of chipboard pieces


Thanks for Stopping by the blog today!
Don't forget to stop the store http://www.memorymaze.com/


Leanne Nankervis Design Team Member 2019


Tuesday, April 30, 2019

Permission

Mez here again. This time I have used a bit of everything. No Regrets from the Spread Your Wings Collection by ColourBlast, along with CB Steel Paste,CB Mica Powder Peach Nectar, CB Heavy White Gesso,left over pieces from a workshop I attended a fewmonths ago.
Plus Tim Holtz Distress Stamp Pads in Rusty Hinge  along with Distress Crayons in Rusty Hinge & Fossilized Amber. Tgey were used with both Memory Maze Stencils Grunge Circles & Memory Maze Stamps Fishnet Grunge & Text Grunge in Landscape & Memory Maze Chipboard Title " Permission to be Crazy"
Hope you like it & use up your left over bits.
Hop onto the website http://www.memorymaze.com.au/ & check out our new items.

Sunday, April 28, 2019

School Rocks with Sarah

Hello crafty friends, I have a quick and easy layout for you today using Memory Maze stencils and chipboard.
I created the background of this layout using Distress Ink and the packaging technique. Once you open up your chipboard, you can use the packaging to create this effect.
Simply apply the ink to the packaging, spritz with water and turn over and press gently on your layout. I then used the Memory Maze arrow stencil with some distress ink to create more texture to the background.
Another great use for your packaging is to place the chipboard on it while you paint it. This chipboard title was painted using Dina Wakley’s black acrylic paint.
I then matted my photo and adhered to the layout. Here are some close up shots. Thanks for stopping by to take a look at my project.

Saturday, April 27, 2019

Fairy Sophie by Suzanne Franin

Hey Everyone Suzanne here

For my project this week I've chosen a photo of my Goddaughter from a few years ago in a fairy costume I had some Memory Maze chipboard Fairies just waiting to be used when I remembered this photo

Make sure to check out the Memory Maze Blog for lots of inspiration and to see the new upcoming designs
We are also on Facebook and Instagram so make sure to check us out on social media as well


I painted the fairy using the Finnabair Art Alchemy Paints Metallique Rustic Brown, Wild Fuchsia, Pure Sunshine, Fresh Orange, White Pearl and Opal Magic Yellow-Blue

I mixed Helmar Super-Tac Glue with some glitter to cover the Criss Cross, Mini Scribble Heart I used
Here's what the heart looked like when it dried

I added some extra colour with Colour Blast Colour Artist Inks Slipper, Citrus and Spice just letting them run down the canvas and into the muslin and glitter I had added

After placing my photo where I wanted it with Helmar Acid Free Glue I stuck the Fairy into place with Super-Tac Glue after adding a flower to her hand

I added some extra embellishments for some dimension and interest  and glued the down with Helmar 450 Quick Dry Adhesive

Memory Maze Products


Thank you for visiting and I hope you come back soon x

Monday, April 22, 2019

Wedding Card-By Leanne Nankervis


Hi Everyone!
Leanne back to share another project with you today, using chipboard products from Memory Maze Lasercuts.

Wedding Card

Today I'm sharing a wedding card I made for a client recently, I have used Kaisercraft Rosabella paper collection, Memory Maze Chipboard for my title, and some wedding laces and flowers and butterflies from Blossom Tree Creations.

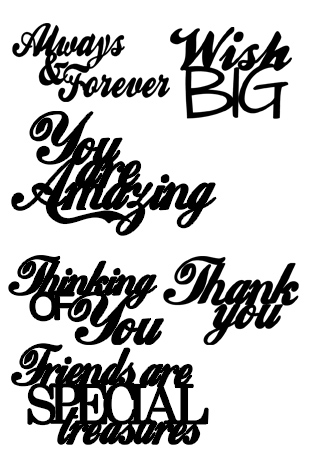
Double Z Fold Wedding Card Featuring my Memory Maze Title Always and Forever from the cards Sentiments pack. I embossed my title with a silver embossing powder from stampin up, I then highlighted the title with Finnabair's silver wax.


Back view of the Z Fold card

Card in matching envelope


Card and Envelope


Memory Maze Supplies used:

Card sentiments 3 110 x 160 mm assorted greetings Memory Maze


Thanks for stopping by the blog today!
Till next time happy crafting x


Leanne Nankervis Design Team Member 2019