Wednesday, February 11, 2015

LIZ HERE WITH MY 1ST DESIGN TEAM POST

Hello girls,

Well to say that I am very excited to join Memory Maze's Design Team and work with a wonderful group of girls is an under statement and I can't wait to show you some of MM fantastic products.

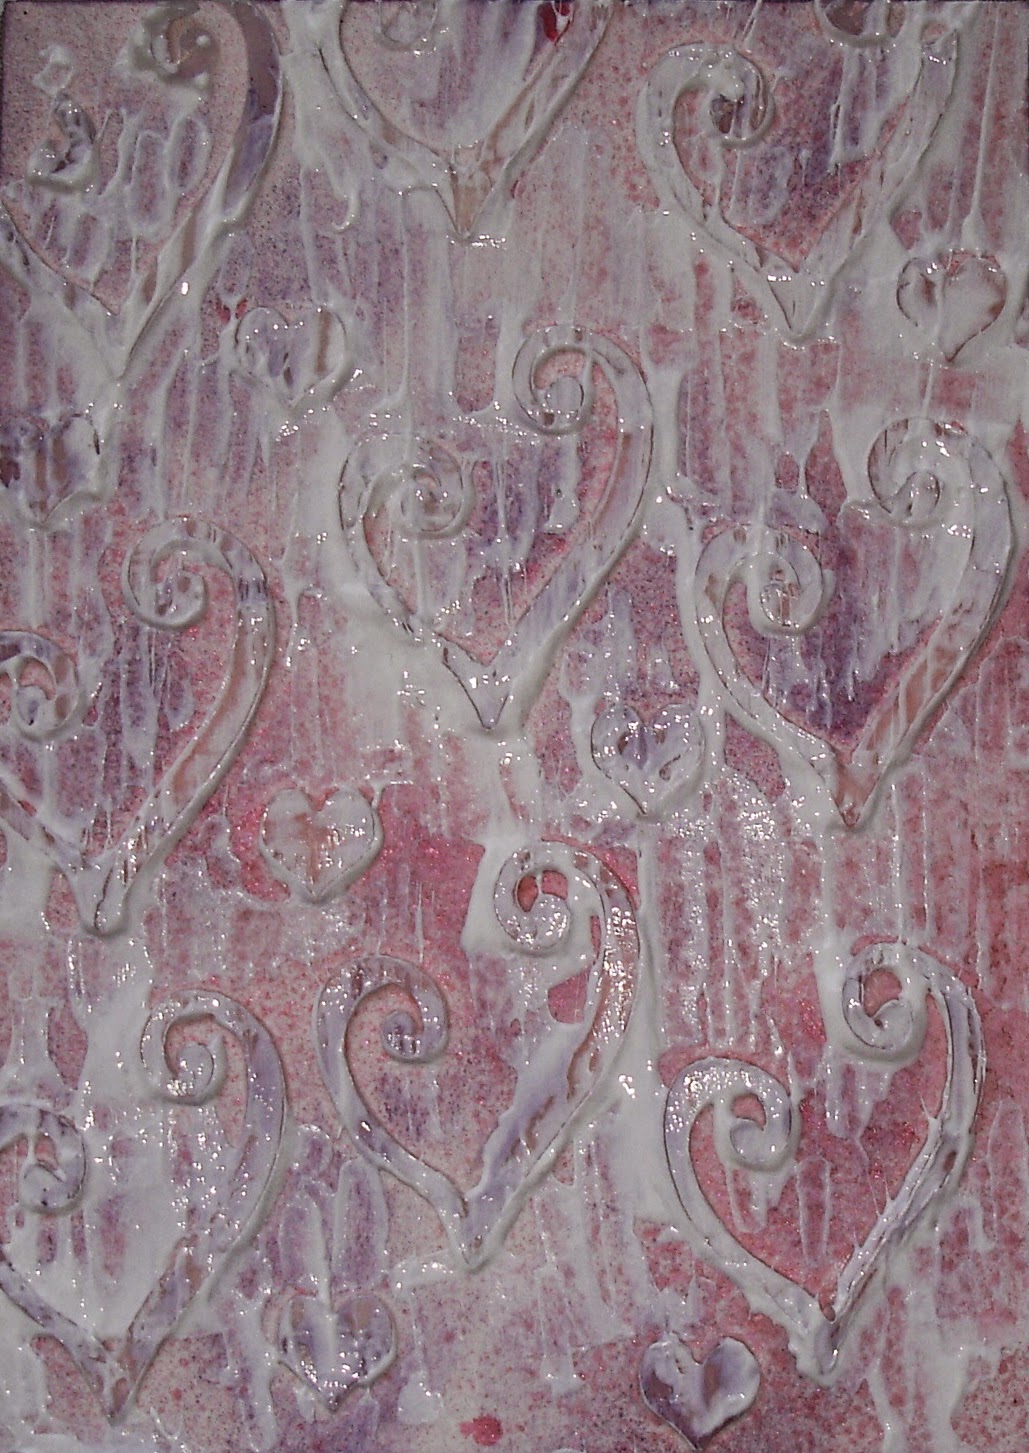
Firstly, I decided to have a play with Memory Maze's heart stencils.  Although we don't celebrate Valentine's Day here in Australia, I could not resist making a card for my dear Hubby Ray.

So I set to with some water colour paper, sprayed with a little Tattered Angels Vintage Pink Glimmer Mist.  Then the gorgeous MM heart stencil with some Impasto and dried with a heat gun.

 I then applied some Tim Holtz Distress Ink 'Dusty Concord'.

I love how this looks at the moment and you could stop here, but why????? It is a lot more fun to extend your work don't you think??  I decided to apply some Gesso over the whole area, just patchy
and dried with the heat gun once again.
Now for the fun part.............I embossed the hearts you could do this with clear or coloured embossing powder.

 So now all the play is over, I set to dressing up the card and here is my final result.  I used another heart stencil from Memory Maze to cut out the centre purple heart.


Now for a layout girls, here I have cut up the Memory Maze's Flourish, which I have spread with PVA Glue, then dried with heat gun to make it bubble up, looks great when it bubbles up. Then spread gesso over the top and dried with heat gun.  Sprayed with Tattered Angels Glimmer mist, which caused a dotted effect.

For the Memory Maze Anchor I covered it with Gesso and applied some Silks 'warm gray' and some Inca gold to give it an aged look.
Now for the final result..........................................................

Thanks for taking the time to look and don't forget to check out the wonderful array of goodies at Memory Maze
and until next time........Happy Scrapping   Love Liz.


Monday, February 9, 2015

Jodie's back with her Family Canvas


Hi all. It’s Jodie here and I am back as promised with a canvas reveal this time. Now I did pre-warn you that it may be a little long, so if you haven’t already done so you may want to grab yourself a cuppa before you get too into it. There is plenty of Memory Maze chippies used on this one, and I used a few techniques that I haven’t tried with chippies before, but am really impressed with the way they turned out. So let’s get into it.

To begin with I started by selecting a picture that I thought would go nicely with the frame chipboard that I had (I actually had 2 that I couldn’t decide between as you will see in the following pictures). Then I searched through my Memory Maze chippies stash to find others that might work with these. After a few minutes of playing around with the layout I had one that I was quite happy with.


Then it was onto preparing the canvas. This would be the background of the piece so I wanted it to have some texture to it, but also match in with the theme of the piece. I initially stamped a floral image several times on the canvas and then out came my leaf stencil and modelling paste. While the modelling paste was still wet I grabbed another smaller leaf embossing plate that I had, and pressed this in to a few areas of the paste. This gave it just a bit more texture as you can see in the following pictures.


This was then allowed to dry (with some assistance from my heat gun), and a coat of gesso applied over the top. I only had a little gesso left in my container so decided to add a few drops of ink to it, to give the background a bit of base colour. This was then heated again to speed up the drying time.


Then came the fun (but messy if you are anything like me) part, colouring time. I spritzed the canvas with a little water and then added drops of inks in random places over it, followed by more water and inks, a little heat and then more of the same until I had something that I was reasonably happy with.


I then decided to add a little more ink to the background, but this time I added it to a baby wipe first and then sponged this over the canvas randomly. It gave the ink colours a completely different look, and gave the base colours that bit extra it needed. Once this was all dried a coat of matt medium was brushed over the top to help seal it all.


Then it was time to move on to the other elements for the canvas. There was the main frame chippie, the Family sentiment, the butterfly halves, and the other word sentiments and small ornate frames that all needed preparation before being able to stick to the canvas backing. The word sentiments, ornate frames, butterfly halves and large frame were all given a coat of gesso and then covered in acrylic paint.


I then concentrated on the butterfly halves, by giving them a coat of crackle accents. These were left to sit and dry while I worked on some of the other elements and after a little while you could see the little crack marks appear. This was when drops of alcohol inks were placed over the top of the crackle accents and left to soak in. Check out the effect in the pictures.


They needed a little bit of lightening, so I did the same again with some liquid acrylic ink, only this time it was only left for a minute or so and then the excess sponged off.


The smile and laugh word sentiments and the ornate frames (that had already been painted in black), were prepared in the same manner with the crackle accents and alcohol ink droplets soaking in. Here are a few close ups so you can see the effect of using this process on these pieces.


With the Family word sentiment I wanted it to be a bit lighter than the others, so before it was covered in crackle accents I sponged some white acrylic paint over it lightly. Then instead of adding the alcohol ink drops directly to the chippie piece, I applied them to my craft mat (which already had a spritz or 2 of water on it to help the inks react). I then turned the chippie over and left it to soak up some of the liquid colour (crackle accents side down in the ink). Be careful when lifting this as it will be very wet and fragile. I then heated it to help it dry a little (both front and back). As you can see from the close up below the difference in colours is a lot more subtle than the direct ink approach. I then covered the piece in the green liquid acrylic ink and wiped it off after a minute so that it seeped into some of the cracks.

Then it was onto the main frame. I thought that this needed a bit more texture to it so decided to clear emboss a leaf stamp randomly onto the top of it before I added any more colour. The glossy sections are where the leaves have been heat embossed.


Ink drops were then placed on a sponge and these were sponged over the frame to give it some additional colour.

Now it was time to start assembling all of the pieces. I decided to change up the original layout idea slightly as you can see from the pictures. I chose the main picture that I was to go with and this was cut down and glued to the back of the main frame. I also printed out some of the photos details on a spare piece of photo paper and cut these out and glued to the back of the ornate frames. I covered the front of the details sections with glossy accents. These were then glued in place on the main frame as were the butterfly halves. The sentiments were glued down to the canvas and the main frame was glued to several sheets of cardboard before being adhered to the canvas (to give it some added depth).


There you have it. Sorry about the length of the post, but there were quite a few steps involved in this one. Enjoy the rest of your day and another team member will be back in a few days, with more Memory Maze goodness to share.

Until next time,

Happy Crafting.

Jodie.


Jodie with her first DT post for Memory Maze


Let me first start by introducing myself. My name is Jodie Mason, and I am a wife and mother of 3 beautiful kids, a geriatric cat, adorable Labrador puppy and half a dozen chooks. Crafting has always been in my life, and now that I am a mother I am cherishing being able to pass some of my knowledge and skills on to my children. If you would like to find out a bit more about me or want to check out some of what’s been going on in my craft room lately, please visit me over at Jodie's Craftivity.
Now let’s get into it. To begin with I have a Birthday card that I made for my 2nd child who turned 7 yesterday. It was a really quick card as I was under the pump with this one. I have used pieces of plain cardstock in black and grey for the bases of this card. Dies were used to cut the shapes out of the black and grey card and a piece of watercolour cardstock was placed behind the shield shape window (it was coloured with several alcohol inks). There were 3 Memory Maze chippies used on this card; the Happy Birthday, Crazy Kid and Best Wishes sentiments.
 
The Crazy Kid chippie was painted with light green acrylic paint and then covered with green kindy glitz and glossy accents. The HappyBirthday sentiment was painted with Lumier acrylic paint in indigo, and then topped with glossy accents. Check out how much shine this can add to a chippie in the pictures.
 
On the inside of the card the Best Wishes sentiment was coloured with green alcohol ink and then covered with the green kindy glitz again.
 
The edges of the grey card were all inked with brown stazon ink. Once all of the pieces were prepared they were pieced together and Hey Presto!

The second item I have for you today is a canvas. Now I will worn you that this has quite a few steps and pictures to it, so check back in this afternoon for that one.


Until Then,
Creative Crafting,
Jodie.


Saturday, February 7, 2015

Memory Maze Design: Jan McKenzie 's inaugural post for Memory maze. Ja...

Memory Maze Design: Jan McKenzie 's inaugural post for Memory maze. Ja...: Jan McKenzie 's inaugural post for Memory maze.  Jan has created an amazing canvas ,using a range of amazing techniques. ...
Jan McKenzie 's inaugural post for Memory maze.
 Jan has created an amazing canvas ,using a range of amazing techniques.


Hello and welcome to my first ever post as a member of the mm design team.
This canvas was created by first using mm stencils and texture paste.
I then added some mists and allowed to set, whilst this was happening I sealed the mm cross and assorted mm butterflies with gesso and then outlined them with liquid perfect pearls in gold and silver.


Using a thicker canvas I decided the edges were in need of some personality, I added some texture shapes with the mm 6 x 8 butterfly stencil and let it dry , I them stamped them with dark charcoal ink to the butterflies.


I have added brass corners and feet to the canvas so that it can stand  on its own.
I have used glitter mists and semco sprays to add the needed color.
The quality of the mm products allow you to do so much, this has been a great project to work on.


This is the front of a board book using one of the new maxi sayings 
some of the new bling and butterflies 


Thursday, February 5, 2015

Creative Process continues with Toni

Good afternoon, I trust that you've all had a lovely day so far.
Mine of course has been filled by my two boys.
Classroom helper for my Preppie and running around with some Swimming Rep forms for my new High Schooler. Who even though he has a broken thumb, still managed to get selected into the District Rep Team side.
 
Thank you for coming back this afternoon, the creative process continues as I share with you a Canvas made featuring a photo of my Grandma in her younger youngers and a gorgeous Mannequin chipboard piece.
 
 
Don't worry, this post is going to be shorter than this mornings introductory post.
Again, I'll start with a photo of what I gather together for the project.
I was actually at my Mum's house when I created this. She has all the best goodies, so I had fun making this one! In fact, my boys like scrapping with my too.
 Hunter assisted (or directed) with this particular canvas.
 
The first steps where to cover the base of the canvas with gesso.
Next I layered the chipboard, ribbon and some strips of paper, then covered it all in gesso again.
There are also 3 different mist colour sprays on here too.
For some extra texture and dimension, I used a plastic picnic knife edge to spread the pastes.
 
After the gesso applications, Hunter and I went out to play with the Cows and Horses on my Mum's farm. It was a good way for me to pass time allowing the pastes to dry. I'm a very impatient crafter!
 
Since this canvas is very white on white, for the pops of colour I've used some cute flowers.  


 Memory Maze product used;
Mannequin
 
 
Thank you again for joining me. I am so excited to be working with the amazing Memory Maze products as I've been a fan for many years! I'm also very honoured to be crafting along side some of the most talented scrappers in Australia. The ideas and brilliant pieces that are being created with the MM products, I'm sure will supply you with endless amounts of upcoming inspiration.
Until next time, happy scrapping.
Toni.. xoxo