Friday, October 30, 2015

Mixed Media Christmas Album

Hello everyone Candy here bringing you another Christmas Mixed media creation. 
It is not to many weeks to go until Christmas is there. scarey thought heh.
I started with the large fancy frame and then cut my chipboard for the book covers to the size I wanted. Mine is a large book 8x10 inches. But you can use any size frame you want for this. 


I used 2 of the  12x12 inch chipboard pieces and cut them down to 8x10 inches, then a 1 1/2 x 10 inch piece for the spine. I have used a 12x12 inch Christmas paper pad for this making sure I had enough paper to decorate inside and out of my book. Using 2 12x12 pieces of the papers glue or tape together with about an inch overlap. I used wide tape for this make sure this sticks well.
Now place all three pieces on the paper and tape onto paper. I drew a pencil mark around the edges of the chipboard so I could put them back where they belong.


Score well around the edges of the chipboard and also along the creases for the spine.
Cut the corners from the paper leaving a little bit for the overlap. Make sure the edges are stuck very well


I cut another 8 pieces of the chipboard 1/4 of an inch smaller than the covers, so mine measure 
7 3/4 x 9 3/4 inches these are for the inner pages. This more or less depends on how many pages you want for your book. To join these I cut enough pieces of cardstock at 3 x 9 3/4 inches, folded them in half long ways. Placing your tape along one side, you will need heaps as you need the strength for the spine. Stick the half folded piece of the cardstock to one side of the chipboard piece then stick another piece of the chipboard to the other half of the cardstock. So when you open your pieces it looks like this. Continue doing this until you have done them all. Making sure they are all even top, bottom and sides.


Now to attach to the covers  to the front and back pages, join to the cover the same way as joining your pages together. I then cut a piece of the Christmas paper for the inner pages 1/4 inch smaller and stuck down, continue doing this all through your book. 


Now this is how your cover looks. I used some washi tape around the edges.


I covered the large frame with paper and glued it onto the front of my book.


I have used a mask along with some texture paste, gold spray, gold foil paste, flowers. leaves, a Christmas plaque and also two small corner flourishes. With these I used some Prima chalk ink and inked them well, daubed some of the texture paste with a paint brush, then while wet added some gold glitter. 


A couple of close ups of the texture


The inner pages are work in progress so I will put onto the blog when I have finished

Memory Maze Products


Flourish Corner Small Pkt 2   Sold in 3\'s

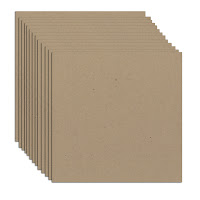
12 x 12 sheet chipboard 120 UM  pack 10

Thank you for visiting
Candy Chelepy
2015 Memory Maze
Design Team


Monday, October 26, 2015

Spring inspired mixed media layout by Thandar


Hello Everybody,

Here in the US, the winter is creeping up. However, on the other side of the world, it is spring time. I just wish that I can travel through time to spring. Nonetheless, I would like to share this spring inspired mixed media layout created with yummy memory maze chips.

Flowery Spring Mixed Media Layout 

Here is a mixed media layout that I have created on a blank card stock. The chipboard not only provide a solid support for my layout, it also adorn my layout perfectly.


Memory Maze supplies used:

Wrought Iron 28 flourish


Thanks for visiting
Memory Maze Design Team 2015

Saturday, October 24, 2015

Fun scrapbooking layouts with Jodie Mason

I hope that this post finds you all well. Hopefully this will be the last time that I am having to create without being in my craft room, and with very limited supplies. Today, I have a few layouts for you that were as much fun to create as we had in the actual pictures.

Delightful Droppers

Now I'm not sure about you, but my kids love to get into my craft area and get their 'creative' on just like I do. This layout features pictures of my 3 year old daughter, Holly letting her creative juices flow as she painted some watercolour masterpieces. I set her up with a palette filled with colours (a combination of water and food colours), had some water colour paper on the bench in front of her and handed her some droppers. Then she was left to her own devices. Once dry I added some of her artwork to my layout.

Given the complete randomness of her colours and composition I thought that the mayhem chipboard pieces fitted in nicely. These were created by covering with white gesso first, and then using various alcohol inks to drop colour onto the chipboard. Once dry a coat of glossy accents was applied.


Memory Maze supplies used:


Finally Together

After a pretty long engagement my husband and I finally managed to tie the knot last year. These were some of the pictures from our day together. Combined with our wedding colours and papers to tie in to our wedding themes, this layout came together quite easily. I couldn't get just the right tone and shade of blue in a paint/ink/chalk etc., so decided to cover my chipboard pieces in the metallic blue papers that we used for the wedding. After gluing this down, I used my craft knife to carefully cut around the edges of the chipboard. I also used some smaller off-cuts from a sheet of chipboard to add dimension to some of the pictures and sentiments.


Memory Maze supplies used:


I hope that this has provided you with some inspiration, and until next time, keep creating.

Thanks for visiting

JODIE MASON
Memory Maze Design Team 2015

Thursday, October 22, 2015

A Few Cards to Inspire You by Jason

Hi everyone and welcome to my Memory Maze blog post. 
Hi all  today I am sharing 3 cards  with you

Card 1
I used Memory Maze Amazing paper I went around the edge in Dina Wakley White Paint
With the word congratulations I painted it white with Dina Wakley White paint then I used Emboss it clear Dabber then used shabby white embossing enamel an heated with the gun
With the Wine Bottle I paint it Black with Kaiser craft black paint an wipe it of with a baby wipe then painted the bottle with Kaiser craft paint an lightly wipe with baby wipe then I used Emboss it clear Dabber then used shabby white embossing enamel an heated with a heat gun
With the champagne glass I used Dina Wakley lemon paint then I used emboss it clear Dabber then used shabby white embossing enamel.


I have used the following Memory Maze products

Wine Bottle and Glasses


Card 2


I used Memory Maze amazing back ground paper with the word Moo I painted it black with black gesso when dried I went over it with glossy accents
With the cow I painted her white with gesso than I used black gesso to make the spots on the cow and glossy accents.
With the wire fence I painted it with Kaisercraft Burnt umber an lightly wipe some off with baby wipes.


I have used the following Memory Maze Products

Cow


Wire Fence


Alphabet Letters


Card 3

I used memory Maze back pattern paper I went around the edge with black gesso .
With the word timeless I painted black with gesso an went over it with glitter glue 
With the clock I painted black with gesso an went over with glitter glue.

I have used the following Memory Maze products

Title Timeless

Clock face and Hands


Filigree Paper

Thank you for coming to view my upload I hope I have inspired you to create something wonderful with Memory Maze.

Jason Anesbury 
Memory Maze Design Team Member 2015

Tuesday, October 20, 2015

Someone Special Canvas & Tag Book - by Toni Herron

Welcome back friends, Toni here today and I'm bringing to you the sister project to a layout I shared with you a few months ago. I had such great feedback from it, that I decided to make this special canvas as a gift for Hunter's favourite Junior Driver - Abi. She is so fantastic with her little fans! Hunter just absolutely adores her!

Someone Special Canvas


First I started by covering the base of the canvas with white paint, then covered it lightly with red paint to give it a distressed look. Next, using some of the offcuts from the first project, I layered the pattern paper to fit the canvas. 
The large yellow circle was inked, covered with crackle paint and the lightly dusted with some paint. 
Both of the white and black circles have been covered with coloured Ranger Ink crackle paint. 

The chicken wire was coloured with Gelato first, then sprayed with silver Smooth spray. Finally, using a small paint brush, I wet it with water to distribe the colouring products evenly. It has finished off with a great shine look. 
Last steps were to simply add the embellishments and 3D the torn quote strips. 


Memory Maze products used; 


Tag Book


It has been a while since I have had the chance to make an album of any kind lately. However with a new Envelope Board, I wanted to experiment and have some fun. So I came up with making this fun Tag Book using the folds on the envelope board.


Memory Maze products used; 


Thank you for visiting today
Toni Herron
2015 Memory Maze DT Member