Showing posts with label canvas. Show all posts

Tuesday, November 6, 2018

Butterfly by Suzanne Franin


Hey Everyone Suzanne

This weeks project I created a canvas with a quote that I  think a lot of us should listen too especially me

Make sure you visit our Facebook Page Memory Maze to see what's happening and keep up to date with what's going on

The photo is very dark so I wanted to go with soft colours to make it look how we should feel after the change - different

It's a simple canvas with not a lot on it but I wanted the quote to speak for itself and the embellishments. just to soften it


I started off by using the Door Wire Stencil in random places on the background paper (I love this stencil it works with anything you're doing)
I then mixed a bit of Colour Blast Colour Paste -Blush and Sunshine each with a bit of water to make a thin paint consistency so I could make it drip through the lines of the stencil the Sunshine worked great but I think I put too much water with the Blush


On the Butterfly Corner Flourish I spritzed some Colour Shimmer Dust in Sunshine first and then a little bit of Lollipop I have them made up already in bottles very lightly over the top 


With the Heart with Wire insert I spritzed that with the Colour Shimmer Dust in Peacock for a contrast


Here you can see the Sunshine Colour Past in the grooves of the stencil 


I then just finished off with my favourite embellishment - flowers and some tiny metal pieces and that's it 

Memory Maze products I used


Thank you for visiting and I hope you will come back soon x

Wednesday, October 31, 2018

Unicorn Love by Suzanne Franin


Hey Everyone Suzanne here

I have a couple of friends that love unicorns but one in particular who saw this picture and loved it so I HAD to make her something with it 
So for my Memory Maze project this week this was created for her

Don't forget to check out the rest of the blog for any of the latest products or news or just have a look around at some of the awesome Design Team work for inspiration 


Because the photo is so colourful I wanted the background to be neutral and simple but still have texture


So I started off by using texture paste through the Mini Divided Heart Stencil once each layer dried I went over it again for extra height


I then used clear gesso over the top of them and made sure I carefully pushed into the divided lines of the heart 


I stamped archival in with the Vintage Baroque Stamp randomly over the canvas but because there are so many raised areas it didn't show up very well


On the word Unicorn I used Colour Embossing Powder in Snow White which showed up silvery because I painted the all the embellishments in black gesso


Here I spray Colour Shimmer Spray in Dusty Charcoal to enhance the grooves in the hearts 


I used the Unicorn from the Set that has a few different sizes, the word and some stars in it 
With the medium Unicorn I used Colour Embossing Powder in Bling
I also used it on the arrow


I used the Unicorn Acrylic White and the Double Heart Vintage Frame which I also used the bling Colour Embossing Powder raising two of the corners up using the Helmar Liquid Scrap Dots it's great for having height without having to use white dots that you can see


Here I filled the glass bottle with little beads I have a heap of and used a flair button from Flutterby Designs

Memory Maze products I used


Unicorn Set


Arrow from a set


Thank you for visiting and I hope you will come back soon x

Wednesday, August 22, 2018

Canvas Love with Sarah

Hello crafty friends, Sarah with you today with another one of my mixed media canvas. This time it is a 12 inch round canvas - probably one of my favorite shaped canvas to paint.
Similarly to one of my previous canvas posts, I used the same approach and applied paint using an old credit card. Layering the paint with various toold give various textured and effects on the canvas. I used Dylusions paints for this project.

I then used a number of stencils to apply paint across the canvas. Keep adding layers as you wish, using a variety of stencils, overlapping the borders of the colours on the canvas.

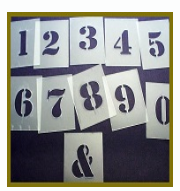
For added texture, I sponged paint through punchinella, made marks using the edge of the credit card and using balck and white paint, applied random pieces of alphabet and Memory Maze number stencils - these are defintely a favorite.
I hope you enjoyed this project and if you are interested in any of the Memory Maze products, be sure to contact your local craft store or Memory Maze for your local stockist where we can place our local sales reps in contact with them.

Saturday, July 21, 2018

Mixed Media Canvas by Sarah

Hello crafty friends, Sarah here with a mixed media project using some of the alphabet and number stencils from Memorymaze. Lets' take a look...
This 16X20 inch canvas sheet was largely inspired by the artist Nina Ribena. If you havent seen her work, she does some great Youtube tutorials that are easy to follow along with. I started by covering the canvas with swipes of colour using an old credit card. I used a mixture of dark and light but you could apply what ever colours you iike.
From here you then build the layers using stencils and other objects. I used a variety of Memorymaze stencils for this project. Some of my favorite at the moment are the individual letter and number stencils. They are 40mm and perfect for this kind of project to add to the background but would be fantastic for cards or scrapbook layouts. You can see the "A" and "2" on this project. Stencilled in black, they make the background colours just pop!
Once you have applied layers of colours with various stencils, you can use items such as bottle tops, edges of a credit card to make further marks on the canvas. The difficult thing is knowing when in fact to stop! Let's take a closer look at some elements on the canvas.
I hope you enjoyed this project and will give it a go yourself. Pull out your stencils....maybe buy some more....and have some fun! I'm off to play with some more colour combinations on some more canvas pieces. Until next time....

Monday, June 4, 2018

Keep Calm by Suzanne Franin

Hey Everyone Suzanne here

Make sure you're a member of our Facebook page to keep up to date with everything that's happening incase you miss a Blog post

I found this quote on Pinterest - don't they have some great stuff to find on there

So I decided it would look great on a canvas in my favourite colours


I used the Heart Butterfly Cog Stencil with clear impasto in Radom spots on the canvas


I glued my Flourish Chipboard down using Helmar Tacky Craft Glue so this was in place when I started to paint and would be covered at the same time as the canvas (I did have to use a brush along the sides of the Flourish so I could get it fully covered)
So using Impasto paints by Finnabair - Raspberry Pink, Poppy Red, Pumpkin and Lemon Peel I blobbed each colour at the top of the canvas and scrapped them down then where the lines where I blended them with a wipe so they mixed a little and created slightly different versions of each shade

I used an old paint brush and added some of the Raspberry Pink Impasto to that and after stamping a pair of scissor I painted in the middle of the handles instead of trying to fussy cut them out
To the right side of the canvas I added lots of wire for some interested and texture


I love the embellishing stage of any project and what you can use is endless I had a packet of tiny pencils which I thought was perfect for this canvas 
I used a little bottle with some liquid like an ink or spray 
I added a little tea pot because I love to have a cuppa while I'm creating and I love that crafting is such a social hobby 

I used the light bulb because isn't that the symbol for an idea LOL 
A little clock for the time that gets away from you when you get engrossed in a project
And then the words are from one of Tim Holtz's word stickers, and from Flutterby Designs Stickers and a Flair Button I love of their products they have make sure you check them out

I then went over everything with Art Alchemy Metallique White Gold Wax for a bit of shimmer and to tone down all the black


Then of course flowers, art stones and a few flicks of white gesso and thats it


Memory Maze products I used :-


Thank you for visiting and I hope you will come back soon xx

Saturday, May 26, 2018

Strong by Suzanne Franin

Hey Everyone 

My turn on the Blog today make sure you check out the Facebook page to keep up to date with all that's happening - constant new products and all the latest Design Team projects
I couldn't wait to use the BOHO Skull and Feathers with a Dreamcatcher Chipboard Set I love this set it's awesome there is so much in this set to use 

I saw this Quote online and thought it was so true and wanted to use it 


I started of by using some of the Colour Blast Bling Colour Paste, then used some of Art Alchemy Acrylic Paint - Rusty Red, Pink Blush and Vintage Rose adding water here and there to mix the colours a bit and to also make them lighter and darker in different areas
After the paint dried I went over the paint with the Colour Blast Bling Colour Paste with the Skin Stencil so the Bling Colour Paste would stand out more


I used the Colour Blast Bling Colour Paste on the Chipboard Feather which is also from the BOHO Skull and Dream Catcher set I love how when you heat the paste it bubbles so it gave it lots of texture


I added some flowers, some Bling in a little bottle and scattered some Art Ingredient Art Stones mixed with some Helmar Tacky Craft Glue  


I used some Colour Blast Colour Paste Snow White on the head of the skull and then the Antler I used the Rust Paste to make it look old then added lots of flowers to the top of the head for more dimension 


I added the Art Stones and some of the  Rust Paste over the top of the flowers and then randomly added some Art Pebbles 


Memory Maze Products I used - 


Thanks for visiting and I hope you come back soon xx