Saturday, May 19, 2018
Gel print tutorial with Sarah
Hello crafty friends, Sarah with you today with my greatest love....gel prints using a number of layers but in just one single pulled print....lets take a look...
For these prints, I have used my 3X5 inch gel plate and the idea is to add layers on to the plate, allowing them to dry in between. I have broken this down step by step as below;
Firstly, apply your paint on to the plate and begin by adding some layers - here I have used some bubble wrap and the Memory Maze noughts and crosses stencil.
I then applied some paint to my rubber stamps and added this to the plate. The range of Memory Maze rubber stamps can be found online here.
Then using another of the Memory Maze mini stencils, I applied a darker contrasting colour.
A bit more stamping and now to let it dry.
Next we apply a thin layer of white paint. This must be thin otherwise it will only pull off the last layer added to the plate.
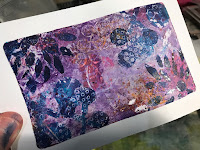
Press a piece of cardstock or paper firmly over the plate, rubbing all over to ensure there is good contact between the paint and the paper. Pull it up gently to reveal the print.
This is so much fun! Stay tuned for more projects where I do a similar technique on various sized Gel plates! Lets take a close up look at this print.
If you are interested in any of the Memory Maze products, be sure to contact your local craft store or Memory Maze for your local stockist where we can place our local sales reps in contact with them.
Subscribe to:
Post Comments (Atom)


No comments:
Post a Comment