Showing posts with label Distress Paint. Show all posts

Sunday, December 15, 2013

A Merry Christmas to you all

  Good morning everyone.  Well the countdown is on to Christmas.  The children are getting excited, The tree is up and we a re in the process of making cards for all their school friends.  Today I am sharing two cards that I created using the totally awesome Memory Maze Chipboard.

................


I had lots of fun playing with these designs.  

Silent Night


This first card is super easy to do.  I painted all the designs in black distress paint and let dry.


While it was drying I created my background by using three colours of distress ink and blended them in to give me my background of a sunset.
  For the big star I covered it with distress glitter.  I love this glitter, such a vintage feel to it.,  once ever thing was dry I glued them all down.  To make the frame stand out I covered it in a thin layer of glossy accents.

...............

Let t snow :-)

I can not take credit for the design of this stunning card.  It has been totally inspired by the one and only Tim Holtz.  I have changed the stamping to Chipboard and love the overall effect.


For this card I broke down one of the snowflake boarders into individual snowflakes,  painted them with distress paint and then added a think coat of distress glitter to make it look like snow.  I added a pearl into each of them.


I am a layer girl and I love all the different layers on this,  hard to believe there is 11 layers to get this effect.  But well worth it and the snow flakes make this card.


Memory Maze Products used:

Frame Square 20mm


Silent Night  card face coming to shop soon.
SNOWFLAKE BORDER 300 X 95 12 INCHES

Well that's all from me for now.  I hope you all have a very happy and Merry Christmas.  Spend time with your family and enjoy.  Merry Christmas.  Fro all of us here in New Zealand :-)  xox Donna


Sunday, December 1, 2013

Altered Art and Memory Maze Chipboard (a perfect pair)

Hello and welcome back, Donna here with you today glad you see you have made the web trip to come visit us here at Memory Maze.  

Have you heard the news...........  We are having a DESIGN TEAM CALL OUT!  yes that's right.  Do you love chipboard, working with an amazing Company and being part of a very talented design team.  Then you need to go check out the call....  HERE  This call is open to all  Australian and New Zealand, talented Scrapbookers that can work magic with chipboard.   

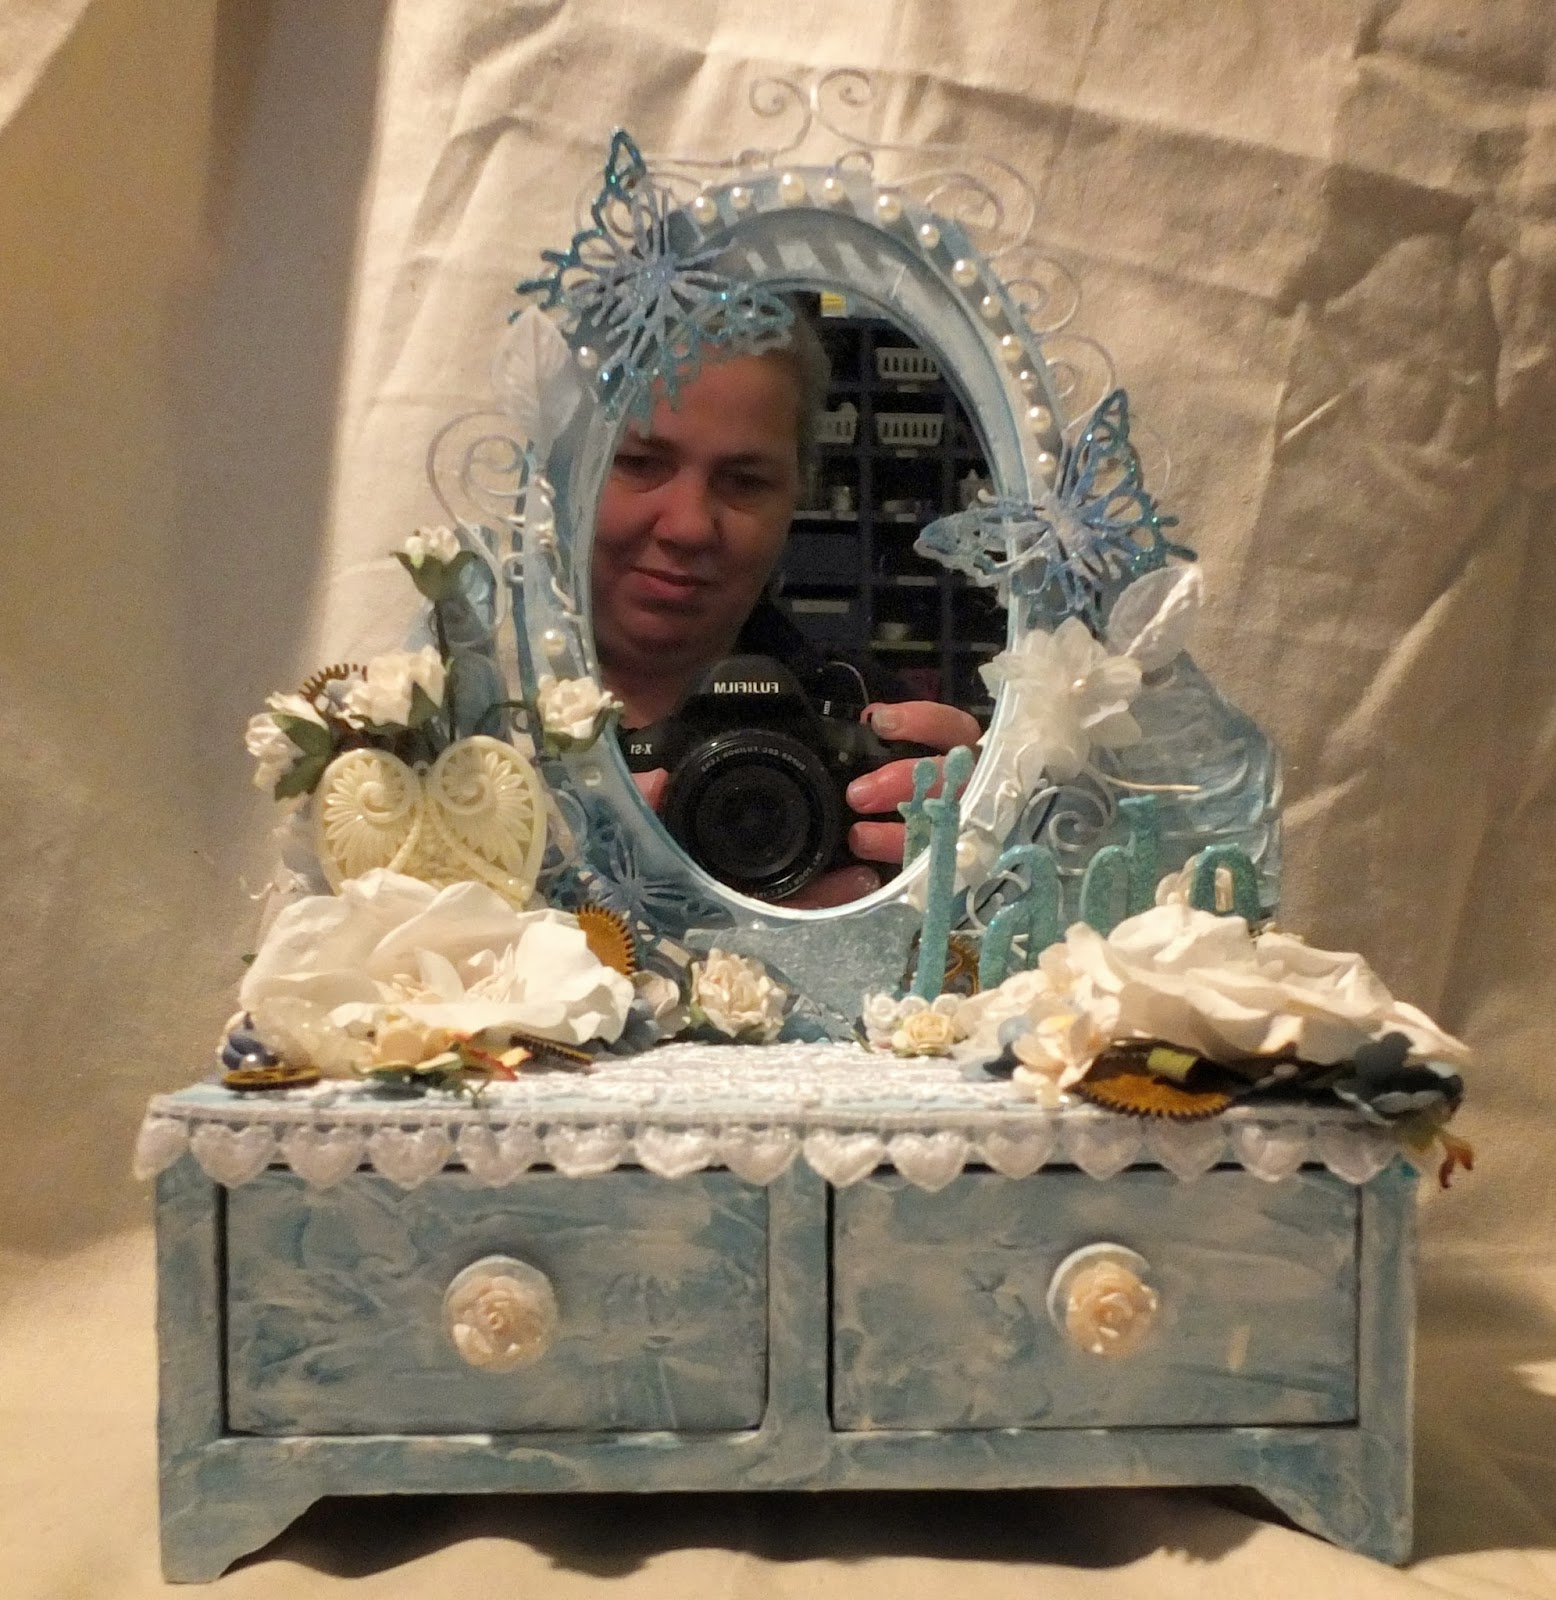
Well it's been a very busy month for me here in New Zealand,  getting classes organised, projects finished, the kids (5) and thinking about Christmas.  We have two birthdays before Christmas so I have been working on a project for my daughter Jade who turns 8 tomorrow.  I have also made another doily Christmas decoration for our tree.   Hope you enjoy

                                         "JADE"


I love going to op shops (second-hand) and finding objects to give a second life to. I found this little mini dresser which I thought would look awesome altered.  I started but applying a very thick layer of gesso as it was uneven and letting it dry.  I did not attempt to make it all smooth but instead I left it all messy.  After it completely dried I added a layer of white paint and then my favourite blue, let it dry and then added white again to give it that shabby look.  Then the fun begins.  I collected an assortment of goodies to go on top.  I really love the Memory Maze butterflies, and the vintage frame.


I glued the frame to the mirror and then added some paint, let it dry and started to embellish.  I know the frame does not fit perfectly but I really liked the look.


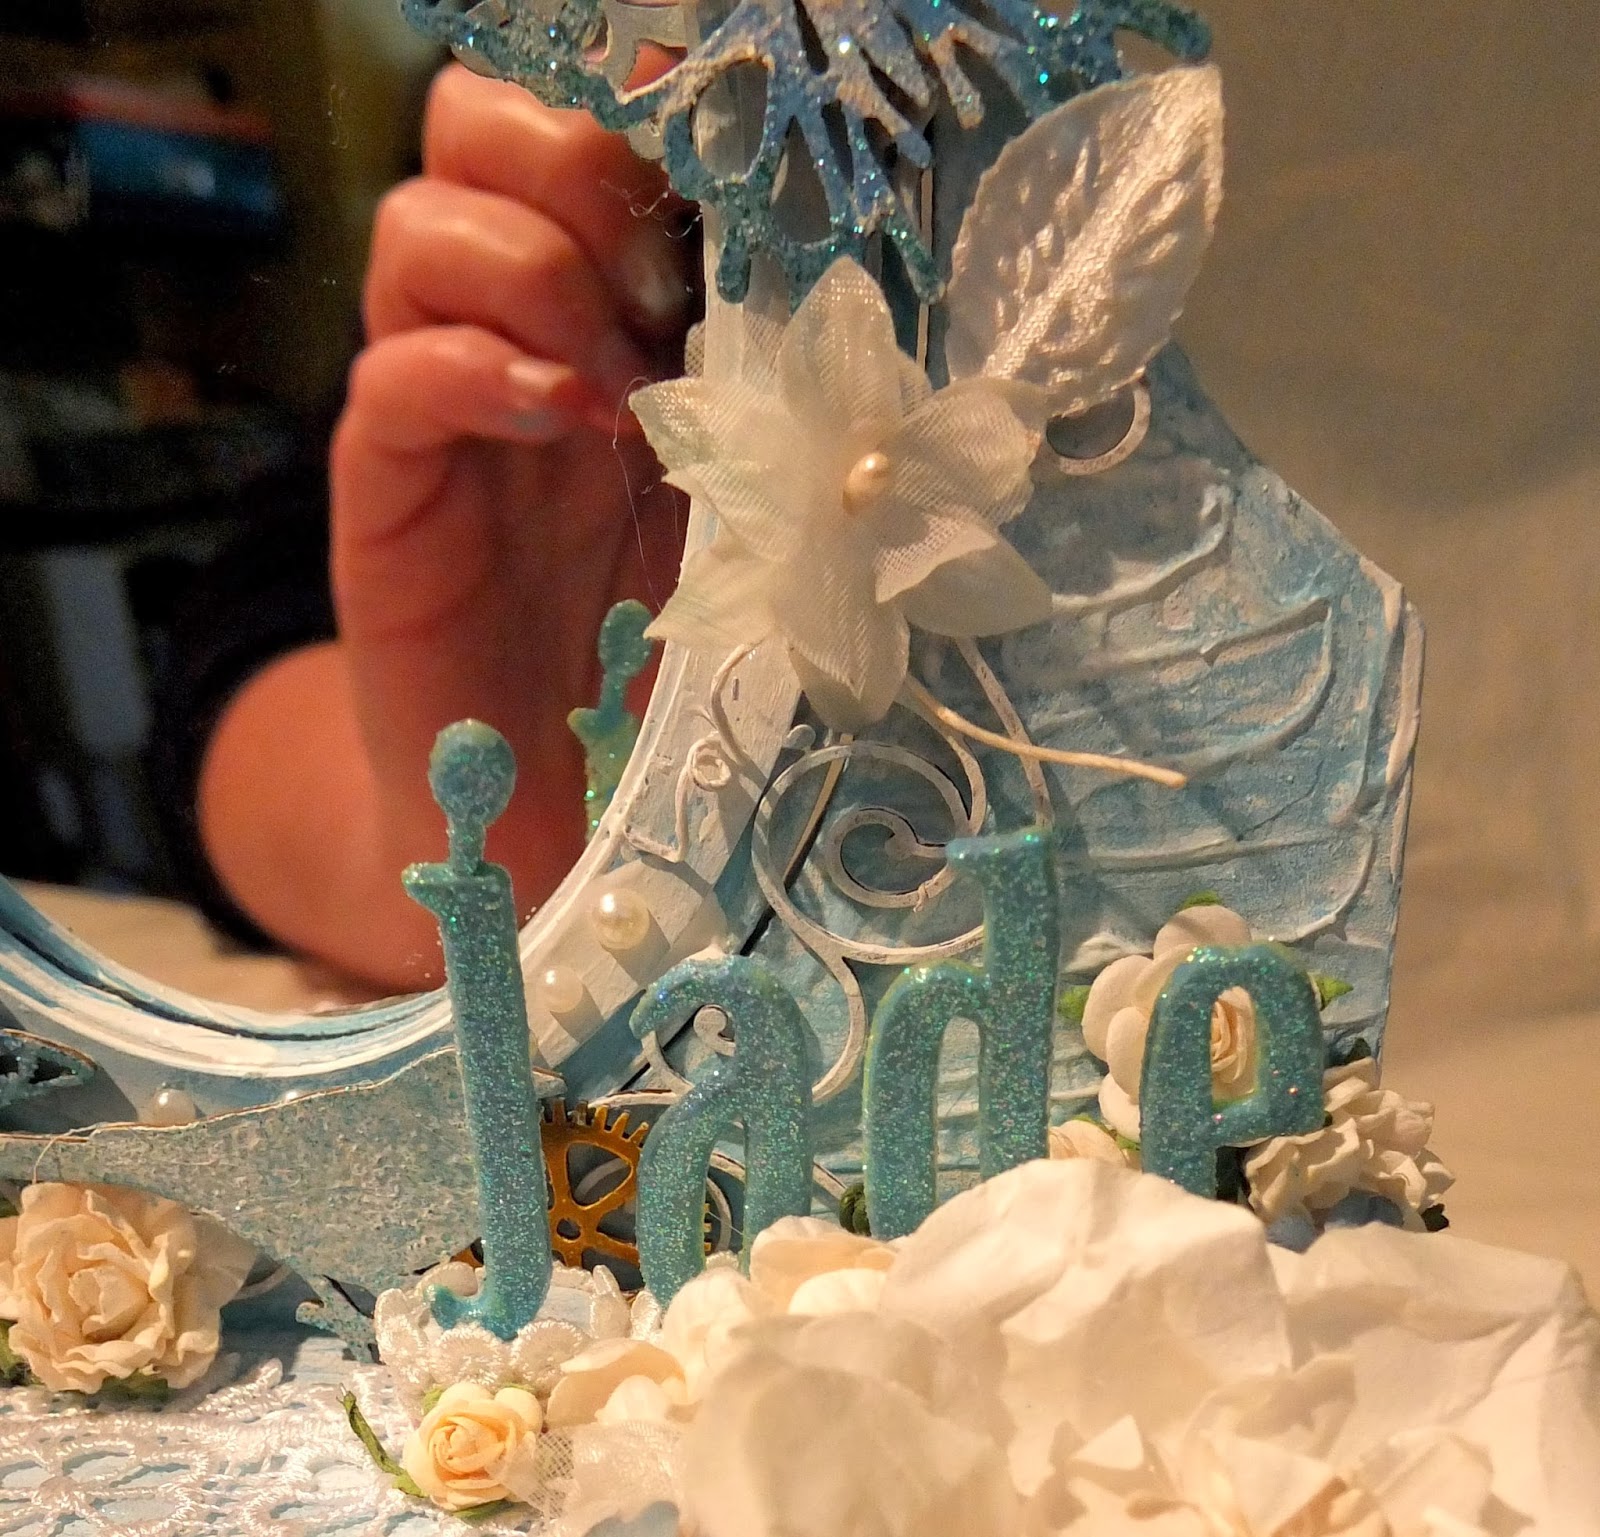
For  the Memory maze chipboard I painted the lot the same as the dresser and then choose some sparkly embossing glitters to make them pop.


Adding more embellishments :-) for the cogs I painted with copper distress paint.


Here is one of the butterflies :-) 


I made this for my daughter Jade, so I added her name.  Do you know how hard it is to make letters stand up in the air!  It took a while but I got it in the end.  I painted up some of Tim Holtz bingo bits and added a small lace around them to blend them in.  Then I spent a while holding each letter while the glue dried :-)


and another stunning butterfly on the vintage frame with some Devinne flourish with a bling pearls.

I hope she likes it :-)

..............................

"Doily Bliss"

I had so much fun making the last Christmas doily decoration that I had to make another.  Its such a lovely idea to do and is something you will be able to get the kids to help with.  I got one Memory Maze doily and and another Christmas themed one and painted them all in a light coating of gesso and let them dry.  What this does is gives them a coating of white which you can then go back on once dried and use your favourite pens to added colour.  My favourite pens are my distress pens.  I was able to apply colour to highlight areas. 


After I coloured I added some more embellishments.  I added the lace to the outer edges and bling !  


That's all from me today.  I hope you enjoyed and please remember to go check out the Design Team call out.  This chipboard is totally amazing and comes in so many different designs.  Take care,  happy scrappin and I can now say Merry Christmas xox Donna


Products used today to complete Projects;

Lindas scribble with butterflies dragonflies and birds sold indi


Micro cogs sold 3\'s


Vintage Frame 2

Christmas Candle pack

Vintage Doily 1

Other products used:   Gesso, Distress Paint, Distress Pens,  Lace, Embossing Powder, Bling and glue


Wednesday, June 5, 2013

Donna O'leary - June DT Share

Hello everyone, I hope your month has been as crafty as mine.   I have had a lot of delicious Memory Maze arrive to my place and I could not wait to play. 

...............................................

Family Hugs
My oldest boy William came to stay for a few nights last week, we had not seen him since New Years and it was wonderful to see him.


I had lots of fun dressing my MM chip board,  first I masked my frame with a mask and medium, and then I spent some time adding WOW Foil.  Once all foiled I added distress paint and ink


For the bike I added distress paint and metallic rub to give it that old feel.


These balloons are super cool, again I have coloured them with distress paint.


a close up of the frame

Products used:
Medium and small Hot Air Balloon
J13002 Vintage Frame
S0606 Penny Farthing
.......................................................

Sisters Forever

This is such an awesome frame and could be used in so many ways.  Today I am going to share how I used it as an Off the Page Project


I cut another frame out of scrap chipboard so I could use it as the base,  I covered it with pretty papers.  I painted the top of the frame with paint and added some stamping and mist.


Here you can see the MM chipboard, SISTERS,  I have repeated the process that I did to the frame


Added some flowers and stickers


and totally yummy Flourish with a bling to give it that ex factor :-)

Products I used:
Chip board work : Sisters
Birds Round frame: VOW6

....................................................................

Sweet

DSCF1626

I made this layout for our blog hop,  if you would like a detailed tutorial on what I did to my Memory maze, click here

Product I used:

Butterfly Corner Frame : LO143
Chipboard word: Sweet.

Well that's i from me tonight,  sleep well.  Happy Scarppin Everyone xox Donna