Sunday, April 12, 2015

Ocean's View Canvas and Love Tag with Jodie Mason

Hi all. Jodie back with you again today. I hope you all had an enjoyable and safe Easter break. For me this time of year usually means organised chaos, with the kids home for the school holidays. Now I must admit that I did have some help with todays items. All of my kids love being able to come and craft with me in my craft area, but Miss 3 hasn't quite got grasp of the concept that sometimes mummy needs to do 'Mummy Only' craft. Anyway you will see what I mean a little into the post.
Ocean's View Canvas
This Ocean's View canvas does contain quite a few Memory Maze pieces so this will be quite photo heavy. I warn you in advance. The idea for this canvas actually started a while back when our DT members had a little challenge. I made these adorable little seahorses.

I covered the chipboard pieces in green acrylic paint, then the magic begins. After cleaning some egg shells and allowing them to dry, I have added a layer of tacky glue to the top of the chipboard pieces. The egg shells were then placed onto the top of the chipboard and then pressed down into the glue. This process will crack the shells into small pieces. Let the glue dry completely and then place drops of alcohol inks over the top. As the egg shells are porous they soak up the colour and you are left with this great mosaic like effect. I have added a layer of glossy accents over the top to finish them off.
So with my seahorses in hand, and a stash of other sea related chippies on board also, I set about creating a mixed media style canvas of the ocean. Here is the finished product.
And a few close-ups.

I initially set about working on the layout for the canvas. I roughly worked out the skyline, sea bed and where each of the chippies would be placed. I wanted to add a bit more dimension to the canvas so found a heap of nautical themed stencils and added some texture paste. As you can see from this next picture I turned my back for a minute and Miss 3 decided that the canvas needed a little something extra. LOL!


Never mind. Nothing a little Gesso and some water colour paint couldn't hide.


All of the chipboard pieces were covered in a layer or two of white Gesso to begin with.
The stars were created in the same manner to that of the seahorses above.
The sharks were just covered with dark grey ink. The anchors, beer bottle and wheel were covered in alcohol inks and then sat in salt to give a distressed look.
 The seagull and pelican were coloured with felt pens and then the white sections were covered in a layer of white glue and then some fuzzy flocking was added to the top.

It really gives a great appearance of feathers.

 After it was all glued down I covered the canvas in a layer of matt medium to finish it off.
Love Tag
This one is a nice, quick and easy one. To begin with I covered this leafy swirl in liquid chalk ink.

Then stamped on some of my favourite stamps.
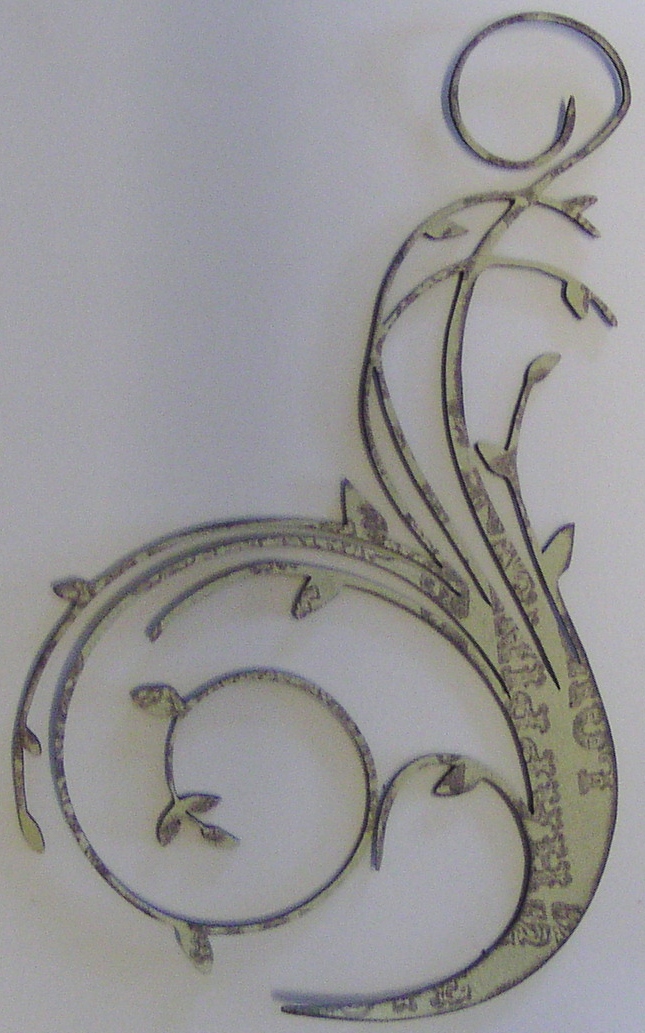

 And finished off with a layer of star dust stickles. Add some papers and a few other embellishments and ta-da!
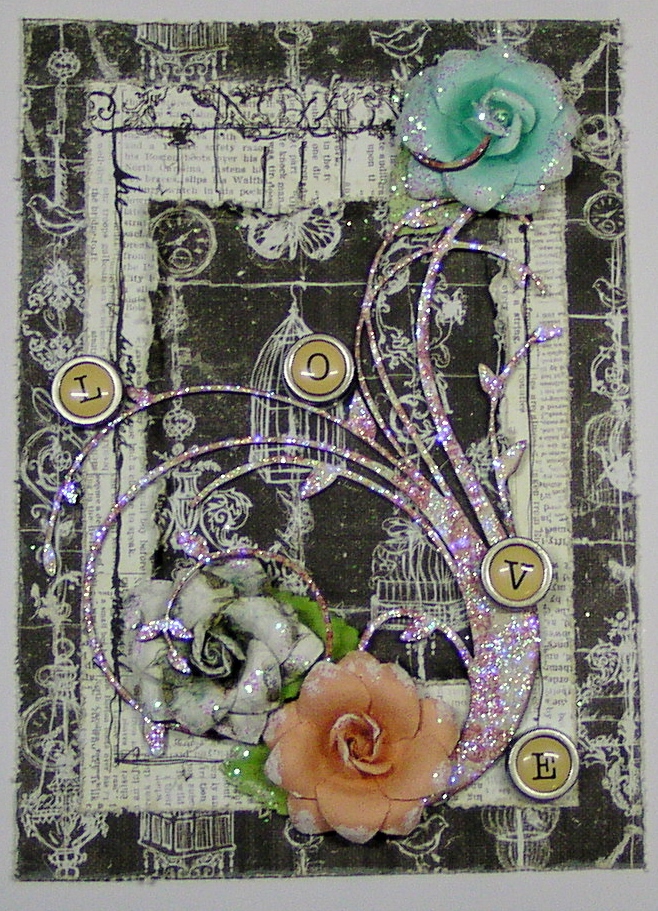
 You'll have to tune in to my personal blog later in the month to see how I am planning on using this for a mother's day present.
Until next time,
Keep Crafting.
Jodie.
Memory Maze Design Team Member 2015

Saturday, April 11, 2015

A Little mixed media fun with Jan McKenzie.

Hello everyone and thank you for joining me.  I have been experimenting with some new mix media techniques and products.

Believe canvas

Today I have used one of the lovely birdcages from the memory maze range and coupled it with Memory Maze flowers and some bling.


I first covered the canvas with two coats of Gesso, whilst drying I coated my chipboard with a coat of acrylic paint and  then a second coat I added a light spray of Lindy's Stamp Gang starburst mist to give it a light sparkle.
When the canvas was dry I added some texture layers with texture paint using some of the Memory Maze stencils.
After this was dry I added some leaves and flowers from MM which are made from mulberry paper .
When the several layers had dried I them added layers of Lindy's Stamp Gang mists in order to get the desired effect.
Once I had the colors I wanted I them added lace, pearls and assorted embellishments to finish it off.

Memory Maze Supplies:


Little Girl Chipboard Book

My second project for today is another page in my chipboard book, some of you may have seen previous pages.

This page has a pocket at the bottom to add tags and other items


I have first covered the book with paper, then added a paper pocket at the bottom this has then been covered with lace and trim to make a pocket.
I have added flowers, lace and velvet ric rac to give it that dressy look.

Memory Maze supplies used:


Thanks for looking and happy scrapping

Jan
Memory Maze Design Team 2015


Wednesday, April 8, 2015

Butterfly Mini Canvas (video) & Masculine Card in a Box - by Toni Herron

Welcome back Memory Maze, friends and fans.
I hope you've all enjoyed your special Easter break and got plenty of crafting opportunities.

Today, I'm sharing with you another special video featuring some Memory Maze chipboard on a mini canvas..  Follow the LINK for more information..
  
Butterfly Mini Canvas


Memory Maze products used;


Masculine Card in a Box

Now I'm really excited to share with you a special Card in a Box that I made.. It has a definite masculine theme as I had made it for my older son's birthday in May.. But I've fallen in love with it so much that I think it will now become a display piece instead. 

I have actually cut the Tribal border chipboard piece in three bits for the 3D effect. 


It's important to keep the theme going even around the back of some projects if the back is easily seen or shown off, so that means you should colour the chipboard on both sides too! 


Memory Maze products used; 


Tribal 12 flourish min buy 3


Thank you very much for dropping by today! I hope you're all enjoying the holidays! 

Memory Maze Design Team Member 2015


Sunday, April 5, 2015

All about babies...with Sally McIntyre

This month with Sally is all about babies, everywhere I look someone I know is having a child, a grandchild, or great grandchild.


Now it is well known by those that know me that I have trouble with pure pastels often wanting to add navy blue, maroon or hot pink. Well I am mastering it and loving the effect.


I have used our new chipboard assorted hearts to cover with paper and  create a dimensional border as a feature on the page. I have also carried this across to my second page. I have laid these with dimensional foam tape.


 I have added our new chipboard butterflies, which were painted beautifully by my good friend and exceptional painter Teena Reid for me.
A little bling and a thread knotted and made into a bow to finish.


Memory Maze supplies used: 


I have also used the multi  hole frame  for lots of small photos for this one 


***********************

My second post is a refashioning 

of an old and past its use by date lamp and shade.


I initially coated the lampshade that was very old and grungy with white P.V.A glue and added single sheet serviettes with a pattern randomly over the shade.
As I worked I continued to coat with a slightly watered down  glue under and on top of the tissue.
I continued until I had the effect I was looking for, leaving some folds for effect.


After this dried overnight, I then completed a final coat of  watered down P.V.A. glue to the complete shade,this dries clear and hardens making the shade quite hardy.
I loved the effect.

I then chose a serious chipboard flourish, sprayed with  ink, Pearlex and water. When dry, I added gloss for effect.


A selection of flowers, bling, gems stamens and embellishments were added. 
I completed the shade with a beaded trim around the bottom.

Memory Maze supplies used: 


Sally McIntyre
Memory Maze Design Team Member 2015

Thursday, April 2, 2015

From a time gone by...with Alicia Barry

Welcome back to the Memory Maze blog, Today is my turn to share some projects with you. 

Family.

My first project is a heritage layout. I began with some new Kaisercraft papers which featured clock faces. From there, I matched it up with some Memory Maze chipboard clocks in various sizes.


 For each of the clock faces, I began with distress inks in 3 colours, beige, brown and red. Next I sprinkled some metallic embossing powder in random spots. I then added Distress embossing powder, again just in selected spots. This gave a rough texture somewhat like sandpaper.


 Finally I dabbed a little more of the red ink to intensify the colours that were already there.


Memory Maze supplies:

cogs clocks and hands 100 x 150 MIN BUY 3
Clock face and hands 150 x 150 mm  vintage min buy 3

Happy Birthday

Next up is a pretty little card. The design is relatively simple, but I have used chipboard to dress it up and make it a little more special.


One of the big trend coming out of CHA was the gold look, so I have used this to add sparkle to my card. I painted each of the pieces in gold Smooch paint, and then dabbed a little Stickles over the top. A very simple technique, but by keeping each of the pieces consistent, it created a stand out element across the card. 

Memory Maze supplies:

card sentiments 1
Lots of butterflies  100 x 150 mm Min purchase of 3

Thanks for visiting. 


Monday, March 30, 2015

A Little bit Art Deco with Kim Kendell

Hi everyone and welcome to my Memory Maze blog post. 

Art Deco Canvas

Hello its my turn again today I am sharing a Art Deco Canvas with you I have used an 8 x 10 canvas and an array of Tattered Angels products to create the background I have then used a Jan's girls No 6 I ran this through my big shot in a brocade embossing folder and then using Tattered Angels High Impact paints painted the various elements of the girl. I then selected a gold colour from my Metallic Cream rubons and applied this over the top of the body of the girl and then rubbed it off with a dry paper towel.
I then took the wrought iron no 5 and painted it in the same colours as this piece has a real art deco feel to it. I the started adding flowers and lace to my canvas to finish of the effect. I hope you like it.


I have used the following Memory Maze products

Jan's Girls No 5


Wrought Iron No 5


Project Life 

My second share is a share of a project life LO I have created to let you in on a little secret I have never got into project life and this is my 1st page but when I received my kit from Memory Maze and had these awesome cute cameras and arrow's I thought well her goes nothing I hope you like what I have created with them.  

I have used the following Memory Maze products

Camera's


Arrow's Selfies


Thank you for coming to view my upload I hope I have inspired you to create something wonderful with Memory Maze.


Kim.
Memory Maze Design Team Member 2015

Saturday, March 28, 2015

Happy Days with Jan Agnew

For this upload I have created a card and layout. I have inked the raw chipboard and embossed it with one layer of clear embossing powder to give it the effect I wanted.

Happy Days


Memory Maze chipboard used:

Swirl 3; which has been cut into two pieces

Birthday Card


Memory Maze chipboard used: