Saturday, July 9, 2016

Christmas in July by Jason

Welcome to my Memory Maze blog today I be sharing with you 3 Christmas in July cards. 

Card 1 

With this first card I used this amazing 3d sheet I cut out each layer an layered 3d tape each layer to u use all the 3d sheet up.
I went over the flower in glitter glue


Card  2

With my second card I used this amazing 3D Sheet from Memory Maze I cut around the outside of the 3D sheet to u get all the 3 layer cut out.
layer the layers up with 3d tape.
when I got the layer stuck down I went over the windows with crystal effects an glitter glue..


Card 3
I Used Memory Maze  amazing 3D Sheet
I cut All around the out side of the 3D sheet an around the flowers I layered up each layer with 3d tape.
with the Merry Christmas amazing chipboard word I painted the merry Christmas word with Dylusion paint White Linen an went over the top of the paint with Tim Holtz Distress Ink Festive Berries.
with the flower I painted them white with Dylusion paint white linen an went over the flowers with Tim Holtz distress ink Festive berries.   


I Used the following memory Maze products


Thank you for checking out my memory maze post
Jason Anesbury 2016 Memory Maze team member. 

Thursday, July 7, 2016

A Couple of Layout's to Share By Jason

Welcome to my Memory Maze blog post today I be sharing with you 2 layouts.

layout1

                         This layout is my football team Parramatta eels .
                         With the word HERO I painted the word with Kaiser colour Green , when dry I went 
                           over it with crystal affects for the awesome finish.
                           
                            The football boots the bottom part of the boots I use Kaiser colour green for the 
                             main part of the boot I use Tim Holtz Distress ink Mowed Lawn ,when dry I 
                             went over it with crystal effects.      


 I used the following memory maze  products

Shoes


Layout 2

The back ground I used the pebble template I used Textured Paste over the stencil an lifted the stencil off ,when the texture paste is dry I used a dapper an use Tim Holtz distress ink Vintage Photo.

With the Banner I use Tim Holtz  Distress ink Tea dye ,when dry I went over with crystal affects an went over the banners with a smear of glitter glue.

The flourish corners I used Tim Holtz Distress ink Tea dye when dry I went over with crystal affects.

The Heading A Little Dirt Never Hurt I use Tim Holtz  Distress ink Tea Dye ink when dry I went over with crystal affects.


I use the following Memory Maze products


Thank you for checking out my memory maze post
Jason Anesbury 2016 Memory Maze team member. 

Tuesday, July 5, 2016

Envelope card - Candy Chelepy

Hello everyone today I am sharing with you my project for Memory Maze
 I decided to make a card with a difference for you all.
A card with a difference you say, yes a difference.
A girly, grungy envelope card

  1. Using a 12x12 inch piece of cardstock cut to 8x12 inches. Then score at 4 and 8 inches.
  2. Crease your score lines and measure along the top  of your card at 4 inches, mark with a pencil, this will be the middle of your card, then measure 1/2 inch to either side and mark with a pencil so it should be marked at 3 1/2 and 4 1/2 inches. Draw a line with a pencil from the 3 1/2 inch mark back to the left score line, do the same to the other side. ( image 1) Then cut.

       
Image 1                                                                                 Image 2

4. I have used two pieces of 12x12 inch pattern paper for the inside and outside. Cut 3 pieces at 7 3/4     x 3 3/4 inches. Tape two of these to the bottom two 8x12 inch rectangle pieces not forgetting to           place your end of your ribbon under the top of the first pattern paper before taping this down, 
    then with the top one do the same as for the top of your card. ( Measure to the middle then 1/2 inch     either side and cut to bottom corners) Not forgetting your other piece of ribbon to tie your card           together. (Image 2) Do the same to the middle of your card I also added a small pocket to the               bottom by cutting some cardstock at 7 1/2 x 2 3/4 inches, pattern paper at 7 1/4 x 2 1/2 inches and       tape together. Turn over and place thin tape along both small sides and along the bottom. Tape to         the bottom of your card. I sprayed some spray onto the front and back of my card
5. Now for the chipboard cover well with some gesso, then I have used some Liquid pearls to cover       them then pounced with a paint brush to give it that metalic look. Dry with a heat gun and make it       bubble more texture, when dry and cool rub over some gold leaf wax gently around the edges
    and the top. I also covered the butterflies with gesso, really roughly and sprayed with some spray,       dry with heat gun and keep on using the spray until you are happy with the look.
6. Add your flowers and butterflies and I cut three tags to go into the inside pocket.


Memory Maze products


Cog border sold individually


42 / 4 cm hearts  Chipboard   will came bagged .  Chipboard Sign


Butterflies,solid for painting or inking, covering 110 x 180mm m


Forever wordsheet sold in 3\'s

Other product used

Cream cardstock
Two sheets 12X12 pattern paper
Lindy's sprays
White gesso
Liquid pearls
Paint brush (old one)
Rub n buff gold leaf
Brown ink and Good strong glue
Ribbon Assorted flowers from my stash


Thank you for visiting
Candy Chelepy
Memory Maze 2016 DT

Friday, July 1, 2016

Mixed Media and Chipboard

Hello every one and welcome to my design team post. Today I am going to share with you all a page from my art journal page where I have incorporated chipboard to give some depth to the page. I hope that you like my creation.

As you can see from this close up i have left the chipboard raw and allowed the inks paints and spays to colour the chipboard.

I have used 2 flourish boarders and placed them facing each other to frame my word.


This is the whole page  completed


And the final double page  of the journal


 I have used the following memory Maze Chipboard on my creation
Thank you for look at my post and I hope you enjoyed it 


Wednesday, June 22, 2016

Wedding Themed Layout - by Toni Herron

Welcome back Memory Maze friends. Toni here and  I have a special treat for you today with a loved up layout featuring a stunning photo (credit to Kristina Childs) of a good friend Shae and her new husband Alex. They finally made it official in Bali in April in a spectacular wedding!
 

Journey Adore Believe Love Together


I started out with a pattern paper from Kaiser as the background. I left it as is.
 Then used this fun Beehive 12x12 chipboard piece as the focal piece for the background. I painted it with a "Linen" coloured paint and randomly plot some "Cotton Candy" paint in some areas. Over the top of that paint I lightly applied some Silver Stickles Glitter glue.


The swirl chipboard pieces used as a cluster branch for the flowers has been coated with a Silver Opal embossing powder. The Words for the title have been coloured using the Adirondack Alcohol Silver ink. I really wanted a flat, clean and shiny finish to the words. So therefore using any sort of embossing powder was out of the question.


The flower clusters include plenty of Kaiser, Manor House and Prima. Of course I added the final touches of some Memory Maze bling in there too.
 
 
I submitted this into my local show a couple of weeks ago, I'm very proud to announce that I captured 1st Place with this gorgeous layout. I hope that this does some justice for the stunning photo and amazing chipboard pieces!
 
This awesome layout that my youngest son Hunter (just 5yrs old) did featuring Memory Maze chipboard captured - link to blog post -  1st Place for his Age Group section also! :)


Memory Maze products used;
 
 
beehive 12 x 12
 
Border 40- NO 11 flourish  PK 25 BULK  approx 140 long
 
Together word sheet sold 3\'s
 
Thank you so much for joining me today
Toni Herron
2016 Memory Maze DT Member

Tuesday, June 14, 2016

Frame and Card - by Guest DT Lane Herron

Hello crafters. We are back today to share with you the two latest creations that our Guest Designer Lane has been working on.

Swimming Frame


Lane wanted to bring you something different! Something unique! And I definitely think he managed that when he came up with the idea of using the special Swim chipboard pieces to alter this plain black photo frame.

He started off by simply painting the "Lane Rope" pieces white and then randomly adding some glue and Blue Glitter on top. "My Mum thinks it looks weird because it's not all covered in Blue Glitter, but I think it's just because it looks awesome and it was my idea, not hers!"

The swimmer piece was coated several times with Silver Opal embossing powders. He learnt this technique by watching his Mum on another project a few months ago.  He did about 4/5 layers of the Opal powder, as he was finding it difficult to get rid of some of the holes. He eventually gave up and "will live with that".

Then the medal / ribbon piece he heat embossed Gold. "I tried to double layer it like the Opal powder, but that didn't work the same"


Easel Card

Although Lane just celebrated his own Birthday (the big 13!), he is already looking forward to his little brothers birthday at the end of June.
The only Memory Maze chipboard on this card is those cool flag banners in the top corner. As soon we he saw these, he knew that he wanted to make a special card. He simply painted them White.
We looked through some different designs and he settled on the Easel fold. Using Hunter's favourite paper, he dry embossed the pattern paper for the card topper.
The tag on the side has a happy birthday stamped on it and Hunter's favourite character is Iron Man,  "ohhhh YES, jackpot!" when he found this piece in the scrap pile.
Memory Maze products used;


Thank you so much for joining us today
Lane Herron
GUEST Memory Maze DT Member


Sunday, June 5, 2016

Steampunk canvas - by Toni Herron

Good evening fellow crafters, it's Toni here tonight to bring you my latest DT creation for Memory Maze. I wanted to share something a bit different and out of my own comfort zone yet again and chose to go wild with this SteamPunk themed canvas.
 

Steam Punk Canvas


So I started off by preparing this 8"x8" canvas with white Gesso, then before it dried I quickly sprinkled over some Silver Opal embossing powder. When it was heated up, it gave a great melted metal look.
 
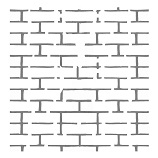
Next I used a MM Brick stencil and Modelling Paste with Gold embossing powder coating it. I loved the look of it bubbling when it was being heat dried. Added that extra special Steampunk feel.
 
I added a little bit of colour to the base with some Distress Inks. And topped it off with a few dashes of Barn Door ink to compliment the chipboard piece that will be featured in the middle of the canvas.
 
Now it was onto colouring the chipboard pieces. Again, I covered some Cogs in the Silver Opal powder and the centre Steampunk piece with Distress Powder.
 
 
So the final touches were to hot glue everything down! I added some extra cogs to the other corners. I have used the Silver Opal powder again and two distress inks to softly colour them.
Embellished with plenty of Steampunk themed goodies like; train, key, clock, pins etc..  


Memory Maze products used;


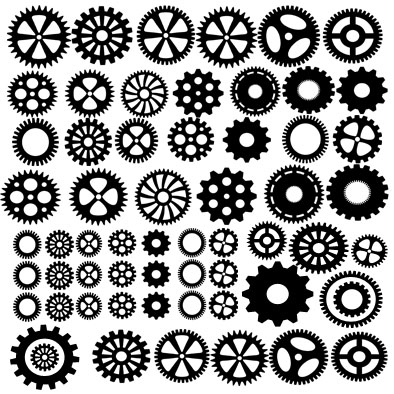
Cogs 
 
12 x 12 all there is is cogs
  
Inverted brick 8x8  min buy 3
 
Thank you so much for joining me today
Toni Herron
2016 Memory Maze DT Member