Showing posts with label Stencils. Show all posts

Tuesday, January 8, 2019

Wonder by Suzanne Franin


Hey Everyone Suzanne here

I hope you have had a great start to the new year
Here's my first project for the Memory Maze Blog for this year
Also make sure you check out the rest of the blog or our 
Facebook page for all the latest updates and 
Design Team creations

I started with a canvas that I used in reverse I like to have some depth sometimes without having to build things up
I painted the canvas with black gesso

Then used the River Pebbles Stencil with modelling paste on the background 
Once the paste was dry I painted over that with the gesso as well

I painted Small Chicken WireBorder 2 Flourishmetal embellishments and Art Pebbles with the black gesso 
I left the flowers, the arrow from Charms Creations and the brown Mermaid Beads as they were so there was so more contrast

With the Deer I used modelling paste with the Mini Flower Stencil 
Then I used Dark Chocolate Impasto mixed with a little White Impasto 
Once everything was dry I rubbed some Finnabair Rich Copper Wax over the raised areas

I used Lucky Emereald on the leaves and then Mystic Turquoise and the Lucky Emerald on the flowers and the 


Small Chicken Wire as well as some Vintage Gold which is what I used on all the metal embellishments
And around the edge of the canvas I rubbed a bit of each colour except the Fire Ruby


The Art Pebbles I used a mix of Fire Rube and Vintage Gold

Products I used from Memory Maze -


Deer Head


Thank you for visiting and I hope you come back soon x

Saturday, September 22, 2018

Hello by Suzanne Franin

Hey Everyone Suzanne here

Yes it's another owl but I can't help it I just love them and this one is very cute LOL 
This weeks project for the Memory Maze Blog I used a Printers Tray they are so pretty and you can do just about anything with them
I love how they have the different shaped sections in them and if you really want to you can cut some of the chipboard out to fit what you need in


On each feather I used a different stencil using modelling paste as you can see (links below) just to add some interest rather than leaving them plain


On the background of the Printers Tray I used modelling paste with the Wire Stencil for some dimension and texture


On the back ground of the I used Colour Shimmer Dust Lollipop


With the feathers I sprayed (I have these colours already made up as I seem to use them a lot) some Colour Blast Colour Shimmer Dust Cobalt, Lollipop and Sunflower they all mixed and made a few different colours which I think added extra interest and is also what I used on the Boho Skull and Feathers and lace border too  


You can see the textures on the feathers


This feather arrow was from the Boho Skull and Feathers and I use Colour Paste Sunshine on the larger feather
I painted the outside of the Printers Tray with Jade Impasto 


This is one of the Acrylic words that Memory Maze make they also have a whole range of different shapes as well 
The Hello also comes in chipboard I love this font


I won a prize from joining in at White with 1's monthly challenge from The Resin Rainbow and this gorgeous lace border was in the pack it was a pale pink and it didn't really go with my project so I  did the same thing as I did with my feathers and the colour shimmer dusts 


And of course there had to be and owl somewhere
And to finish the project off I went around and added Silver Micro Beads with some Helmar Super-Tac Glue 


Products I used


Hello (but acrylic)
Thank you for visiting and I hope you will come back soon xx

Saturday, July 14, 2018

My Story with Sarah Rosse

Hello crafty friends, Sarah here with a 12x12 layout for you today. For this layout I have used a number of mediums to create the background. Let's take a look...
This layout was created for a class I recently taught at scrapbook store Scrap 2 Relax in Drouin. It was fantastic to see how each layout completed was different and how the ladies took on the techniques and adapted them to suit their photos and colour choices. The base of this layout is created using distress crayons directly on the page and through stencils, a circular gel plate print, stencilling with black ink and stamping with both distress crayons and black ink. I also used my Posca black paint pen to add some hand drawn details.
The chipboard title My Story can be found on the MemoryMaze website here and the chipboard 'chicken wire' used can be found here. The chipboard pieces were painted with acrylic paints - for my layout this was a dark blue, then I went over the top of the pieces with a lighter, irredescent blue. I love the contrast this provides.
If you are interested in any of the Memory Maze products, be sure to contact your local craft store or Memory Maze for your local stockist where we can place our local sales reps in contact with them. The new products for July can be found on the website at http://www.memorymaze.com.au/

Tuesday, July 10, 2018

Picture Perfect by Suzanne Franin

Hey Everyone Suzanne here

Make sure you check out what's happening on the Facebook page to keep up to date with what's new on the Memory Maze Store and then let your local store know so they can have the products you need

Today I created a frame with a picture of girl from a magazine which I fussy cut out and decorated it with a few bits and pieces from my stash just for something different


I painted the frame with black gesso then with some graphite texture paste I used the Door Wire Stencil over the background of the frame (I took the glass out and put that aside as I don't use that)


I then used some Linda's Magical Shakers - Alpine Ice RoseGrab a Guy GoldCowabunga Copper and I added a little bit of the Creme Brûlée Cream from the Sweet Treat Shimmer Set but I wasn't happy with that so that got covered up


I used the 2nd largest flourish from the Flourish Corner Set and covered it with Finnabair Art Alchemy Antique Brilliance Red Amber Wax and wasn't happy with it so I then went over it with some Metallique Rose Gold Wax 
I also used the Metallique Rose Gold Wax over some of the metal embellishments

With the magazine lady I liked the way her hair was styled except there was writing in it so I went over it with some brown paint and tried to follow the way it was styled with the brown paint
Then when I was glueing her down I added a bit of tissue under her hair to give it some dimension
I glued the flourish to her hair like a tiara and added a metal embellishment and some pearls


I then added my embellishments to the corners of the frame a few metal pieces a couple of velum flowers, a flower that I have had forever and it was perfect with the rose gold flourish that I used on her hair


I gave her a drop pearl and diamond earring


When I was happy with everything I added the Colour Blast Clear Shimmer Brush Marker to her face so she has a gorgeous shimmer to her


I also added it to the vellum flowers and butterfly - it gave them a more transparent look

Memory Maze Products I used -


Thank you for visiting and I hope you come back soon xx

Saturday, June 2, 2018

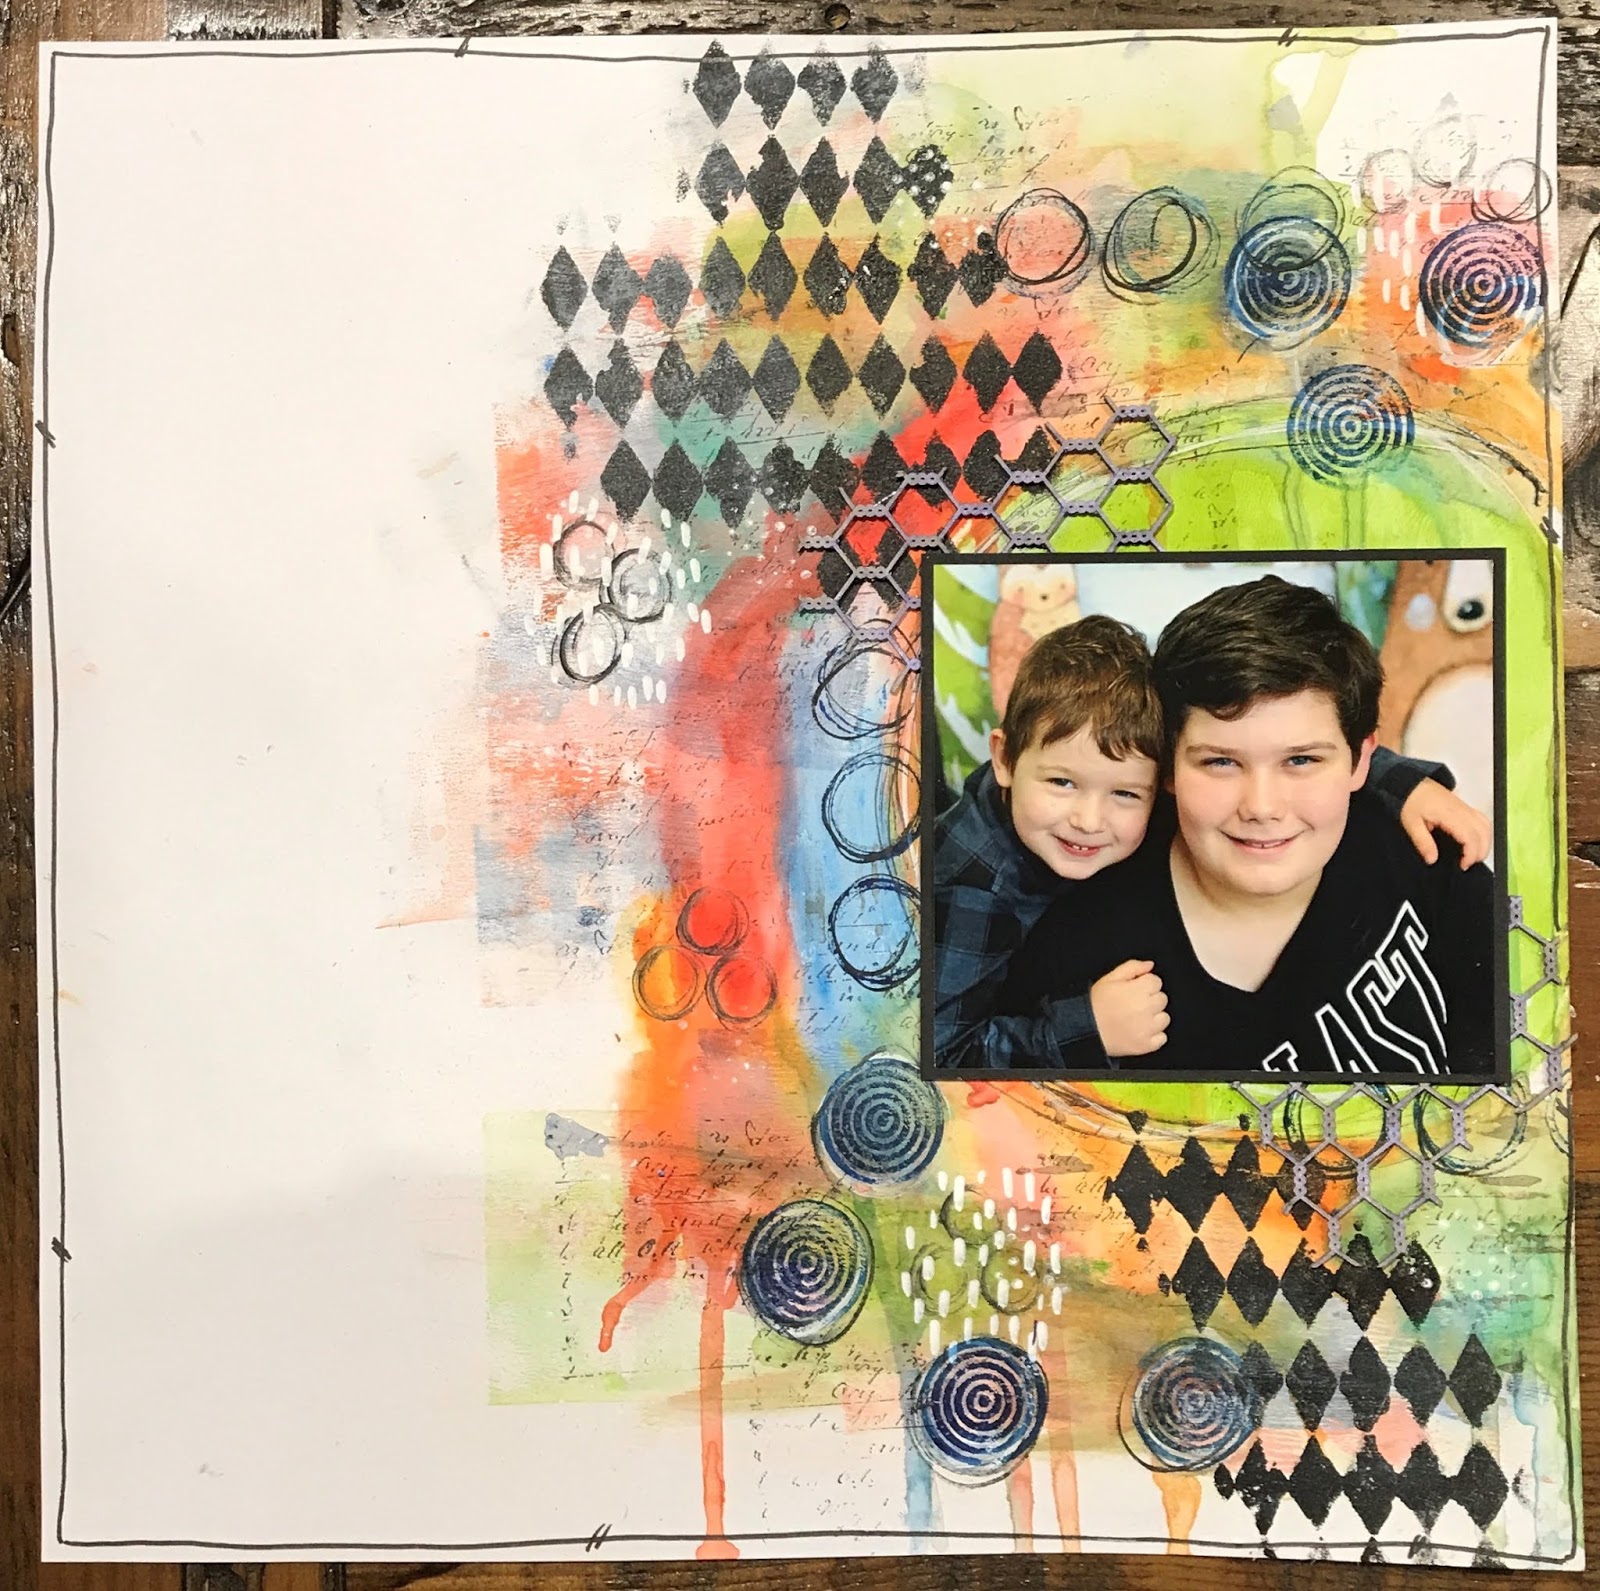
Mixed Media Layout 'My Boys' with Sarah

Hello crafty friends, Sarah here with a mixed media layout for you today using a number of fun ways to add to the background of your scrapbook layouts or memory keeping formats.
The background of this 12X12 inch layout was created with acrylic paints, printing with the 6 inch round gel plate and distress crayons. To create a watercolour affect, the crayons are applied to the background page and 'activated' with a wet paint brush. For this layout, I have allowed them to drip off the page for additional texture. I stamped onto the background using the Distress Crayon to colour the stamp. I used Darkroom Door, kaiser and Memorymaze background stamps.
The layout was finished off by some marks with my Posca Paint pens, and background script stamping (Kaiser) with black ink. The chicken wire chipbaord pieces are from Memorymaze and have been coated with Finnibair metallic wax paste. The shimmer this wax provides is awesome!
The chicken wire chipboard comes in a larger size, 12x12 and a 150mmx150mm piece as shown here. Black stencilling with acrylic paint was added for contrast. The layout was completed with a doodled border using a black fineliner. If you like this layout, I'd appreciate you leaving a comment below.
If you are interested in any of the Memory Maze products, be sure to contact your local craft store or Memory Maze for your local stockist where we can place our local sales reps in contact with them.

Tuesday, May 15, 2018

New Product Release: Stencils

Hello crafty friends, another new release this month from Memory Maze Lasercuts - a number of fantastiic stencils! Lets take a look....
All the new releases for May can be found online by clcking here. Pictured above is the Pathway grunge stencil. Lets jump right in to seeing some of the others;
These two stencils look stunning coupled with our new acrylic dream catcher - keep your eyes out for this coming up soon! These stencils are available in multiple sizes and this can be selected on check out. They also look lovely as border stencils for mixed media projects or layouts.
These are the broken circle and arrow stencils - great for any project, including backgrounds for cards, creating layers and texture on mixed media projects etc. Next up we have a new face stencil named 'mystic lady'. This is also available in a variety of sizes.
Lastly is one of my favorites - skeleton body. This stencil is available in various sizes and also has an option of coming with the skeleton head also.
If you are interested in any of the Memory Maze products, be sure to contact your local craft store or Memory Maze for your local stockist where we can place our local sales reps in contact with them.