Tuesday, September 3, 2013

September Reveal - Tracey Campbell

Well here I am again, hope you all are not sick of me yet? :) I have two layouts that I want to share with you where I have used some of the fantastic chipboard from Memory Maze. One about my youngest daughter which is pretty feminine and the other about me being a Navy Mum.

Navy Mum


I really wanted to give this layout a touch of "Military" so I heat embossed all three pieces of chipboard with a navy blue colour.

 
Although not exactly a Defence piece of chipboard this globe was perfect to represent all the places we go to "sailing the seven seas" whilst serving. Not to mention that globs are such a hot trendy item right now.
 
A bit of a close up of my main title "Navy Mum"- love how easy it is to heat emboss the chipboard.
Memory Maze Product used
Product ID:    CO145 Globe
 
 Memory Maze Product used
Product ID: LO235 Serving with Pride
 
and
Memory Maze Product used
Product ID: Navy Mum - to new to shop to have a product ID right now but just contact Sally in an e-mail and request "Navy Mum"
**********************************************

In the Moment

I just love this photo of my youngest daughter - a simple one I took one day when she was sitting on the ground playing with some stones and just happened to look up when I was snapping away.
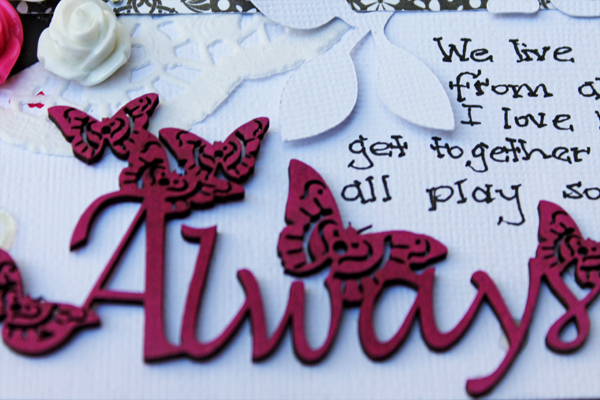
Because I wanted to give the whole layout a soft touch all that was needed was some white gesso and some Kindy Glitz and the chipboard turned out perfect.
A simple way to attach the chipboard to your layout is to staple it on. Simple, easy and quick.

A close up of the Vintage frame and a few of the flowers.
Memory Maze Product used
Product ID:    SO600 \butterfly
and
Memory Maze Product used
Product ID:    VOW12 Vintage Frame Oval - the photo in the store isn't working right now but you can see most of the Vintage Frame in my layout - it is stunning and would suit many layouts and projects.
**********************************************
Thanks for stopping by, I hope you enjoyed my layouts.
Hugs
Tracey


Sunday, September 1, 2013

Dream Catcher Tutioral

I have been noticing a trend towards tribal embellishments in scrapbooking lately and one I particularly liked was the use of a dream catcher on some patterned paper that I saw. It got me thinking about creating my own dream catcher with some of the wonderful Memory Maze chipboard.
With chippie, water paint, gesso, paint brush, Dimensional Magic and twine in hand I put the thinking cap on and came up with this.........
Choose a circular shape for the body of the dream catcher and paint it white with some gesso. 
Pop out a few of the micro feathers from their base and paint them white with gesso. 
Once the gesso is dry paint some of the ends of the feather with water paint.
 Using water colour paint the circular base
- start with the darkest colour and build up to the light otherwise the lighter colours will not show clearly.  As a side note I wanted to point your attention to the paper underneath the dream catcher - It is a piece of white cardstock and as I changed the colour of my paints as I painted the dream catcher I whipped the excess paint on it to clean out my brush. Team that with my messy style of painting chipboard there were some interesting drips and patterns on it too....so instead of throwing it away I used it as the base of my layout, even though I didn't plan on using it originally I just had to when I noticed how nice it looked.
Next make a small ball of twine and wrap around the circular base.
 Use some Dimensional Magic to stick the twine to the cardstock by wrapping the twine around the shaft of the feathers.
Here is the completed dream catcher - very simple to make but looks so effective....now to add it to a layout.
Because that dream catcher looks great all by itself I decided to use it as the main embellishment on the page and keep things simple. I used the cardstock I told you about earlier as the base and gave it a small spray through a mask with some orange mist, added some confetti and the title and tada.....my finished layout.


Some close ups of the dream catcher.
 
Memory Maze Product used:
Pinked Circles: Product ID IO264

Micro Feather": Product ID SO747


***********************************************
Well I hoped you enjoyed my tutorial and if you do make a dream catcher please get in contact and show me how yours turns out.
 
Hugs
Tracey


Friday, August 30, 2013

Awesome August

Hi everyone and welcome to my August post from Susan.
 
MY GUY
 
This layout is all aabout my husband David. I printed out a large photo (A5 size) because at times he is larger than life. He loves his shed and invents, designs and makes many things there. He is an electrician by trade so the ladder and lightbulb fitted this project to a tee!

The viewfinder was coated with Distress Stain in Black soot with black Kindy Glitz spread over the top. A brad was inserted throught the center.
The Sparky Electrician was coloured with Distress Stain in brushed pewter and black soot. The pole was coloured with Radian Rain in nutmeg. The fan was top coated with Kindy Glitz in antique silver to give it some texture. The cogs were coloured with Distress Stain in copper.
 
The tag ticked was coloured with Distress Stain in tarnished brass with black soot around the edges. A tag was glued onto the top and brads were inserted into the ends.
The light bulb was coloured with Distress Stain in brushed pewter and Smooch in gold lame. The inner tree was coated with Plaid glitter paint in silver. Dimensional Magic was applied over the bulb to give it some shine.
 
MEMORY MAZE PRODUCTS USED
Light Bulb (Tree) so779
Micro Film Reels so762
Tag Ticket
Sparky Electrician LO173
 
Other Products Used
Senic Route paper, Tim Holtz Adirondack Collection-meadow, texture paste & gold acrylic paint.
..................................................................................................................
 
SHED TIME

Here is my husband's second home! It is definately a boy's playground, complete with toys and his "fish fridge of fame" where all the big catch photos go...as well as beer! I wanted this layout to reflect the shiny toys as well as the grungy shed stuff. 
 
The fob watch "shed time", was painted with Smooch in silver, blue and bronze. When dry, Distress Crackle Paint in clear rock candy was painted over the top for an aged look.
 

These tools were left unpainted but had clear crackle paint on them. I covered cardstock with silver foil tape then embossed it.
 
These smaller tools were painted with Smooch in silver and bronze.
 
MEMORY MAZE PRODUCTS
Phoebe Watch so613
Tool Set so497
Large tool Set so792
 
Other Products
Ruby Rocket-Vintage-flourish, stickers, twine, corrugated cardboard, foil tape, cardboard.
 
I find that Memory Maze has such a good range of chipboard for the boys( young and old alike!)  and it makes it easier to embellish my layouts to create the feel that I want to convey in them.
Happy scrapping
Susan


Tuesday, August 27, 2013

Amanda Lawrence - Pretty Girl - Step by Step

I love seeing others creative process. I find it so interesting to see how other peoples pages come together and how they go about creating them. With this in mind I thought I would take a few progress shots and make a mini tutorial for how I created my latest Memory Maze project. 

Pretty Girl


Firstly I'll show you the finished layout and then break it down step by step below. 


I started by giving my chipboard pieces a coat of paint using a Distress Paint dabber in pewter. Using a metallic is always a great option when you are not sure which of the colours from your scheme will work best. 


I painted up both the frame and the word 'pretty' which I will use as part of my title later.


I wanted to make the most of my background paper with it's doily elements so I cut some circles of paper from a contrast colour to fit in the centres. To make them pop from the background I lightly distressed the edges and then sewed a circle of handstitching about 1/4" in from the edge.


I wanted to use this vine as the basis for my floral cluster, so I simply bent it to fit the same curve as the chipboard frame.


I pulled more flowers from my stash in my chosen colour palette and worked my way around the vine, filling in the blank spaces. I have used quite bulky flowers but you could achieve the same look with flatter ones. The end of the vine looked a little odd so I covered it with a big floppy bow tied from some hand dyed seam binding.  


I added my title to one of the other doily sections of the background and balanced the layout by adding a smaller cluster of flowers here. To even out the tone I dry brushed some gesso over all the flowers and leaves on the page. 


As a finishing touch I coloured some chipboard butterflies with my silver metallic sharpie pen and scattered them throughout the flowers. 

It was really a fun layout to put together and quite simple when you break down the steps. 

Memory Maze products:

Frame - VOW11
Sunshine Word Sheet (pretty word) - S0787
Micro Butterflies

Other products used:

Bazzil cardstock, Crate Paper Maggie Holmes papers, Manor House Creations vine, Kaisercraft & D-lish Scraps flowers, thread, gesso, AC Thickers, seam binding.

Thanks for stopping by and I really hoped you enjoyed seeing my creative process.

Amanda x


Saturday, August 24, 2013

Tracey Campbell Reveal

I have been having fun adding some Memory Maze Chipboard to most of my creations lately so I wanted to share a few with you that I made for the Darwin Royal Show - I got a Second place and a Third so I was pretty stoked - First time I have ever made anything for the Show before so I was a bit excited to win.

Cousins...ready made friends for life....Always


I just wanted to have a clean and simple look for the Always chippy for this layout so a quick spray of some hot pink mist and it came up stunning.
 

Memory Maze Product used:
Butterfly Always: Product ID GO242
******************************************************

Memories


It isn't very often that I do an off the page item...but this one got me a third place at the show, so I am happy with it. A small and simple canvas with the perfect touch of the word "memories" to finish it off.
 
Memory Maze Product used:
Memories Word: Product ID GO193
******************************************************

Navy

When Sally (the owner and designer of Memory Maze) heard that I was in the Navy she designed some terrific chipboard shapes to go with our life style of being a Navy Family. I have so many photos of myself, my husband and my daughters doing ship visits or our daily Navy routines and now I have the perfect embellishment to go with them.

I have actually used four different shades of mist on these two chipboard pieces to give them a great gun metal grey look.


Memory Maze Product used:
Navy: Product ID LO219

Ship Shape: Product ID LO224
 
Too new to shop - Its a way of life and The Patrol Boat shape.
 (Just e-mail Sally for more information)
******************************************************
I hope you enjoyed the layouts and the canvas I shared with you and I hope that I inspired you to reach for you chipboard and get scrapping.
 
Hugs
Tracey