Monday, November 30, 2015

Art Journal

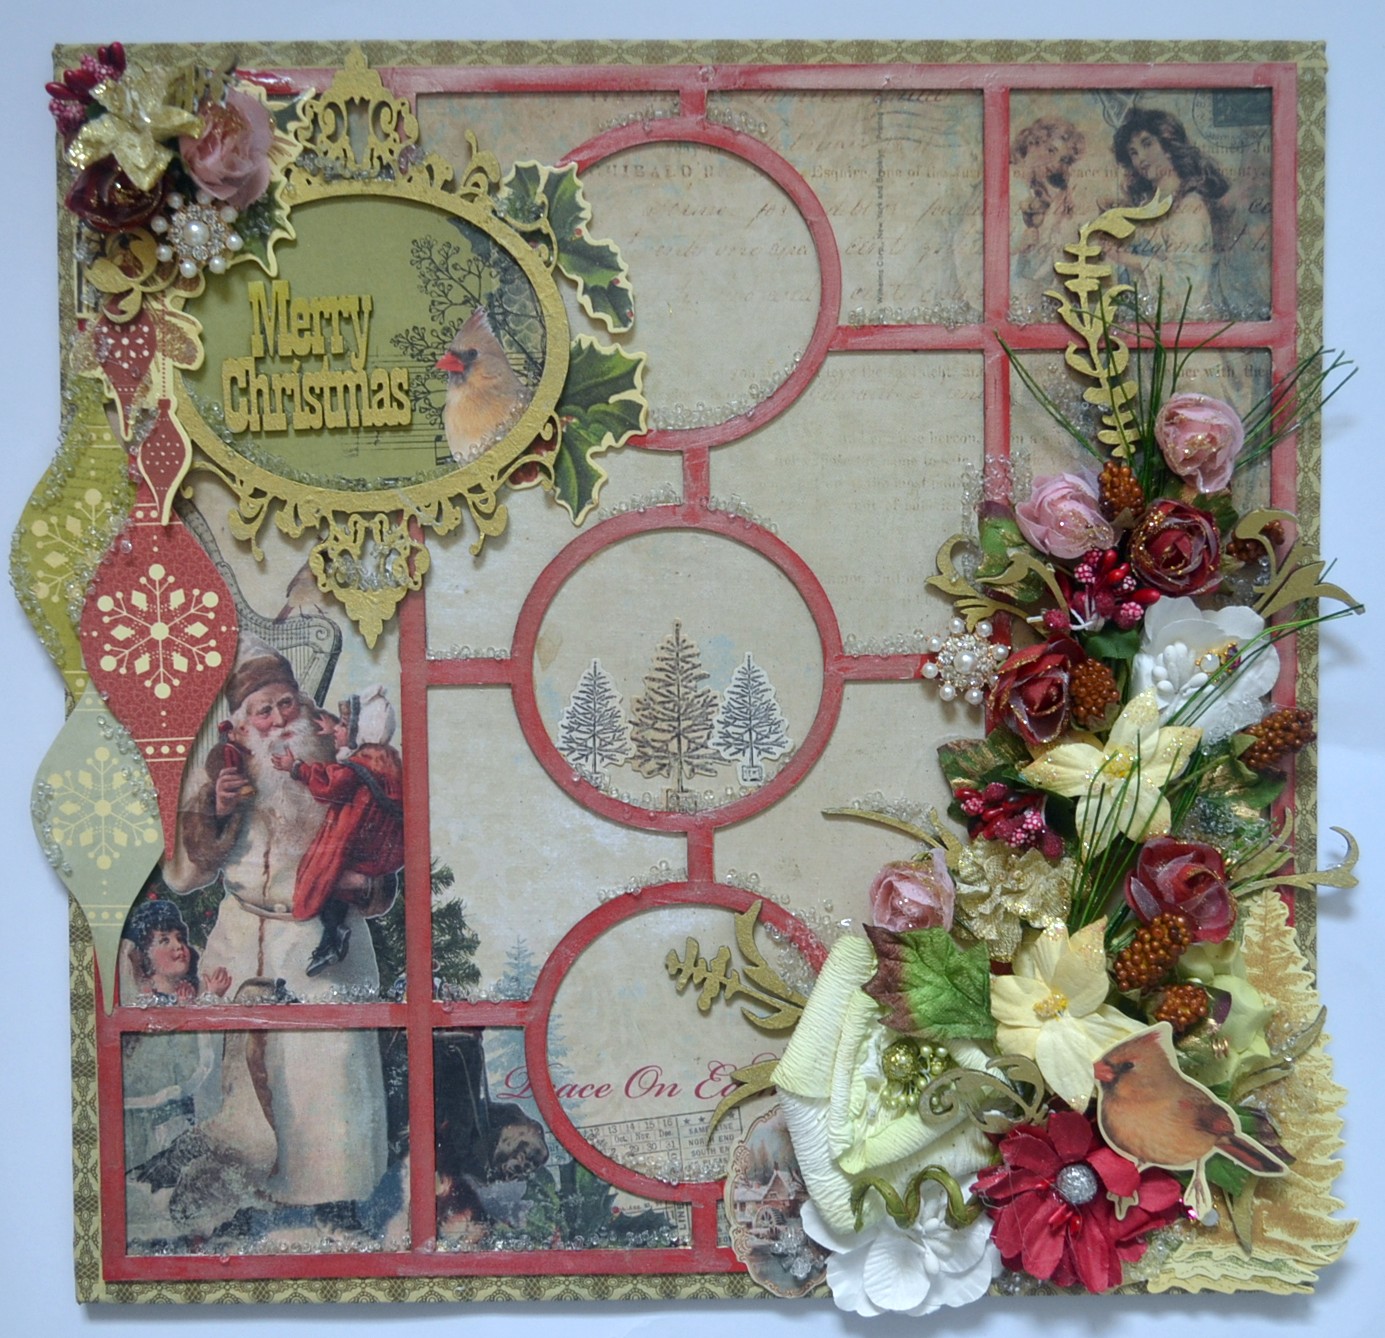
Hello everyone Candy here with another Off the page project. A group of my friends came to me and wanted to make an art journal, so I put my thinking cap on and this is what I came up with.
I started with an A4 2 ring binder , covered it with some canvas that I pulled off an old canvas from my stash. Then I painted it all with some gesso this is to help prep the canvas and to seal it. I used a flower/swirl mask and some texture paste.  Inside and out and then waited for this to dry. I used different coloured sprays and waited for it to dry again. I used a script stamp and archival ink and stamped here and there, then run the stamp pad over the outside, just to give it some colour.


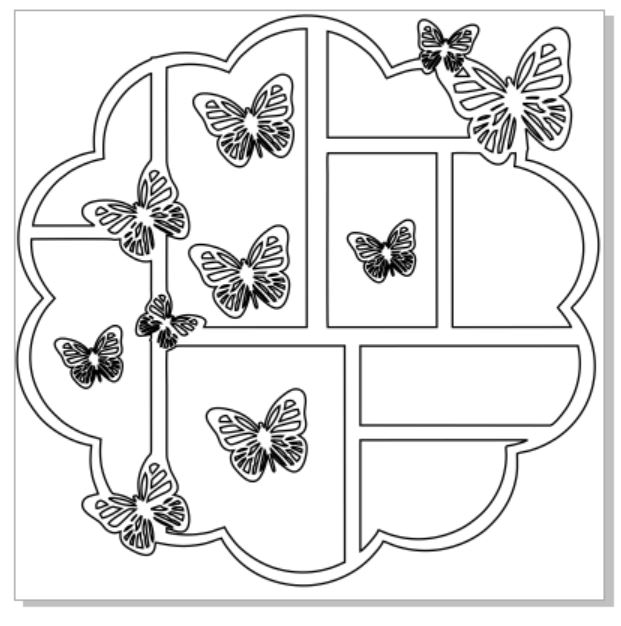
I used the 12x12 inch round butterfly frame from Memory Maze, cut it in half and daubed some texture paste over it and dried it well. When it was dry I sprayed with gold and sepia sprays. The extra butterflies form the pack I coloured with the prima ink pads and glued one on top of each other.


I glued half to the front and the other half onto the back of my folder.


Memory Maze product used


12 x 12   butterflies sold 1\'s


Products from my stash

A4 2 ring binder
Canvas and gell medium ( I used this as glue)
Gesso, Texture paste and flower/ swirl mask, rose/word mask
Prima gold foil and cotton candy sprays
Lindy's steam punk sepia, wild honeysuckle coral and time travel teal sprays
Prima chalk inks blossom tree, teal damask, pastel peach and knotted wood
Archival inl coffee, small script stamp
lace and dyed seam binding
Metal embellishments, white doily I coloured this with gold spray
hand made stick pins


Wednesday, November 25, 2015

Wedding Mementos Picture Frame by Jodie Mason

This has been one of my 'to do one day' projects for quite some time now, and I'm really glad that I have finally had a chance to do it. I wanted something that would not only help to preserve some of our wedding day mementos, but could also serve as a nice decorative display. The following is what I came up with, and I must say that I am pretty pleased with it (if I do say so myself. Lol).

Wedding Mementos Picture Frame

Now this was not just a quick and simple process by any means. I think it took me about a week to do from start to finish (as you can probably tell from all of the clothing changes in the videos), but the end result was well worth the effort. I hope that you enjoy the videos and I'd love to hear what you think of the frame.


Memory Maze supplies used:


I hope that you enjoyed my project and I'd love to hear what you thought of it.
Thanks for visiting

JODIE MASON
Memory Maze Design Team 2015

Monday, November 23, 2015

3D Cards by Jason Anesbury

Hi everyone and welcome to my Memory Maze blog post. 

Today I'm sharing 3 cards 

Frog Card
With this amazing 3D frog sheet from Memory Maze I cut out the frog an layered with 3D foam mount tape to give u the desire affect 
I went around the Flower with Glitter glue and around the eyes I use crystal affects 


I used the following memory maze product 


Butterfly Card

With this amazing 3D butterfly sheet from. Memory Maze I cut out the butterflies an layered them 
with 3D mount foam tape
I went around the edge of the butterflies with glitter glue an the blue part in crystals affects.

Flower Card 
With this amazing 3D sheet from Memory Maze I cut this Amazing flower out an I use 3D foam tape to mount it up .
I use Glitter Glue over the bow and flower for the Amazing affect I wanted 


I have used the following Memory Maze 
3D flower sheets 

Thank you for coming to view my upload I hope I have inspired you to create something wonderful
Jason Anesbury 
Memory Maze Design Team Member 2015

Friday, November 20, 2015

Fairy with Mirror Frame (video) & Acetate front card -by ToniHerron

Pretty, Pretty, Pretty. As many of you may well know, with having two boys it's not often that I get to craft "pretty", so this time I decided it was my turn! I love Pink and collect Fairies, so put them together with some delicious Memory Maze goodies and this is what I finished up with.
I have done up a special video featuring the process of this creation and some cool technique details also.
 View the video HERE.

Fairy with Mirror Frame


Memory Maze products used;


Happy Birthday - Acetate front card


Memory Maze products used; 


Thank you so much for joining me today
Toni Herron
2015 Memory Maze DT Member


Monday, November 16, 2015

12x12 Christmas Canvas

Hello everyone Candy here again. Today I have created a Christmas Plaque for you all.
I have started with a 12x12 inch canvas board from my stash and a piece of Kaiser craft Turtle Dove paper, this is a very old range but I love it. I glued these together with matt medium as I didn't want it lifting off. Then did the same to the red frame from Memory Maze. I used some gold washi tape and put it around the edges of my frame to neaten it. As you can see I have cut a piece of the frame out so you could see Santa I didn't want to hid his face.


I then glued on my flowers how I wanted, then the  collectables from the same paper range. I used some Liquid Pearls Bisque colour and rub some with my finger along the frame just to bring back the red colour as it was a bit bright.


I have also added some little demonetise in a couple of places around the flowers. 
Using the swirl, fancy frame and Merry Christmas word. I covered them all with gold ink. Make sure they are covered well. I put a scrap piece of paper under the frame and glued the word onto it and then placed it onto the frame. With the large swirl I cut it into pieces and glued them around in the flowers and around the outside as well. Then using some glue and the crystal glitter beads I placed them around amongst the flowers and the red frame.


Memory Maze Products


MULTI FRAME 4 12 x 12 multi photo frame memorymaze CAN BE CUT IN

Swirl 3


Swirl 3 Swirl flourish  min buy 3

Vintage frame 2 pk


Merry Christmas


Merry Christmas 45 x 36


Pearl Bling

Super bling silver  wavy  flat back pearls and diamante large .


Other Products Used
12x12 Canvas Board
Kaisercraft Turtle Dove paper and Collectables
Manor House flowers
Petaloo flower vine
Prima crystal glass beads
Gold ink pad, washi tape, 450 glue and matt medium


Thank you for visiting
Candy Chelepy
 2015  Memory Maze DT


Saturday, November 7, 2015

Decorative Birdcages and Marbled Christmas Card by Jodie Mason

Hello again, and I hope that this is finding you all well. Today I have some decorative birdcages to show you and a fun Christmas Card that can be created with the kids.
 
Decorative Birdcages

These birdcages are a heap of fun to create and I must thank Tracy from My2Angels for showing me how to put one of these together. The charms and embellishments also came from her store. I made 4 of them at the same time, but all in different colours and each with their own little twist. The little houses inside the cages and the flourishes were made from sheets of chipboard (Memory Maze of course). The houses either had chipboard bricks glued to them or had modelling paste used through the chipboard brick remnants (like a stencil). For more detailed instructions and photos please head over to my personal blog here.
 
The house components.
The house when glued together.
Modelling paste was used through a stencil to get a honeycomb effect for the roof.
One of the houses with the Memory Maze bricks glued on.
One of the houses with the brick stencil and modelling paste.

Front view of a finished bird cage.
Chipboard flourishes were die cut from chipboard sheets and then painted. These were placed around the houses in the cages.
A close-up of the house showcasing the bricks that are stuck on.
 
An example of the modelling paste bricks on the house.
 
Memory Maze supplies used:


Marbled Christmas Card

Today I have for you something that is completely new for me.... a video. Now this process can get a little (or a lot) messy so you may want to attempt it outside (I set mine up on our trampoline and my assistant sat on that), that way any mess can just be hosed away.


Memory Maze supplies used:


Now I hope that you have enjoyed this post and if you do find yourself attempting any of these techniques, I'd love to see what you created.

Thanks for visiting

Memory Maze Design Team 2015

Tuesday, November 3, 2015

Naughty or Nice? Advent Calendar & Pyramid Explosion Box - by Toni Herron

Ok, I have a confession to make......... I have never made an Advent Calendar before. Yes, I know you're gasping right now! How can a person be crafting for so long and never had made one?! Well, I finally decided the time was right and thanks to the super adorable chipboard pieces from Memory Maze, I was inspired to create TWO this little beauty below and a special "Aussie Christmas" version for my boys. You can see both below. 

Naughty or Nice?  


I am truly loving this project and do believe that I will be keeping it for myself. 
Although I did use matchboxes for the drawers, the house is made by using the 12x12 sheet chipboard. The circles and title were inked, sprayed with mist and dusted with distress glitter. The cute little Reindeer was simply inked. The Trees and Sleigh were both painted with the same Grey that was used on all of the edges on this project. 


Memory Maze products used; 


Aussie Christmas - Advent Calendar


The Santa Hats have been covered with Red ink on both sides, then glue has been applied for the "Fluff" to stick, then Liquid Pearl has been used to make the dot on the tip.
"Aussie Christmas" comes already prepared in different colours, I choose Red.
The little Reindeer has been layered 3 times with "Puff White" embossing powder.


Memory Maze products used;

 Reindeer

Aussie Christmas title

Pyramid Explosion Box


I am absolutely loving the chipboard packs that Memory Maze are now designing that have all you could need for a project or page. I have used a gorgeous flourish, some butterflies and flowers all from the same pack. Honestly, what more could you want! Such an ease knowing all the hard work of matching pieces is already done for you! All of the chipboard that is brown and teal have been inked, the grey was painted. I have not added glitter or dimension magic to these pieces as I really wanted to keep it as a matte finish.


Memory Maze products used; 

Thank you for visiting today
Toni Herron
2015 Memory Maze DT Member