Tuesday, October 31, 2017

{dina and Me}

Hi there - thanks of stopping by the Memory Maze blog today I hope you are inspired by my upload .......

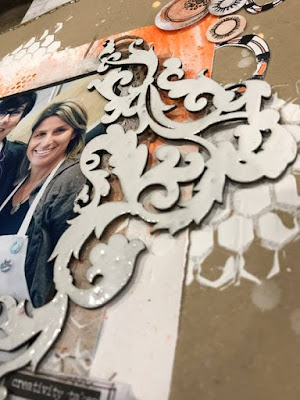
I created this layout using a photo of the fabulous Dina Wakley and myself after attending one of Dina's awesome classes.


The Memory Maze chipboard used was Flourish 2 -m170 x 145


I decide to emboss this chipboard piece using white embossing powder

I embossed with two layers to get a thick glossy accent - and 
once the process was complete and the chipboard dry I adhered onto my layout.


I have used a kraft 12" as the background, layered with an altered piece of marshmallow cardstock using colour blast powders and texture piece with a stencil, the second layers pattern paper and the third is hessian. To embellish the layout I have added stickers, stamps, gauze and epoxy dots. The finishing touches are the doodling around the edges of the layout.

I just loved how it turned out......


Hope you found some inspiration......


Monday, October 30, 2017

Make a Wish, tag, by Tania

Hi again, hope you all had a lovely weekend! Today I have a small project for you, a gift tag, using one of the Memory Maze Stencils and a gorgeous chipboard piece!


I coloured my chipboard with a blend of Metallic Embossing powders, for an antique look.


The Rose and leaves stencil, used along with Distress Oxide inks, made a beautiful, soft background!


 To add another layer to my background, I partial stamped some hexagons in Black archival ink, then went around the edges with a blending tool and Distress ink.


My tag then needed some dimensional layers. I added a patterned paper strip, some ribbon and die cuts, before adding the chipboard piece. Then finished it off with some brads, a Tim Holtz phrase sticker and ribbon at the top!


Thanks for looking! 
See you next time!
Tania

Thursday, October 26, 2017

Stay positive with Candy

Hello everyone...
Candy here sharing with you all my layout I created
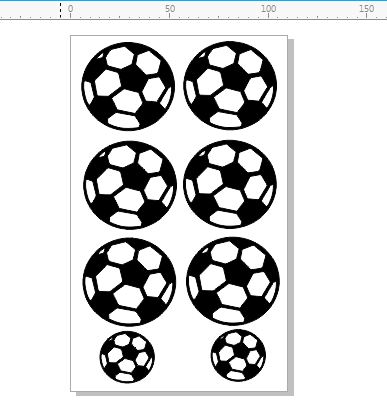
 using the soccer ball chipboard.


I cut about 1/2 inch from 2 sides of the pattern paper 
then tape to the black cardstock.

Using three of the soccer balls, give each one
a good coat of the colour paste. I used a daubing
motion to give them texture.
Let this dry and glue the three to coloured pattern paper
and cut around the edge with a craft knife.


Double matt your photo and lay where you want your photo.
Place the cogs and soccer balls around your photo.
When you are happy glue these down.
I added a couple of sequins on the cogs.
Add your title and then using the grunge mask and
colour paste place around the edges of your layout.

Mmeory Maze product


Other products used

Black cardstock
Kaisercraft factory 42 collection
Machine and assembly line papers
Paper from the paper pad
Collectables
Grunge film mask
Corbet creation veneers
Sequins


Thank you for visiting
Candy Chelepy
2017 Design Team


Tuesday, October 24, 2017

Halloween card-by Leanne Nankervis


Hi Everyone!
Leanne here to share another project with you today, using products from Memory Maze Lazercuts.

Halloween Birthday Card

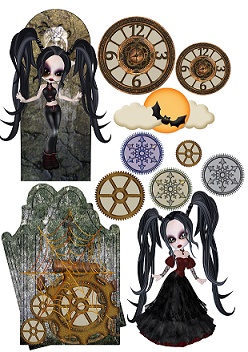
Today I'm sharing a Halloween Birthday card I made using the 3D Mixed Media sheets, and the Memory Maze Chipboard Cogs. These Mixed media sheets are great for Journals, Tags and Cards.

 
Close up of the front of the card with the Halloween Mixed Media cut outs, which I adhered to acetate and fussy cut them out. I mixed some of the chipboard cogs in amongst my floral cluster.
 
I also used the chipboard cogs on the front of the card, some I painted in a Metallic paint and
some I used raw, and just inked the edges in black and used a background webbed stamp on the front of the cogs.


The inside of the card I used a lot more cogs, along with some metal ones as well, and some more cut outs from the media sheets.
 
 
Close of the back of the card.


Memory Maze supplies used:

 
Halloween 4 designed for Mixed Media Journals, cards


Chipboard Cogs 12x12
12 x 12 all there is is cogs, cogs for everything

Thanks for stopping by the blog today!
Leanne Nankervis
Design Team Member 2017


xx


Monday, October 23, 2017

Cards

LOTS OF BUTTERFLIES

I have created these four cards using "Lots of Butterflies" Memory Maze chipboard.  

The chipboard has been heat embossed using white embossing powder. 


Thanks for looking Jan

Sunday, October 15, 2017

Happy 21st Birthday Card by Tania

Hello again everyone! I'm just back from a holiday overseas and it was so great to get back to my desk and make something!!! Not that I didn't have a great holiday!

So, today, I am off to a 21st Birthday Celebration and made a card using some very awesome Memory Maze Chipboard pieces! 

Vintage frame 001 11x14cm BULK 5 PACK unpackaged


This 1st piece, VINTAGE FRAME, I used as a stencil! (See below!)


So the first thing to do, is remove the centre frame piece from the frame, and save for another project. We are going to use the negative part of the chipboard as a stencil!!


Cut a piece of white cardstock, approx. 5.25 x 5.25". Place the negative piece of chipboard over the white card and spray with Black Marble Dylusions, ink, or other brand ink.


So. you end up with this cool background for your card.


Next, cut the chipboard triangle border piece into 3 pieces, like this:


First cut!


2nd cut from large piece!

Then, paint your chosen 2 pieces of chipboard with Black Paint.


I cut a 6 x 6" piece of coloured cardstock, and another piece of black card, slightly smaller, and used this for my base card, adhering the sprayed ink piece on top!


Finally, I decorated my card with the chipboard pieces and had fun with some die cuts and foils from Kaszazz.


I adhered the chipboard triangle pieces with some Glossy Accents!


I'm pretty chuffed with the end reult, just love the stenciled background and making the most out of the chipboard, negative pieces! I hope I have inspired you to think outside the square with your chipboard!


Saturday, October 14, 2017

Perfection


I have coloured my memory maze chipboard with gold acrylic paint to keep it pretty neutral for this layout.
How beautiful is the font for the title.


I have used a triangle arrow border also as and accent.
Check out all the great titles and accents at Memory Maze.

This page is made with 49 and Market papers and three D Stickers.

thanks for looking
Tracey

Wednesday, October 11, 2017

Butterfly cards with Candy

Hello everyone .....
Its me again ... Candy. 
Today I am sharing with you my butterfly cards
that I have created with the Birds on a branch chipboard.


The card I have made measures 4x8 inches. 
The branch is from the birds on a branch chipboard.
I coloured the leaves with the Lindgrum metallic 3d paint
 and the branches with brown paint.
The paper butterflies I painted with the Hellblaw metallic 3D paint.
Just be careful if you are using paper flowers or butterflies as the are
very fragile and might fall apart.
So let them dry naturally.


I have made a 4x8 inch card base. 
Cut your pattern paper to measure 3 7/8 x 7 7/8 inches
and tape this to the base of your card.
I also roughed around the edges of the pattern paper.
Glue down the branch and add your butterflies, flowers and sediment.

An extra card for inspiration


Memory Maze products


Birds on a branch  220x160 min buy 3

Other products used

4x 8 inch card  base
Kaisercraft 6 1/2 x 6 1/2 inch paper pad
- also well wishes paper
Green tara flowers

Thank you for visiting
Candy Chelepy
2017 Design team