Wednesday, March 30, 2016

Jason's Card Post

Welcome to my Memory Maze blog post today I will be sharing with you 3 cards. 

Card 1 

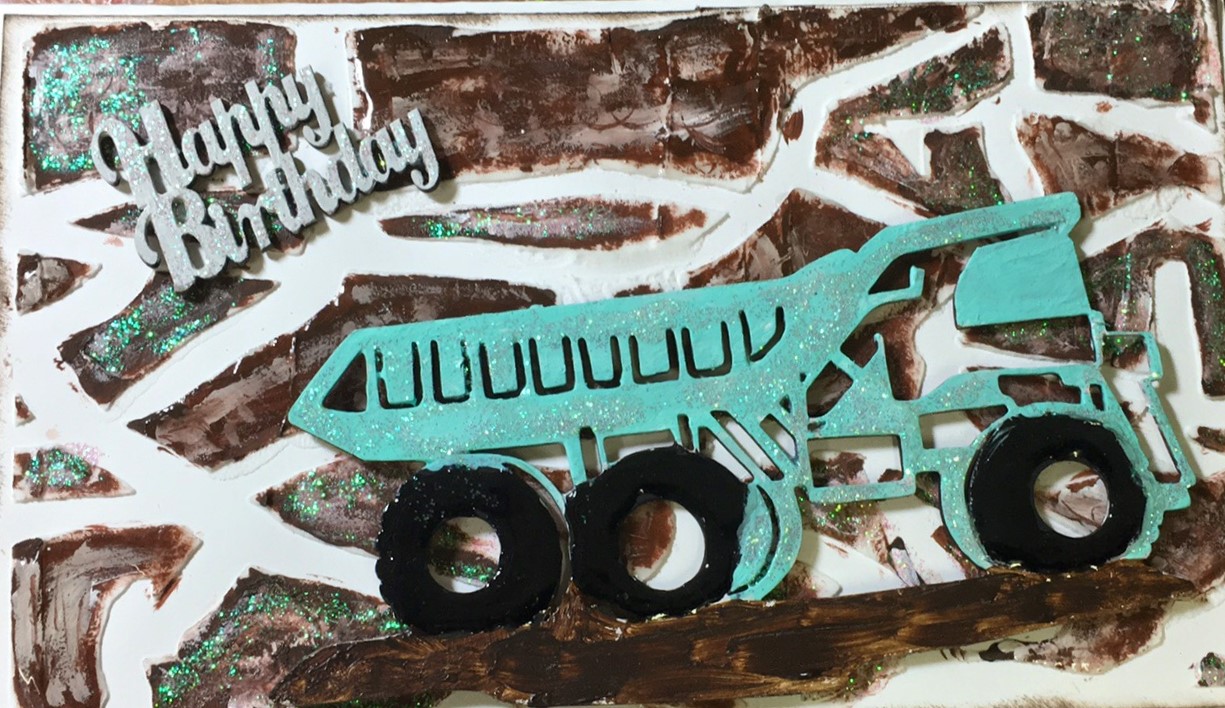
I started of with the amazing Pebble Stencil I place it on top of white card stock , I went over the stencil with Texture Paste , when the Texture Paste was dry I went over the Texture paste with Sullivans burnt amber paint , when the brown paint is dry I smeared Diana Wakley white paint over the brown to get the  affect I wanted , when dried I went over some with glitter glue.

With  the Happy Birthday title I painted it with Dina Wakley white paint , when dried I went over the Happy Birthday with Glitter Glue.
The dumped Truck I painted the body in Dina Wakley Turquoise , when dried I went over with it with glitter glue, with the wheels I used Kaiser colour paint Black to paint them, when dried I went over them crystal affects. 


                                                     I used the following Memory Maze products
                                                                                          
                                                                         Dumped Truck


Card  2 

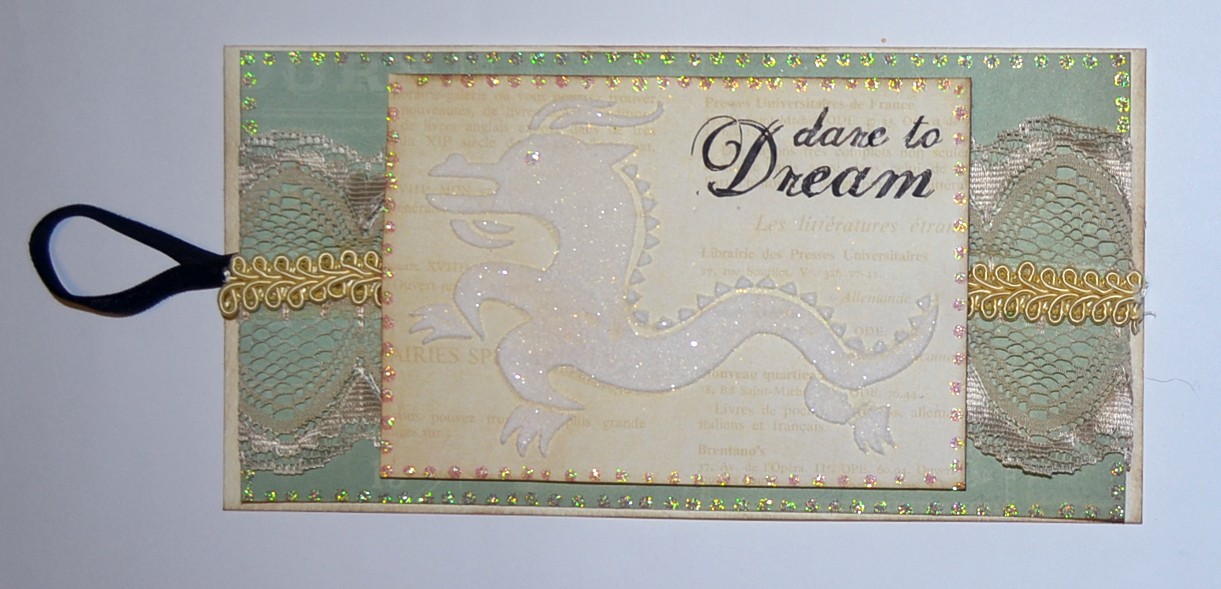
I put the stencil down on the white card stock I went over the Stencil with Texture Paste to get the desire affect that I wanted, when dried I Painted the circles With Dina Wakley Paint ruby  For the little bits I used glitter glue, when dried I went over the circles with crystal  affects.

With the flower I sprayed them with water to pull them apart , when dried I painted them with  Dina Wakley white paint, when dried I went over them with glitter glue, an centered of the flower I Used Tim Holtz Candied Apple .

The thank You saying I painted it with Tim Holtz Candied Apple paint Dabber, when dried I went over it with crystal affects.   


I used the following memory maze products 


Card 3

The back ground papers are Memory Maze I cut them into 1 inch squares an stuck them down to the card stock an went over the joins with glitter glue.

the sign best wishes I painted it with Dina Wakley white paint , when dried I went over it with glitter glue.
the frame I used Kaiser colour black when dried I went over it with crystal affects .  


                                                           I used the following memory  Maze products

                                                                  Best Wishes


                                                                          Oval Frame


Thank you for checking out my Memory Maze post
Jason Anesbury 2016 Memory Maze team member. 

Saturday, March 26, 2016

A couple of cards with Candy

Hi Everyone Candy here again. Today I thought I would do something different for you all.
I have created two cards and a tag.

The first is Busy Bee


I started with a 4 1/2 x 8 inch card.
 It has to be this wide to accommodate the chipboard piece I have used. Then I cut a Matt out of green paper at 4 3/8 x 7 7/8 inches  and went round the edge with the edge distresser. Tape this onto the front of your card and then I tore a piece of gauze and glued that on top as well. Using the bumble bee chipboard piece paint with white paint or gesso, then light green paint, paint your bees black then using a fine paint brush paint in the body parts. When this was dry I added a coat of dimensional magic to make it pop. Glue this to the top of your card and I then added some small flowers and punched out some small leaves and added them as well.


Card 2 - Eiffel Tower


I have used a 4 x 8 inch card again for this one. 
Double matt this one with the bottom layer measuring 3 7/8 x 7 7/8 inches and the top paper 3 3/4 x 7 3/4 inches. Tape these onto the front of your card. I have used an Eifel Tower chipboard piece, painted it with brown paint and while wet sprinkled with silver microbeads and then some dimensional magic. When dry glue the Eifel tower onto the front and add a verse.

A tag just to be different


I cut a cream piece of cardstock at 4 x 8 inches then cut another paper at 3 7/8 x 7 7/8 inches for the top layer. I cut another piece of cream cardstock at 3 1/2 x 5 inches and using the dragon mask and some texture paste, before the texture paste dries cover the dragon with fine clear glitter to give it some bling. I have added some lace and ribbon to the top of the card and then placed the dragon ontop of that. Add your verse then a ribbon to one side to make the loop for the tag. I went around the edges with some Crystalina kindy gliz.


Memory Maze products


Mini eiffel tower pack of 10


Stencil,mask or template J0159  110X180   Min buy 3

Thank you for visiting 
Candy Chelepy 
2016 Design Team

Tuesday, March 22, 2016

Fairy Pocket Album (video) - by Toni Herron

Fairy Pocket Album

Using some 12x12 chipboard sheets and my latest favourite papers, I have created this fun pocket album. It stores loads of the diecuts.. Embellished with Memory Maze chipboard pieces, flowers, ribbon and bling.
I have made a special video featuring this album - you can view it HERE.


* TIP *
To make it easier for a brad to go through chipboard, use an eyelet hole maker to punch the hole first.
 

Memory Maze products used;

Lattuce fence

lots more butterflies small 110 x 150 min buy 3  memorymaze


ATC FRAME

 12 x 12 clocks  sold individually


Thank you so much for joining me today
Toni Herron
2016 Memory Maze DT Member

Saturday, March 12, 2016

Jason's Design Team Share

Welcome to my Memory Maze blog today I will be sharing with you 3 Cards

Card 1

With this amazing saying I Love U To The And Back.
I used Dina Wakley paints Lime, Tangerine, Lemon an Ruby.
When the paint dried on the  moon I went over the moon with glitter glue.
with the heart I glued red sequins onto the heart

                                                                 
                                                         I used the following memory maze products
                                                          
                                                            I love u to the moon and back

Card2

With the man an lady I painted them with Crema coat  colour Ac Flesh.
then for the lady I used Dina Wakley Paint Yellow an with the man I used Dina Wakley paint Night for the pants and Sky for the shirt , when dried I used Glitter glue for the lady dress and on the man's shirt.
For this amazing title U Make My Heart Beat Faster I used Dina Wakley paints Lemon , Lime , Sky, Tangerine and Ruby .
when the paint dried I used red sequins on the heart.


I used the following memory maze products


Card 3

For this card I used this amazing template dots and stuff poly template, to get this effect I went over the template with Jo Sonja's texture paste, then I used Memory Maze chipboard sheet with Sizzix Original's Hearts & brackets and put it through the big shot.
I painted the hearts with Tim Holtz Distressed Paint Candied Apple , when dried I went over the hearts with crystal affects .
With the brackets I used Dina Wakley paint Tangerine when dried I went over with it with glitter glue.
For the saying one of  a kind I used Dina Wakley night than I embossed it with Stamping Up Emboss powder Ice for this amazing affect.


I used the following Memory Maze products


thank you for stopping by an looking at my Memory Maze post
Jason Anesbury Memory Maze 2016

Tuesday, March 8, 2016

Butterfly canvas Candy Chelepy

Hi everyone these months are quickly rolling around. The year is going to fast.
Today I am showing you how to create a 4x12 inch burlap/ hessian canvas and some lovely chipboard from Memory Maze.


I firstly painted the canvas with white gesso and when this was dry I used some gold crackle/texture paste from Finnabair along with a mask from Memory Maze. I left this to dry overnight as it crackles better when air dried. 


I found some flat lace from my stash and some white flower strip and glued them down along the right hand side. When this is dry I sprayed the canvas with Lindy's sprays Rusty Lantern Lime, Wake me up before you go gold and Time Travel Teal. I dried this with my heat gun and then give the canvas a good coat of white gesso, dry this well. Now you spray one colour at a time, lightest first. Make sure you dry in between each colour. I also used a spray bottle to lighten the colour and let it run down the canvas to give it a washed look. I have used a black stazon ink pad rubbed it gently around the edges then over the top of the canvas also the flowers. This gives a distressed look.


Now for the chipboard I painted the chains with turquoise paint, then dried. Then added some CM iridescent turquoise paint (this is a deminsional paint) then I added some clear fine glitter over the top and dried with my heat gun. If you hold your heat gun close the paint will bubble for a lovely texture. I then sprayed some more Lindy's Time Teal Travel over the top and dried again. I sprayed the Lindy's over the hearts as well.


Now for the metal butterflies, coat well with white gesso. Dry and paint with  Shimmerz paint Dazzelerz texture paste Gummy berry blue. While this is still wet cover with some Shimmerz enamelz gold digger embossing powder. Dry them with your heat gun hold close so it bubbles.  Careful as the metal gets very hot we don't want to burn ourselves. Then rub gently with your black stazon ink.


Glue everything onto your canvas. I have used a verse, stamped this onto some white paper cut out and glued down onto the canvas as well. I have gone around the edges with a black pitt pen to finish this off.


Memory Maze Porducts


Thank you for visiting
Candy Chelepy
2016 Design Team member


Saturday, March 5, 2016

Son-uva Digger layout - by Toni Herron

Chipboard friends and family, DT Toni here bringing a Monster treat for you today with a photo featuring my oldest son Lane with his favourite Monster Jam truck, Son-uva Digger while we were in Brisbane in October.  Lane was stoked that he got to met Adam Anderson too!!!

Son-uva Digger


 This base page started out being an old basic white Bo-Bunny pattern paper with cogs on it.
I used some Memory Maze goodies with some mixed media supplies to try and make the photo pop!
 I started out by using a chicken wire stamp, place randomly around the edges of the paper. I used a purple StazOn for this.
Then that was followed by cutting up the Chicken Wire chippie into 3 strips and the Cogs piece into little separate pieces also. Then sticking the chipboard down and coating with some white Gesso.
Once it was dry (via the heat gun - thanks to my impatience) I sprayed with A LOT of different mists.

 
Allowed to dry again before I painted the Silver ink over the top of the Cogs and lightly ran the lighter purple ink pad over the top of the chipboard wire.
 The metal embellishments were put on, along with the title and journaling tag under the photo.
The final touch was a light spray of a brown over a Memory Maze stencil to mimic some mud splashes in the top corners.

 
Mixed Media supplies used 
 
 
Memory Maze products used:
 
Chicken Wire Large


 Thank you for joining me today
Toni Herron
2016 Memory Maze DT member