Saturday, July 28, 2018

Flowerpot Frame by Suzanne Franin


Hey Everyone Suzanne here

This project was lots of fun

A friend was getting rid of a few old craft bits she had and thought of me so I was the lucky recipient of some half terracotta pots, some straw and a few other things that will get used at some stage I'm sure

This project I used the Thistle Flowers and Flourish Corner Set from Memory Maze
Make sure you check out the Blog to see what great creations the Design Team create with the fantastic products Memory Maze make

I made a YouTube Video of the process so make sure you take a look and give me thumbs up and subscribe to my channel x


The back of the frame I covered with tissue paper using a couple of layers to give a bit of depth
I glued the pot to the frame with Helmar Super-Tac Glue as this glue hold just about anything  

I painted the frame and the pot with white gesso then made a mix of water and Colour Blast Colour Shimmer Dust Midnight 
After the Colour Shimmer Dust Midnight dried I used the Colour Blast Colour Clear Shimmer Brush Marker I dripped a couple of drops onto another brush so I didn't get any colour onto the Colour Clear Shimmer Brush Marker I love sparkle the more the better


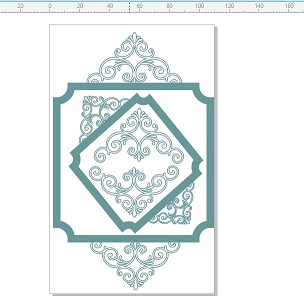
I painted the medium flourish from the Memory Maze Flourish Corner Set with the Colour Blast Colour Mica Powder Watermelon and clear gesso


Then the Memory Maze Thistle Flowers I used Colour Mica Powders in Lemon Zing, Peach Nectar and Polar


I used some Helmar Scrap Dots glue to raise the Memory Maze Thistle Flowers off the back of the frame to add some dimension to the project I also used some Helmar Tacky Craft glue


I gave the whole project two coats of the Helmar Crystal Kote Gloss Varnish to give a nice shine to everything and a bit of protection from dust


Memory Maze products I used -


Thank you for visiting I hope you come back again soon xx
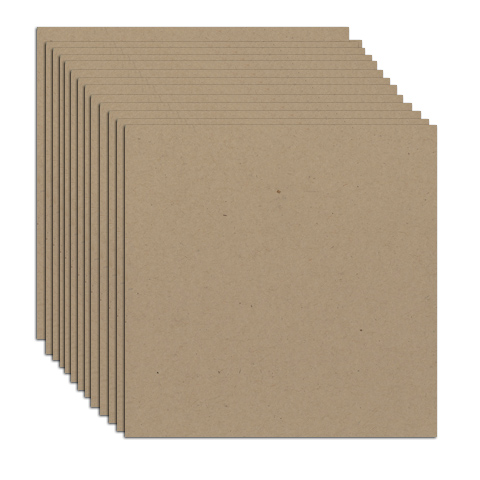
Monday, July 23, 2018

Adventure-by Leanne Nankervis


Hi Everyone!
Leanne here to share a project with you today, using products from Memory Maze Laser cuts.

Adventure

Today I'm sharing a mixed media canvas, I did a sea themed layout of my daughter Alannah. A trip we took to the beach last summer, exploring some of the rock pools at low tide. I have used lots of chipboard from Memory Maze.


Firstly I adhered all my chipboard pieces, and added texture, Then I stencilled my background and painted the whole canvas with white gesso. Once dry I added my sprays, I used Prima bloom spray tea stain for the sandy bottom, Then I used Lindys starburst spray azure for the blue water.

I used some of the elements from the Mermaid seaside 12x12 chipboard sheet. I used the coral, shells, anchor and net, these were sprayed and highlighted with either kindy glitz, or I used some gelato's to give more added colour to my pieces.
I also used the Adventure title which I covered in a teal kindy glitz colour.


I used the octopus from the mermaid set and highlighted his tentacles, with the kindy glitz. There is also some cogs in the background. I added a top layer of embellishments, shells which I added some art ingredient beads.


Memory Maze supplies used:


Thanks for visiting
Till next time happy crafting!
Leanne Nankervis
Design Team Member 2018


Sunday, July 22, 2018

Congratulations card and box with Candy

Hi everyone
Today I have created a decorated card and matchng box.
I have used for the card base a 5x7 inch white card.
And for the box a 6x8x3/4 inch box
which I purchased from Office works.


For the card I cut two pieces of pattern paper.
One measuring 5x7 inches and the other 4 7/8 x 6 7/8 inches
distress around both of these pieces. Tear a V in the top one just to add 
a bit of texture.
Tapr these to the card base and curl some of the edges to give a distressed look.


With the vintage frame and the two vintage corner flourishes
paint with either gesso or white paint.
While this is wet spray some coffee spray and daub with a paper towel
to take off some of the colour. I then added some fine clear glitter
 to give a little bling.
When this was dry daub some silver ink here and there over the three
pieces. Then give them a coat of dimensional magic/
Let this dry.


I placed the square frame to the left of the card added the two flourishes.
One to the bottom and the other to the top.
Add all your embellishments to your card.
The box is just covered inside and out.
Adding some lace, string pearls and lace applique to the front
of your box.


Memory Maze products


Other products

5x7 inch white card base
Assorted Prima pattern papers
flowers, crystal flourishes and metal embellishments
Assorted laces
Silver and vellum butterflies
String pearls
Silver Congratulations
6x8x3/4 inch box

Thank you for visiting
Candy Chelepy
2018
Memory Maze
Design Team


Saturday, July 21, 2018

Mixed Media Canvas by Sarah

Hello crafty friends, Sarah here with a mixed media project using some of the alphabet and number stencils from Memorymaze. Lets' take a look...
This 16X20 inch canvas sheet was largely inspired by the artist Nina Ribena. If you havent seen her work, she does some great Youtube tutorials that are easy to follow along with. I started by covering the canvas with swipes of colour using an old credit card. I used a mixture of dark and light but you could apply what ever colours you iike.
From here you then build the layers using stencils and other objects. I used a variety of Memorymaze stencils for this project. Some of my favorite at the moment are the individual letter and number stencils. They are 40mm and perfect for this kind of project to add to the background but would be fantastic for cards or scrapbook layouts. You can see the "A" and "2" on this project. Stencilled in black, they make the background colours just pop!
Once you have applied layers of colours with various stencils, you can use items such as bottle tops, edges of a credit card to make further marks on the canvas. The difficult thing is knowing when in fact to stop! Let's take a closer look at some elements on the canvas.
I hope you enjoyed this project and will give it a go yourself. Pull out your stencils....maybe buy some more....and have some fun! I'm off to play with some more colour combinations on some more canvas pieces. Until next time....

Monday, July 16, 2018

DayDream Island-By Leanne Nankervis


Hi Everyone!
Leanne here to share a layout with you today, using chipboard from Memory Maze Laser cuts.
Today I'm sharing a bright layout, a nice summery feel for the cool winter blues.
I had a couple of photo's of a friends daughters dance concert, which were so cute I had to use them.
I did a mixed media background using Dylusion paints and a stencil, with some layering behind my photo.


I used the Daydream Island title, which I foiled with Gold using my Go Press machine.


I used one of the small frames and foiled in gold as well, along with the butterfly.

Memory Maze supplies used:


Thanks for stopping by the blog today
Till next time happy crafting!

Leanne Nankervis Design Team Member
Memory Maze Design 2018

Saturday, July 14, 2018

My Story with Sarah Rosse

Hello crafty friends, Sarah here with a 12x12 layout for you today. For this layout I have used a number of mediums to create the background. Let's take a look...
This layout was created for a class I recently taught at scrapbook store Scrap 2 Relax in Drouin. It was fantastic to see how each layout completed was different and how the ladies took on the techniques and adapted them to suit their photos and colour choices. The base of this layout is created using distress crayons directly on the page and through stencils, a circular gel plate print, stencilling with black ink and stamping with both distress crayons and black ink. I also used my Posca black paint pen to add some hand drawn details.
The chipboard title My Story can be found on the MemoryMaze website here and the chipboard 'chicken wire' used can be found here. The chipboard pieces were painted with acrylic paints - for my layout this was a dark blue, then I went over the top of the pieces with a lighter, irredescent blue. I love the contrast this provides.
If you are interested in any of the Memory Maze products, be sure to contact your local craft store or Memory Maze for your local stockist where we can place our local sales reps in contact with them. The new products for July can be found on the website at http://www.memorymaze.com.au/

Friday, July 13, 2018

Using your scrap chipboard with Candy

Hello and welcome
Today I have created four tags using some chipboard.
I seem to have a lot of scrap pieces of chipboard left over from
different projects.
So I have decided to use some up.
I have created four tags measuring 2 1/2 x 3 3/4 inches.


Cover each of them with some pattern papers front and back.
Then add whatever you have in your scrap box.
I have used paper doilys, flowers, leaves, lace and
assorted embellishments.
One has a calendar on it and another a small note book.
You could put a magnet on the back and put on the front of your fridge
for a keepsake.

Memory Maze Product


Thank you for visiting
Candy Chelepy
2018
Design Team


Tuesday, July 10, 2018

Picture Perfect by Suzanne Franin

Hey Everyone Suzanne here

Make sure you check out what's happening on the Facebook page to keep up to date with what's new on the Memory Maze Store and then let your local store know so they can have the products you need

Today I created a frame with a picture of girl from a magazine which I fussy cut out and decorated it with a few bits and pieces from my stash just for something different


I painted the frame with black gesso then with some graphite texture paste I used the Door Wire Stencil over the background of the frame (I took the glass out and put that aside as I don't use that)


I then used some Linda's Magical Shakers - Alpine Ice RoseGrab a Guy GoldCowabunga Copper and I added a little bit of the Creme Brûlée Cream from the Sweet Treat Shimmer Set but I wasn't happy with that so that got covered up


I used the 2nd largest flourish from the Flourish Corner Set and covered it with Finnabair Art Alchemy Antique Brilliance Red Amber Wax and wasn't happy with it so I then went over it with some Metallique Rose Gold Wax 
I also used the Metallique Rose Gold Wax over some of the metal embellishments

With the magazine lady I liked the way her hair was styled except there was writing in it so I went over it with some brown paint and tried to follow the way it was styled with the brown paint
Then when I was glueing her down I added a bit of tissue under her hair to give it some dimension
I glued the flourish to her hair like a tiara and added a metal embellishment and some pearls


I then added my embellishments to the corners of the frame a few metal pieces a couple of velum flowers, a flower that I have had forever and it was perfect with the rose gold flourish that I used on her hair


I gave her a drop pearl and diamond earring


When I was happy with everything I added the Colour Blast Clear Shimmer Brush Marker to her face so she has a gorgeous shimmer to her


I also added it to the vellum flowers and butterfly - it gave them a more transparent look

Memory Maze Products I used -


Thank you for visiting and I hope you come back soon xx

Thursday, July 5, 2018

Lovely Moments- By Leanne Nankervis


Hi Everyone!
Leanne here to share another project with you today, using Memory Maze Laser cut products.

Lovely Moments Layout
Today I'm sharing a shabby chic layout,  I created with one of my wedding photo's, and my Persian Cat that I used to have. We had to have wedding photo's with him, he was such a beautiful boy miss him so much. Well it was 16 years ago, how time flies. I have used the beautiful fancy frame from Memory Maze, along with a smaller oval frame. I have used Kaisercraft papers and flowers from Blossom Tree Creations, along with some favourite flowers from 49 Market and D-lish Scraps.


The fancy oval frames I embossed with Stampendous embossing powder in aged ivory and mixed in a white with gold guilded embossing powder.

 The small ornate oval frame I embossed the same way as the large fancy oval frame.


Memory Maze supplies used:

Fancy Ornate frame
Thanks for stopping by the blog today!
Till next time happy crafting!
Leanne Nankervis
Design Team member 2018