Hello!
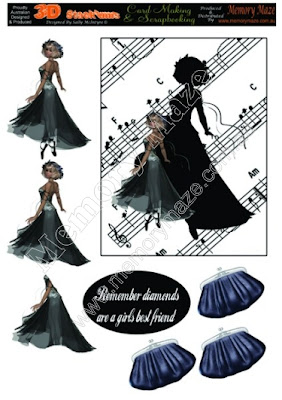
Not do Memory Maze only have a large range of chipboards in the shop, but they do have a large number of 3D Stackum sheets, too. They are printed A4 sheets, ready to cut, layer and embellish as you wish. They are originally design for cards, but who say you can't use them for OTPs or layout, if you want to?
One great thing about the 3D Stackum Sheets is that you really don't need to add more than a base card to have a beautiful card. But if you feel like, you can make them fit your style by replacing backgrounds, adding embellishments, glitter and glossy accent etc to add more structure to the project. In this post I'm going to show three ways to make the cards your own.
by Hilde Aaslund
Fairy Card
For my first card I have used the background on the sheet. All I have added is the base card, stickles (a glitter glue) and glossy accent (a thick transparent varnish) to add more dimension to my card. I also use 3D foam to raise the cut out parts and to add the 3D effect. Here are some details:
Layers created by using 3D foam
Stickles on the butterfly wings and in the girl's hair is a quick and easy way to add the little extra to the card.
Memory Maze product used:
Other products: Stickles & Glossy Accent: Ranger. Base card
& 3D foam: unknown
......................................................
Dancer girl card
For this card I separated the inner frame from the outer frame and added a pink background. I also put 3D foam behind the inner frame to add more depth to it. A few flowers from my stash, and some "diamonds", as well as Stickles, gave the feminin effect I wanted.
Layers
Memory Maze product used:
Other products: Paper (Glitz Design), Flower (Prima),
Stickles & Glossy Accent: Ranger. Bling,
3D foam & base card: unknown
....................................................
Young Girl Card
For my last card I kept the girl herself, and her shadow, but I changed the backup completely. I wanted a more modern style, hence my choice of patterns on the background paper. Did you notice the birthday frase? It's a chipboard, painted with gesso first and then a pink marker. If I didn't start with the gesso, the pink would soak into the chipboard and my piece would look far more grey.
I have used glossy accent on the girl's dress to add more interest
Memory Maze products used:
Other products: Patterned papers: Glitz design.
Stickles & Glossy Accent: Ranger. Base card
& 3D foam: unknown
I hope this post have given you some ideas on how you can use the 3D Stackum sheets, and how you easily can customize your card to fit both your personal style and the recipent. If you have any questions - feel free to ask! Happy card making!


Love them all, they look perfect well done
ReplyDeleteWow Hilde, love what you did with the stackums, i especially like the young girl card!
ReplyDeleteThese look wonderful Hilde. The stackums are so versatile.
ReplyDeleteBy following the paleo diet plan. High Def Disc News points out an Amazon listing indicates the
ReplyDeleteHouse of Cards Season One Blu-ray will arrive June 11th, from
Sony Pictures. Peak Phase 2-3 Wks If all of these different things have
come together so well.
my web-site; caveman diet
they are so pretty, Hilde!
ReplyDeletegreat cards but my fav is the B&W..just stands out a mile!
ReplyDeleteThese's all look stunning, Well done :-)
ReplyDelete