
Hi everyone I am up again with another tutorial
using Memory Maze products.
Today I have made a 6x6 inch card for you

Firstly start with your 6x6 inch card base, I have used white for this.
Cut your pattern paper at 5 7/8 x 5 7/8 inches
and tape to your card base.
Then cut a second pattern paper at 5 3/4 x 5 3/4 inches.
Now with the second paper tear approx a 4 inch strip off the right hand side.
Curl the torn edge and tape to the left side of your card base.
Cut the smaller piece at 5 5/8 inches length wise.
Curl the torn edge and tape to the left side as well.
Paint all your chipboard pieces and while they are drying
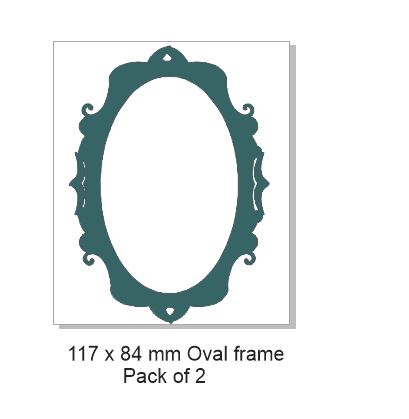
cut a piece of the white glitter paper to fit inside the oval chipboard.
I turned my glitter paper over and traced the oval with a pencil then
cut it out making a little bigger so I could glue to the back of the oval frame.
Cover the oval frame, butterflies both metal and chipboard with the
shabby white embossing powder.
Cut the end parts of the spring arrives flower and swirl piece.
And cover the three pieces with the gold embossing powder, also the word phrase.
Using foam tape under the oval frame tape to the front of your card.
Then add the 2 small scroll pieces to each side of the frame.
Then slide the larger piece under the curled paper.
Add your flowers , pearls and butterflies to your card.
Then go around the inner edge of the oval frame using the white liquid pearls.
Also add a little in the centres of the small gold flowers.
Memory Maze products


Other Products
6x6 inch card base
Pattern paper, assorted flowers, metal butterfly
White glitter paper, Pearl embellishments,
White gesso or paint
Versamark
Stampedous shabby white embossing enamel
Ranger Ancient princess gold embossing enamel
Liquid pearls
Cutter and scissors, double sided tape and foam tape.
Thank you for visiting

Candy Chelepy
2019 Design Team
No comments:
Post a Comment