Hello crafty friends, Sarah here today with a scrapbook layout for you that I recently taught at local store to me - Scrap 2 Relax.
This layout was created using Gel Press petite gel plates - this triangle plate comes in a pack of three and are so much fun to create with! I mount the gel mini plate on to an acrylic block and brayer paint on to them. I then make patterns on the plate using various tools and stamp them on to the page.
The Memory Maze Lasercut products used for this layout include the gorgeous black acrylic title 'Born to be Wild'. This is also available in chipboard or wood veneer. I also used the nested wooden triangles and painted them black to match the title.
I matted the photo of my son with white and black cardstock, then created two other hand painted mats to compliment the background colours of the layout. To finish off the layout, I did some doodled edges with a black marker.
If you are interested in any of the Memory Maze products, be sure to contact your local craft store or Memory Maze for your local stockist where we can place our local sales reps in contact with them.
Showing posts with label gelli plate. Show all posts
Tuesday, October 23, 2018
Saturday, July 14, 2018
My Story with Sarah Rosse
Hello crafty friends, Sarah here with a 12x12 layout for you today. For this layout I have used a number of mediums to create the background. Let's take a look...
This layout was created for a class I recently taught at scrapbook store Scrap 2 Relax in Drouin. It was fantastic to see how each layout completed was different and how the ladies took on the techniques and adapted them to suit their photos and colour choices.
The base of this layout is created using distress crayons directly on the page and through stencils, a circular gel plate print, stencilling with black ink and stamping with both distress crayons and black ink. I also used my Posca black paint pen to add some hand drawn details.
The chipboard title My Story can be found on the MemoryMaze website here and the chipboard 'chicken wire' used can be found here.
The chipboard pieces were painted with acrylic paints - for my layout this was a dark blue, then I went over the top of the pieces with a lighter, irredescent blue. I love the contrast this provides.
If you are interested in any of the Memory Maze products, be sure to contact your local craft store or Memory Maze for your local stockist where we can place our local sales reps in contact with them. The new products for July can be found on the website at http://www.memorymaze.com.au/
Saturday, May 19, 2018
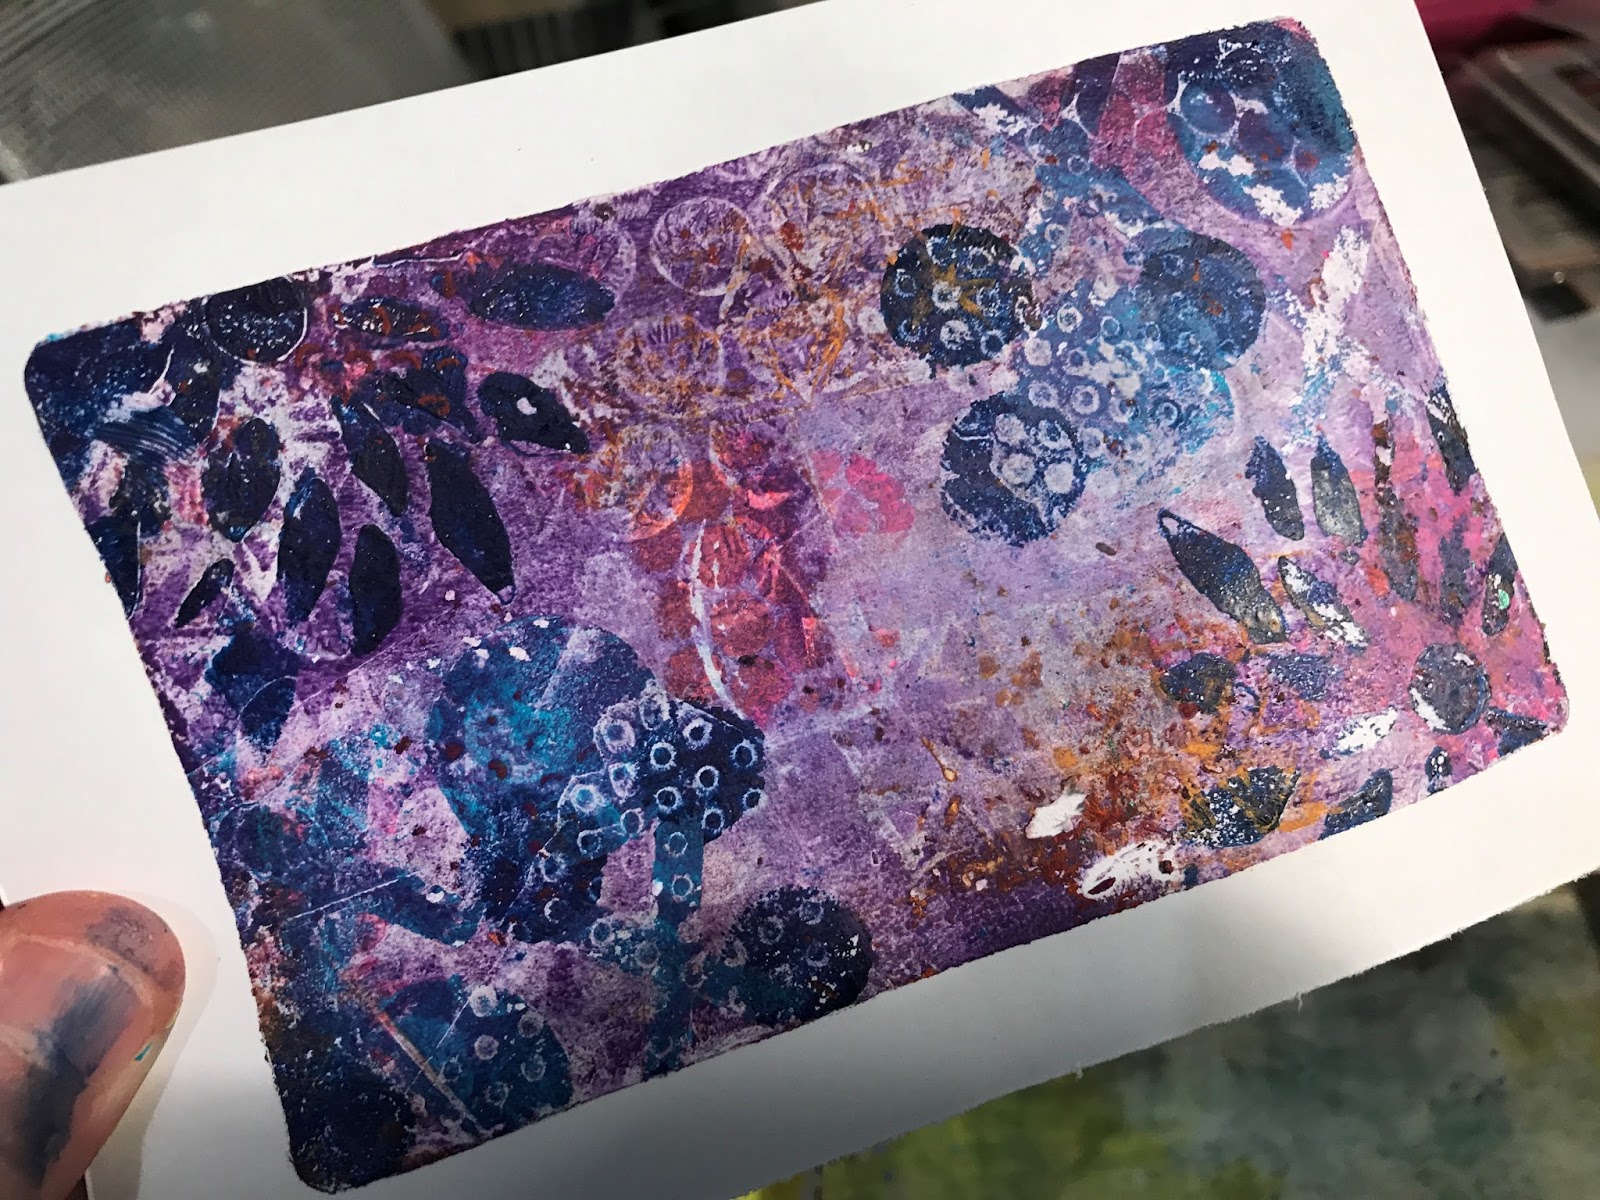
Gel print tutorial with Sarah
Hello crafty friends, Sarah with you today with my greatest love....gel prints using a number of layers but in just one single pulled print....lets take a look...
For these prints, I have used my 3X5 inch gel plate and the idea is to add layers on to the plate, allowing them to dry in between. I have broken this down step by step as below;
Firstly, apply your paint on to the plate and begin by adding some layers - here I have used some bubble wrap and the Memory Maze noughts and crosses stencil.
I then applied some paint to my rubber stamps and added this to the plate. The range of Memory Maze rubber stamps can be found online here.
Then using another of the Memory Maze mini stencils, I applied a darker contrasting colour.
A bit more stamping and now to let it dry.
Next we apply a thin layer of white paint. This must be thin otherwise it will only pull off the last layer added to the plate.
Press a piece of cardstock or paper firmly over the plate, rubbing all over to ensure there is good contact between the paint and the paper. Pull it up gently to reveal the print.
This is so much fun! Stay tuned for more projects where I do a similar technique on various sized Gel plates! Lets take a close up look at this print.
If you are interested in any of the Memory Maze products, be sure to contact your local craft store or Memory Maze for your local stockist where we can place our local sales reps in contact with them.
Saturday, April 14, 2018
Gelli printed cards with Sarah
Hello crafty friends, Sarah here again with another gelli printed project - this time on cards. Gel printing is my obsession at the moment....so colourful, beautiful and so versatile in making many projects.
These two cards were made using printed deli paper from my 8x10 inch gel plate. Check out my post on the 25 March 2018 for more information on the method of how I printed the paper for these cards and of the Memory Maze products used in the printing process. I just love my stencils and background stamps!
The sentiments are from Memory Maze and the range be found online here. I painted the chipboard pieces with black acrylic paint and covered them with Dimensional Magic to give that beautiful shiny finish. Lets take a closer look... The torn printed deli paper is adhered to the card using gel medium which gives a translucent effect. A white posca pen and black fineliner was used to finish the piece and add some background marks. The stamping with black ink provides background texture. I hope you enjoyed this project and will try the Memory Maze sentiments to add value to your crafty projects. If you are interested in any of the Memory Maze products, be sure to contact your local craft store or Memory Maze for your local stockist where we can place our local sales reps in contact with them.
Sunday, March 25, 2018
Fun in the Sun Mixed Media layout with Sarah
Hello crafty friends, Sarah with you today with a fun scrapbooking layout using some gelli prints and this amazing title, stencils and stamps from Memory Maze!
This layout is of my youngest son at the beach when we were holidaying at Mallacoota. Whilst the day was sunny but not particularly hot, he enjoyed wading in the rock pools and playing on the sand with his brother. I just love this photo. The title 'Fun in the Sun' can be found online here. I painted this black and applied Dimensional Magic to create a shiny finish.
If you haven't seen gelli printing before, be sure to google it and check it out. There are many YouTube clips demonstrating the fabulous projects you can make. Using a gel plate which enables you to create a unique mono print with out a printing press.For this layout I used an 8X10 inch plate. You use various paints on the gel plate with stencils, stamps etc and make prints on paper. Once of my favorite papers to print on is deli paper and this is what I've used for this layout.
Deli paper is a semi-translucent, thin paper that works well with layers and on various projects. As I use my gel plate, I use deli paper to roll my brayer on to off load any excess paint. As you can see by the pictures below, I have created quite a stash of it. These papers are delightful on their own as you layer (and brayer) the colours on. They are also fabulous torn up and used on layouts, cards and in art journals. Some of my favorite Memory Maze stencils used in designing the paper for this layout are the All Hearts, Checkerplate, Skin 1 and Diamonds. The range of these 8X8 inch stencils can be found here. I tore pieces of the deli paper and adhered it to my background cardstock using Gel Medium. It is important to put gel medium on to the background cardstock, position the piece of deli and then put more gel medium on top of the deli paper - thats what helps it have a translucent effect once dried. I also used some Colour Blast paste through the Glass Bits stencil. Once dry, apply stamping with black ink to create further texture to the background. I used Memory Maze background and composition rubber stamps - the range can be sought here here. Some of my go-to favorite background stamps are the Grunge xxx, spots, Vintage background spits and spots and Vintage peace. Lastly I mounted my photo on to black cardstock and adhered it to the layout. I hope you enjoyed this layout tutorial and will give gelli printing a go - all you need is your Memory Maze stencils, stamps and a gel plate! If you are interested in any of the Memory Maze products, be sure to contact your local craft store or Memory Maze for your local stockist where we can place our local sales reps in contact with them.
Saturday, March 10, 2018
Creating your own Gelli printed paper...with Sarah
Hello crafty friends, one of my favorite crafty things to do is create my own backgrounds and patterned paper using the Gelli Plate. My post today will share some of my tips in using Memory Maze products to make it super easy!
For this project I used my 3x5 inch Gelli plate (these are squishy gelatin based plates that make mono printing possible with the use of a press) to stamp onto a piece of cardstock to create my background page. The fantastic, large acrylic blocks from Memory Maze make gelli printing easy. As pictured below, the gelli plate clings to the 100x150mm block which enables handling it and stamping with it a breeze!
The paint is then applied to the plate using a brayer, stencil on top and then use your brayer again to run over the stencil to make an imprint in to the plate. The stencil shown here is the Sugar Skull. For the huge range of stencils, in various sizes, click here.
After removing the stencil, the block can easily be turned over to print on your page.
The other way to use the Memory Maze stencils with your gelli plate is to print throught them. As pictured below, place your stencil down on the page and press your painted gelli plate on top of it.
Here is the finished paper....still needs some more embellishing to complete a layout. Alternatively it could be cut up for card making or pocket scrapbooking cards. You can use your Memory Maze stencils to further add to the piece, along with chipboard pieces for a title to finish it off.
I hope you enjoyed this post and picked up some tips on using acrylic blocks for your projects. If you are interested in any of the Memory Maze products, be sure to contact your local craft store or Memory Maze for your local stockist where we can place our local sales reps in contact with them.
Wednesday, February 21, 2018
Product Highlight: Mega Stencils by Memory Maze
Hello crafty friends, welcome to another look at some new products for Memory Maze. Today we are looking at the mega sized stencils, 13x15 inches, developed by Memory Maze.
These stencils were designed especially with the largest gel printing plate in mind. If you havent tried out monoprinting yet, you can look this up on YouTube or google it to see the many fnatstic projects that can be done with it. The largest gelli plate that can be purchased in 12x14 inches, hence this plate was designed a little larger to allow for a full print with these stencis. See photo below for what a gel plate looks like;

Lets take a look at some of the Memory Maze stencils in this mega size;
Of course these wonderful stencils are not just for gel printing. How about art journal pages, card backgrounds, scrapbooking layouts, planner pages, school projects....anything you can think of!!!
Did you know that Memory Maze can do custom stencil designs? If you are interested in any having your own designed realised or of the Memory Maze products, be sure to contact your local craft store or Memory Maze for your local stockist where we can place our local sales reps in contact with them.
Tuesday, February 13, 2018
Australia Day mixed media tag with Sarah
Hello crafty friends, Sarah here with a mixed media tag, this time using the new Australia Day acrylic piece and Outback Australia rubber stamp from Memory Maze Lasercuts.
For this mixed media tag, i got out my 3x5 inch gelli plate to create the background. There are many great tutorials for gelli printing, be sure to google this or search via youtube. The background was created using Dylusions paints with stencils and stamped on to the tag using the gelli plate as the stamping platform. If you'd like to see more of how this was created, leave me a comment below and I can put something together to demonstrate this technique.
I used the new Outback Australia stamp from Memory Maze with black Staz On ink to create texture on the background. I like the versatility of this stamp on this background - you can see parts of the flag, parts of the windmill etc to give a real Australian feel to it. The photos printed for this tag were from the Australia Day BBQ we had at our house - the mega water fight scene and an Australia flag tattoo my young son wore that afternoon. It was fun to print them in a smaller size, perfect for this tag.
The Map of Australia acrylic piece is just spectacular! The black acrylic highlights the edges of the Australia map, whilst the little kangaroo cut out component allows the background work to peek through. The wooden veneer range of options for embellishing your products from Memory Maze is enormous. Click here for the range of chipboard and wood veneer pieces. The piece used on this tag was from my stash, but it's not hard to find one that suits your needs online at Memory Maze.
The range of these products can be found online at www.memorymaze.com.au. If you are interested in any of the Memory Maze products, be sure to contact your local craft store or Memory Maze for your local stockist where we can place our local sales reps in contact with them.
I used the new Outback Australia stamp from Memory Maze with black Staz On ink to create texture on the background. I like the versatility of this stamp on this background - you can see parts of the flag, parts of the windmill etc to give a real Australian feel to it. The photos printed for this tag were from the Australia Day BBQ we had at our house - the mega water fight scene and an Australia flag tattoo my young son wore that afternoon. It was fun to print them in a smaller size, perfect for this tag.
The Map of Australia acrylic piece is just spectacular! The black acrylic highlights the edges of the Australia map, whilst the little kangaroo cut out component allows the background work to peek through. The wooden veneer range of options for embellishing your products from Memory Maze is enormous. Click here for the range of chipboard and wood veneer pieces. The piece used on this tag was from my stash, but it's not hard to find one that suits your needs online at Memory Maze.
The range of these products can be found online at www.memorymaze.com.au. If you are interested in any of the Memory Maze products, be sure to contact your local craft store or Memory Maze for your local stockist where we can place our local sales reps in contact with them.
Subscribe to:
Posts (Atom)